


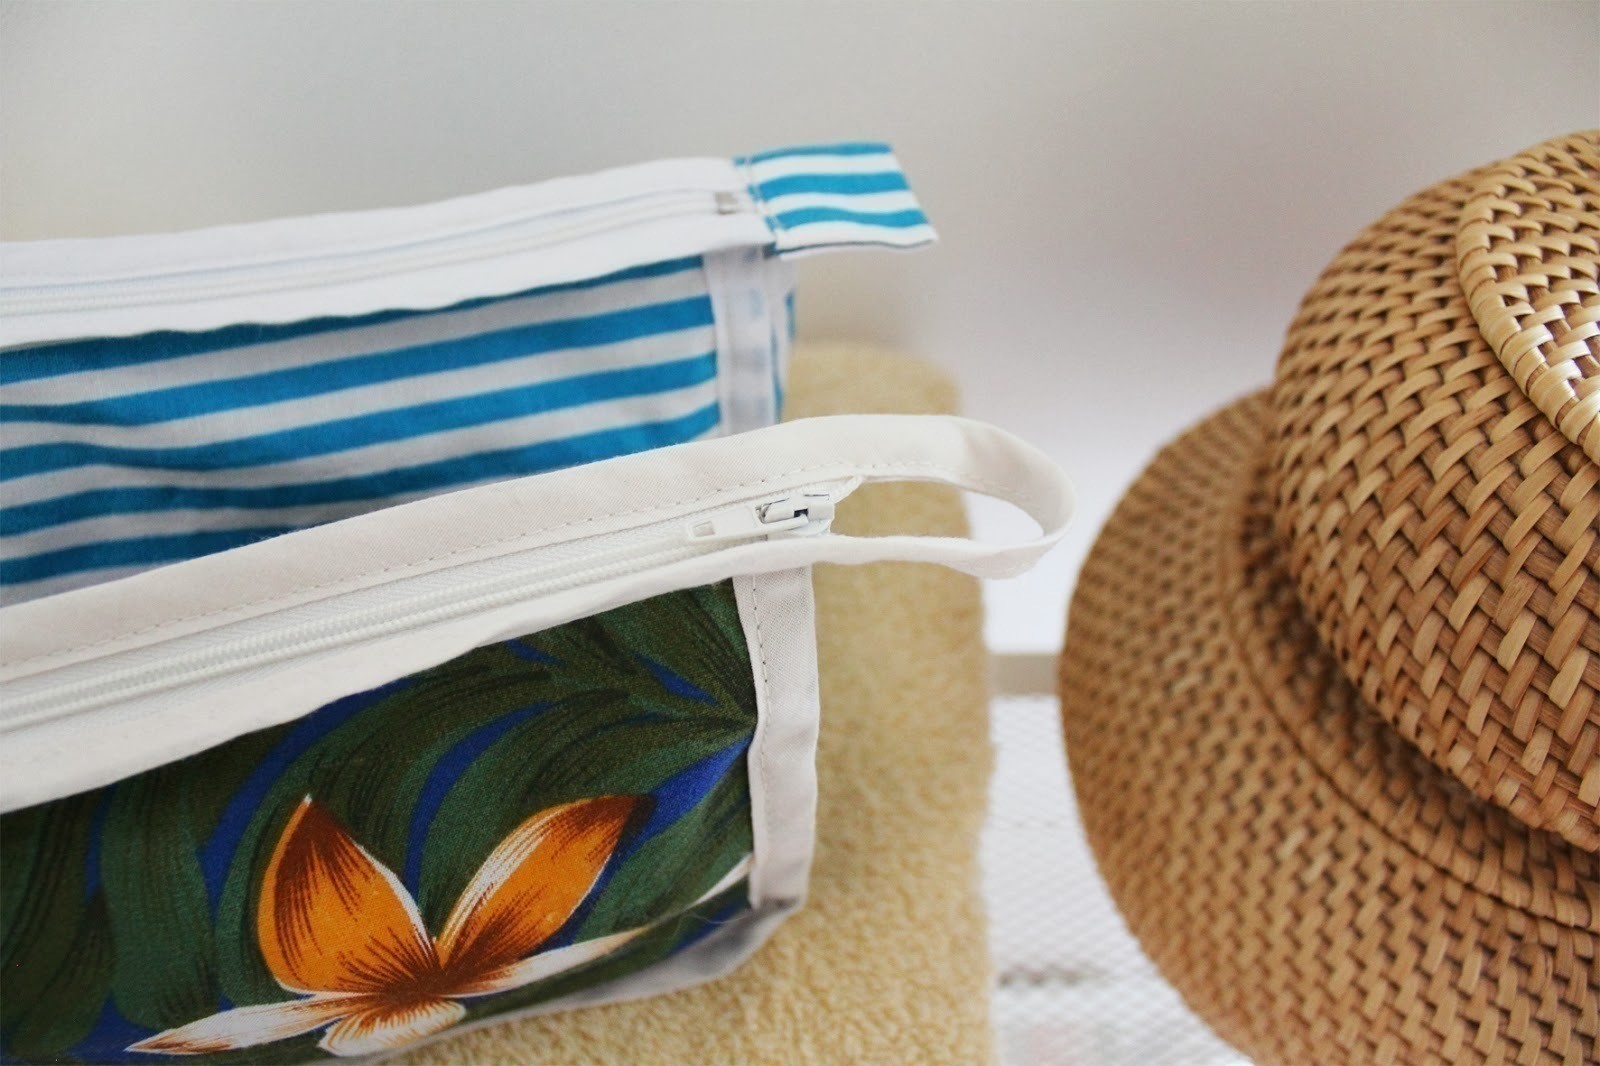

About
A nice little case you can bring with you everywhere.
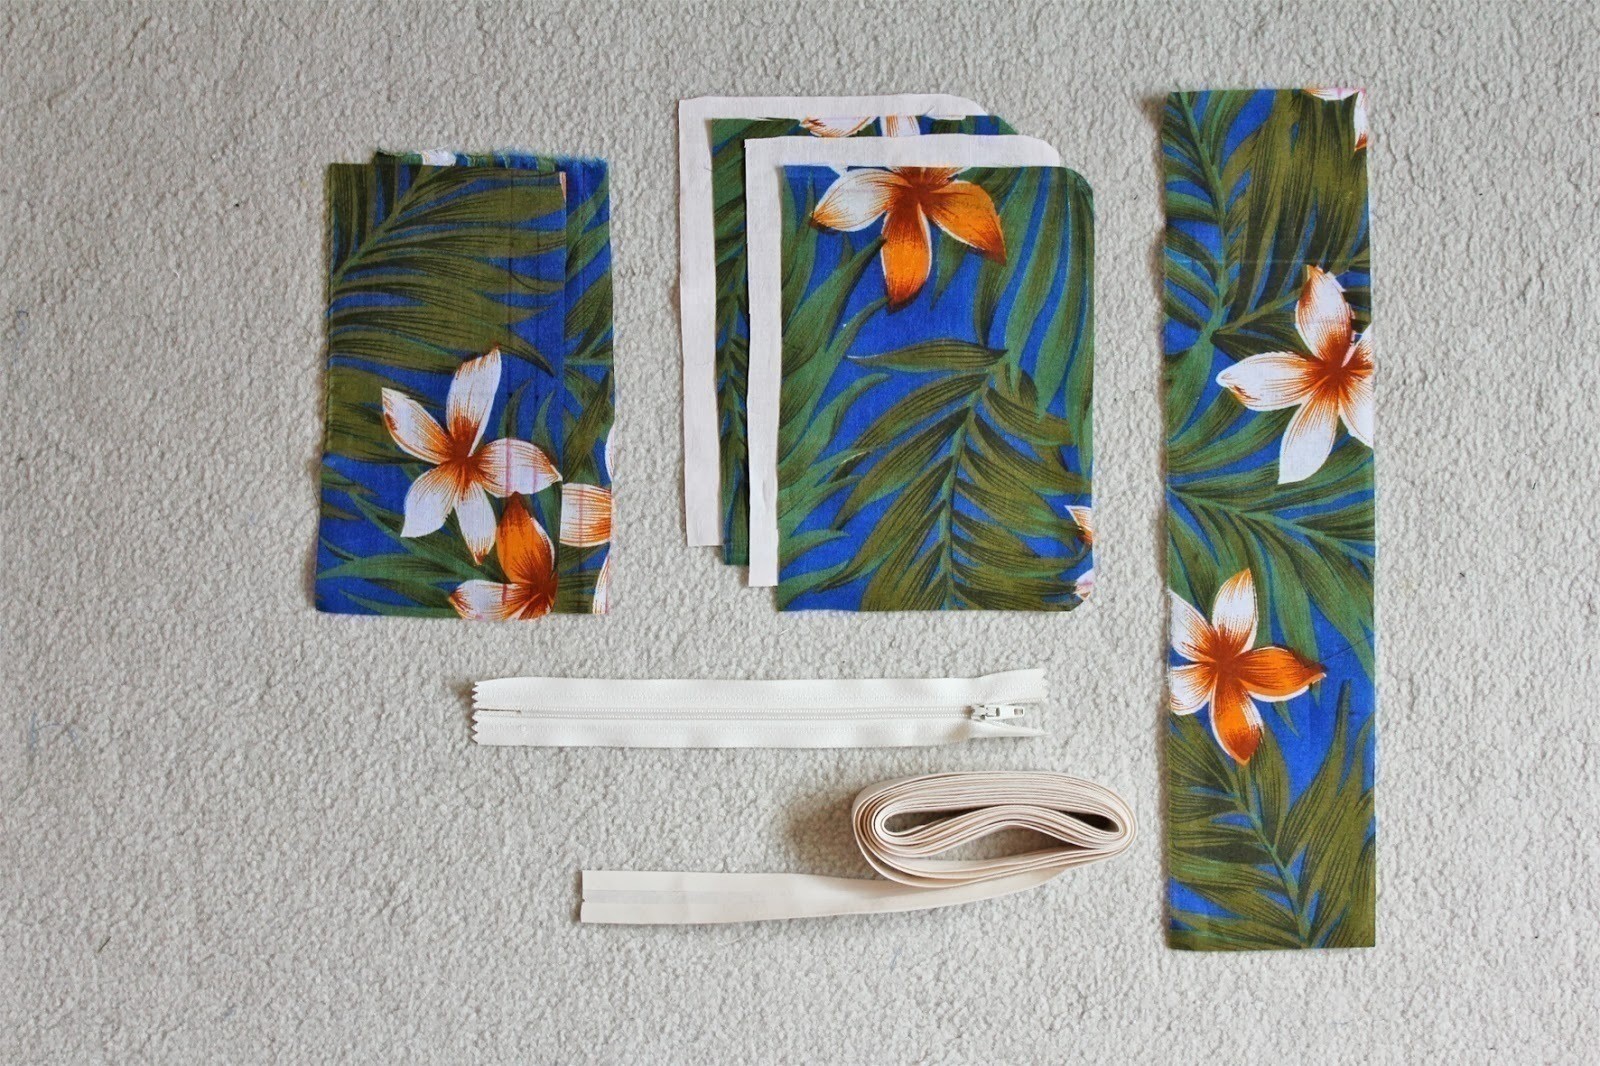
You will need
main fabric
"pockets" = two rectangles 10 by 17cm
"side" = two rectangles 12 by 17cm (cut two of the angles sharp and the two other rounded as shown on the picture).
"bottom/sides" = a rectangle 8 by 34cm.
lining
"side lining" = two rectangles 12 by 17cm (cut two of the angles sharp and the two other rounded as shown on the picture above).
approximately 2m of bias tape
a 18cm zipper
-
 Alma added Toiletry Case to Bags, Wallets...
19 Jun 09:33
Alma added Toiletry Case to Bags, Wallets...
19 Jun 09:33
-
 Miriam S. favorited Toiletry Case
05 Feb 22:28
Miriam S. favorited Toiletry Case
05 Feb 22:28
-
 gypsie_jay added Toiletry Case to DIY Accessories
01 Aug 22:07
gypsie_jay added Toiletry Case to DIY Accessories
01 Aug 22:07
-
gypsie_jay favorited Toiletry Case
01 Aug 22:06
-
 artpanda18 favorited Toiletry Case
05 Mar 23:49
artpanda18 favorited Toiletry Case
05 Mar 23:49
-
 happyliltoaster favorited Toiletry Case
14 Jan 04:13
happyliltoaster favorited Toiletry Case
14 Jan 04:13
-
 Steph. favorited Toiletry Case
25 Nov 09:06
Steph. favorited Toiletry Case
25 Nov 09:06
-
 PixieFey added Toiletry Case to Bags & Purses
24 Nov 00:05
PixieFey added Toiletry Case to Bags & Purses
24 Nov 00:05
-
 Emily Play published her project Toiletry Case
11 Sep 08:29
Emily Play published her project Toiletry Case
11 Sep 08:29
You Will Need
-
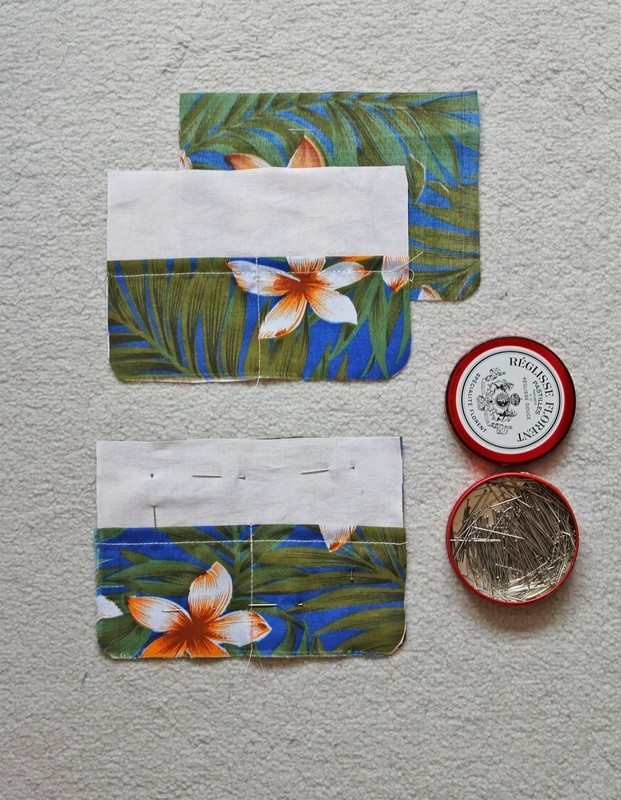
 Step 1
Fold (1cm then 1cm again) and sew the hem of the two "pockets" pieces
-
 Step 2
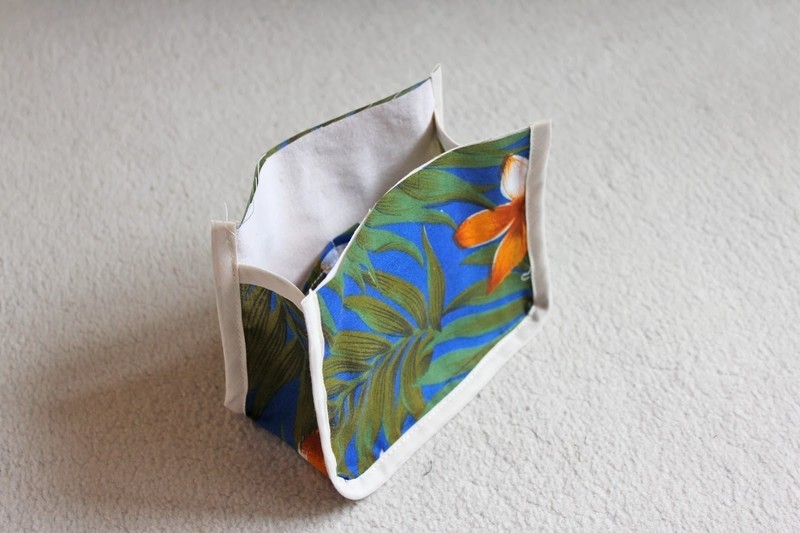
Place the "pockets" wrong side on right side of the "side lining". Pin in place and sew a vertical seam in the middle of the "pockets".
Now place the "side lining+pockets" wrong side on wrong side of the "side".
Do the same for both "sides".
-
 Step 3
Sew some bias at the ends of the "bottom/sides" piece
-
 Step 4
Bast the two sides (="side"+"side lining+pockets") with the "sides/bottom" piece, wrong side against wrong side, as shown on the picture above.
The sides exceed the piece "bottom/sides" by approximately 2,5cm on each side.
-
 Step 5
Now bast the bias tape,folded in half, along the edges of the vanity case
-
 Step 6
Use your sewing machine and sew along the inner side of the bias, through all the layers.
Remove all basting threads and cut the excess of bias.
-
 Step 7
Place the zipper along the top edge of one side, wrong side against wrong side (you can fold over and pin the other side so it's not comming in the way).
The zipper must exceed by approximately 2cm on each side. -
 Step 8
Fold the bias over the zipper+side and bast (following the closing way of the zipper, here from left to right).
-
Step 9
Unfortunately I don't have picture of this step, I'll try to just write it down:
Once you've basted on one side, keep on basting for about 8 to 9 more cm.Place the other edge of the zipper along the edge of the other side of the case (as shown at 7).
Keep on basting this side locking the side+zipper inside the bias folded in half (as shown at 8).
Use your sewing machine and sew along the inner side of the bias, remove basting threads.
-
 Step 10
Cut the excess of bias and finish by covering the bias+zipper with a rectangle of fabric folded in half (here I used the bias but you can choose to use the fabric, it's up to you).


 1
Stud Earrings »
Miraculous Ladybug Earrings
1
Stud Earrings »
Miraculous Ladybug Earrings


