

Rosie The Riveter Coin Purse
Extract from Feminist Felties • By Missy Covington • Published by Search Press

About
Feminist Felties
When men went off to fight in World War II, women
stepped up. Rosie the Riveter symbolizes their
economic power. Use this purse as a reminder
of the attitude that continues the revolution.
Stitches
Backstitch
Overcast stitch
Difficulty Level
Easy
Finished Size
5" x 5." (12.7 x 13.3 cm)
Tags
Downloads
- 2018-09-04-125509-Rosie+Coin+Purse+Pattern.tif 30.6 MB [ Download ]
-
 Atomiller favorited Rosie The Riveter Coin Purse
26 Oct 19:16
Atomiller favorited Rosie The Riveter Coin Purse
26 Oct 19:16
-
 liza.minelli.564 favorited Rosie The Riveter Coin Purse
02 Feb 01:01
liza.minelli.564 favorited Rosie The Riveter Coin Purse
02 Feb 01:01
-
 Patricia J. favorited Rosie The Riveter Coin Purse
16 Sep 04:49
Patricia J. favorited Rosie The Riveter Coin Purse
16 Sep 04:49
-
Sal M. added Rosie The Riveter Coin Purse to Sewing
15 Sep 08:58
-
 Crafterella featured Rosie The Riveter Coin Purse
14 Sep 23:00
Crafterella featured Rosie The Riveter Coin Purse
14 Sep 23:00
-
 mmotse03 favorited Rosie The Riveter Coin Purse
13 Sep 18:20
mmotse03 favorited Rosie The Riveter Coin Purse
13 Sep 18:20
-
 Kimya J. favorited Rosie The Riveter Coin Purse
11 Sep 02:10
Kimya J. favorited Rosie The Riveter Coin Purse
11 Sep 02:10
-
 Search Press published her project Rosie The Riveter Coin Purse
10 Sep 09:00
Search Press published her project Rosie The Riveter Coin Purse
10 Sep 09:00
You Will Need
-
Step 1
Getting Started
Photocopy the pattern pieces and cut them out.
-
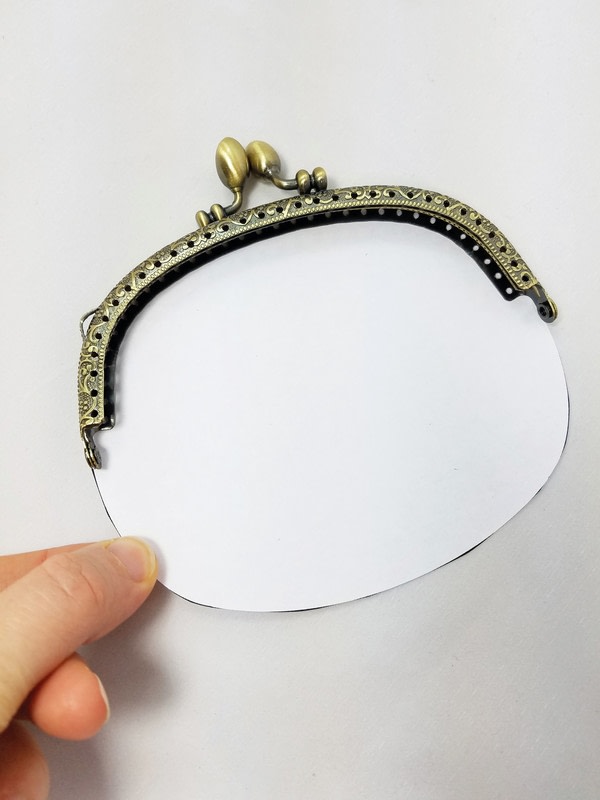
 Step 2
Since the size and shape of purse clasps may vary, check your paper pattern against your clasp and adjust it accordingly by trimming or extending it as required.
-
 Step 3
Tape the paper pattern pieces to the felt, but avoid taping over any stitch detail marks:
• The two purse sections on navy felt (not shown in the photograph)
• The inner circle on yellow felt
• The body, face, arm, hand, knuckles, and thumb on cream felt
• The hair on brown felt
• The bandanna on red felt
• The shirt, cuff, sleeve, and collar on blue felt
• The collar badge on white felt -
Step 4
Cut out the felt pieces that do not have any marked stitch details.
-
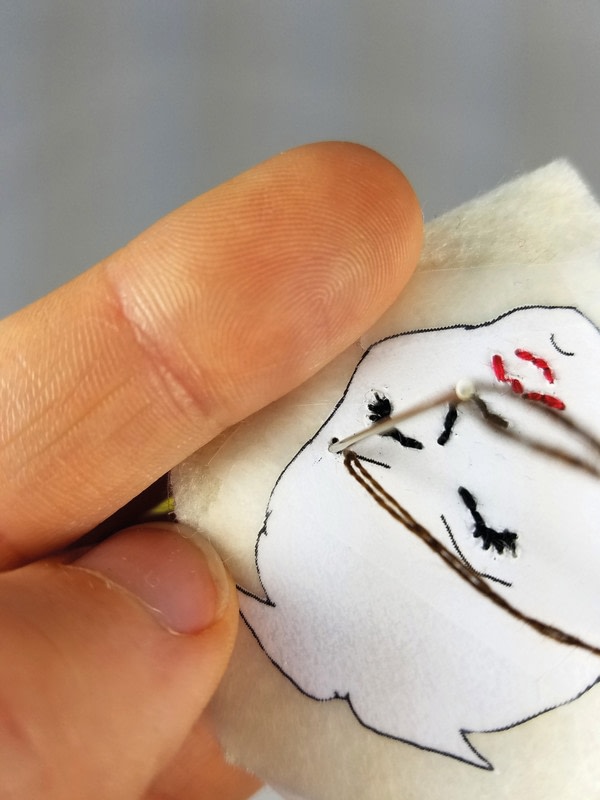
 Step 5
Adding Details
Add the stitch details to the face piece as marked on the paper patterns. Use 2 strands of embroidery floss and a backstitch to stitch as follows:
• Red for the lips
• Black to sew the eye and mouth details
• Dark brown to sew the brows
• Cream to sew chin and ear markings -
Step 6
Cut out the face piece and carefully remove the paper pattern. You can use hot glue to secure the loose thread ends to the back of the felt so that they don’t pull through the fabric when you remove the paper.
-
Step 7
Making The Purse
To assemble the purse, use 6 strands of navy embroidery floss and an overcast stitch to sew the side seams of the two navy background pieces together. Only sew the bottom half of the pieces,
leaving the top half open for the clasp. -
 Step 8
Insert the top of one piece of felt into the metal clasp. Stitch through the holes in the clasp and
the felt to join them.
Repeat on the other side of the clasp. -
 Step 9
Finishing
Use hot glue to join the main body pieces together, starting with the small detail pieces, then moving to the larger pieces to ensure the most accurate placement.
Use tweezers to hold the felt as you’re gluing the pieces in this order:
• The collar onto the shirt and the cuff onto the sleeve
• The arm onto the shirt piece
• The shirt onto the main body piece
• The sleeve onto the arm piece
• The hand onto the raised arm and the knuckles on top of the hand
• The thumb piece onto the raised fist
• The second hand onto the shirt
• The bow onto the bandanna
• The bandanna onto the hair
• The hair piece onto the head
• The bandanna side onto the head
• The head piece onto the body -
 Step 10
Use hot glue to attach the yellow background piece onto the center of the purse. Carefully position the figure on the background, then glue it in position.


 1
Stud Earrings »
Miraculous Ladybug Earrings
1
Stud Earrings »
Miraculous Ladybug Earrings


