


About
Doctor Who, Felt
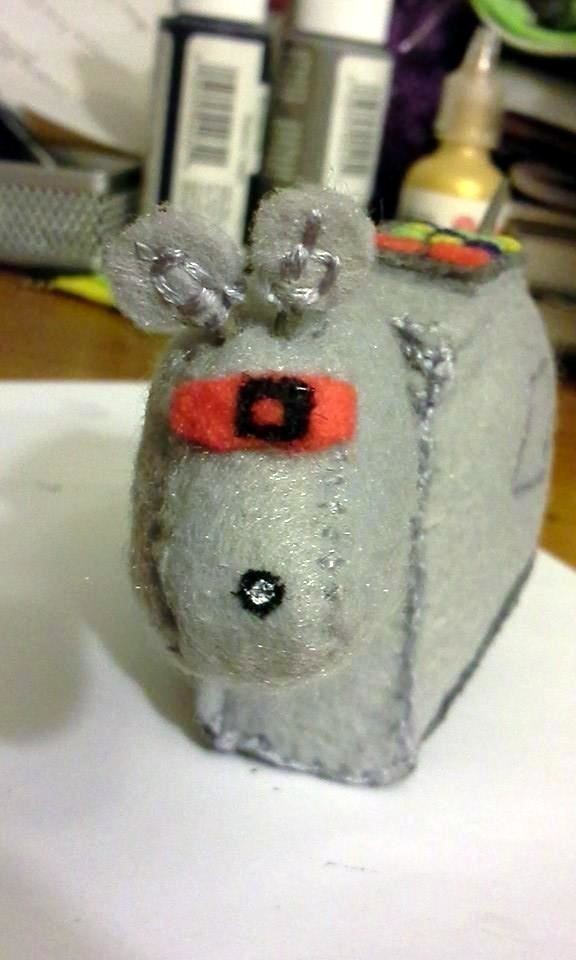
Every Whovian needs a companion, and what better companion then the amazing K-9.
Tags
-
 Moominsmurf favorited K 9
25 Nov 23:56
Moominsmurf favorited K 9
25 Nov 23:56
-
 Julie R. favorited K 9
29 Apr 00:01
Julie R. favorited K 9
29 Apr 00:01
-
 Kristy B. favorited K 9
24 Mar 10:48
Kristy B. favorited K 9
24 Mar 10:48
-
 Penny F. added K 9 to GIFT IDEAS
27 Apr 11:07
Penny F. added K 9 to GIFT IDEAS
27 Apr 11:07
-
 WerewolfCas favorited K 9
29 Mar 12:03
WerewolfCas favorited K 9
29 Mar 12:03
-
 fritzcracker favorited K 9
14 Mar 21:00
fritzcracker favorited K 9
14 Mar 21:00
-
 Sara X. favorited K 9
06 Mar 09:30
Sara X. favorited K 9
06 Mar 09:30
-
 AlterEgo Designs favorited K 9
12 Feb 14:23
AlterEgo Designs favorited K 9
12 Feb 14:23
-
 jaisa.riley favorited K 9
27 Jan 16:50
jaisa.riley favorited K 9
27 Jan 16:50
-
jaisa.riley added K 9 to Make
27 Jan 16:50
-
 Step 1
I started this project by cutting out my pieces from light grey, dark grey, and red felt.
-
 Step 2
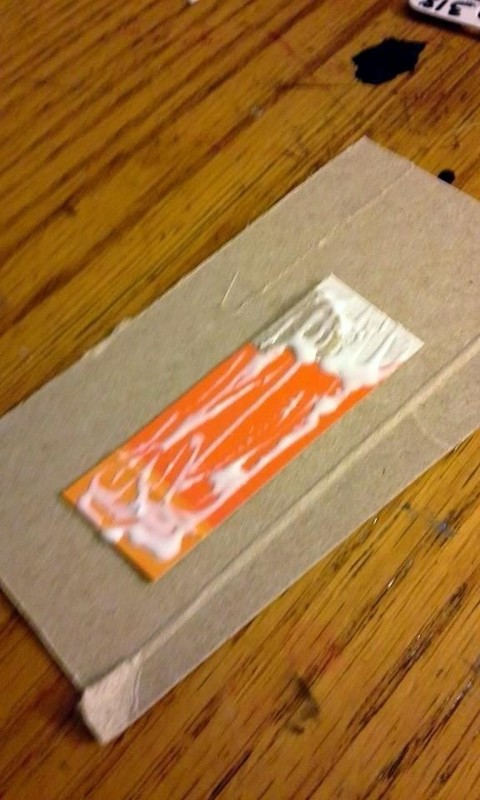
Next I used No Sew Glue to glue the top panel and the side panels to the pieces. I also glued the red buttons onto the top panel.
-
 Step 3
I used light grey embroidery thread to add a square detail to one side panel then sewed around the bottom panel to add some texture.
-
 Step 4
I placed the top panel right side in against the side panel then sewed them together. I did the same for the bottom panel and also added K-9 to the side.
-
 Step 5
I finished sewing the other side panel to the body, here in this picture everything is inside out.
-
 Step 6
After turning the body right side out I was concerned that the bottom would not stay flat so I cut out a small piece of cardboard and glued it into the bottom.
-
 Step 7
I let the glue dry for a bit, but wasn't worried about it being completely dry before continuing.
-
 Step 8
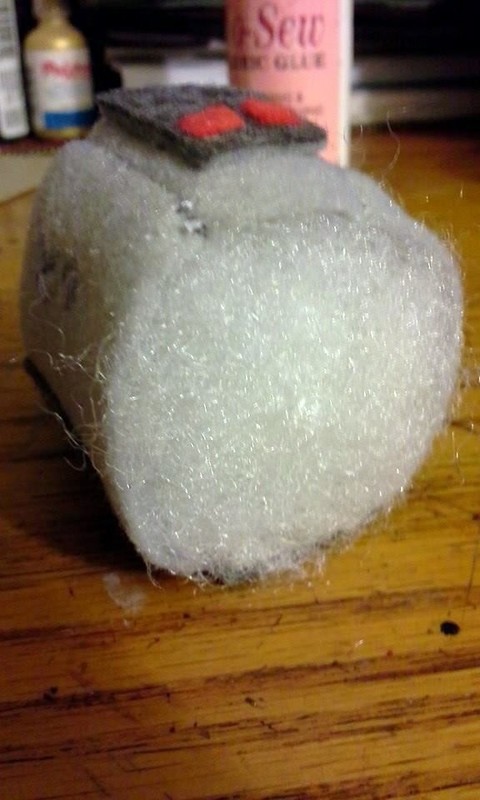
After I added the filling I realized that the to wasn't laying flat either.
-
 Step 9
I took the stuffing out and glued in another piece of cardboard then re-added the filling.
-
 Step 10
I decided to cut out some smaller squares of felt in blue, yellow, and green then glued them to the top panel. I set this piece aside to let the glue dry some of the pieces moved around a bit without my realizing it but it still looks good.
-
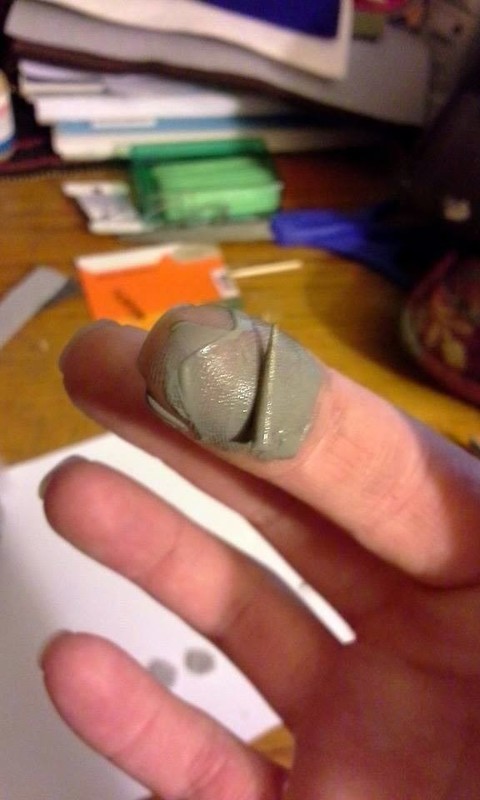
 Step 11
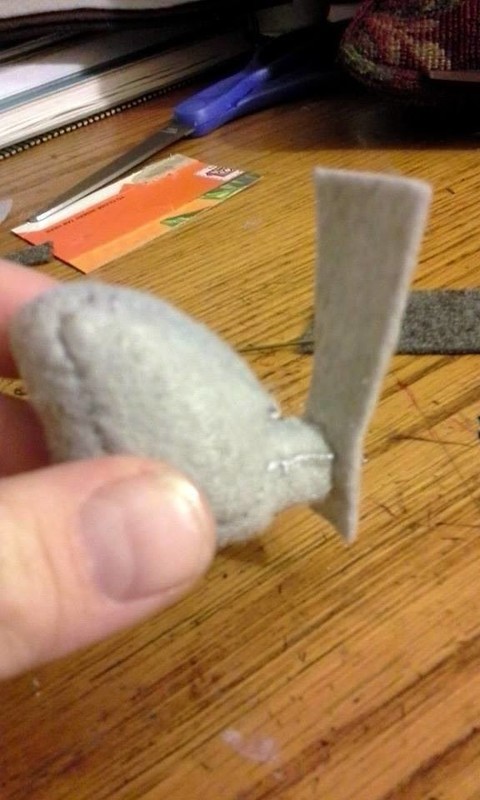
While the glue dried I sewed the head together using the two head pieces and the strip I cut to add the width to the head.
-
 Step 12
I attached the front panel to the neck leaving a hole in the front panel that the neck piece went into.
-
 Step 13
Here is the hole for the neck.
-
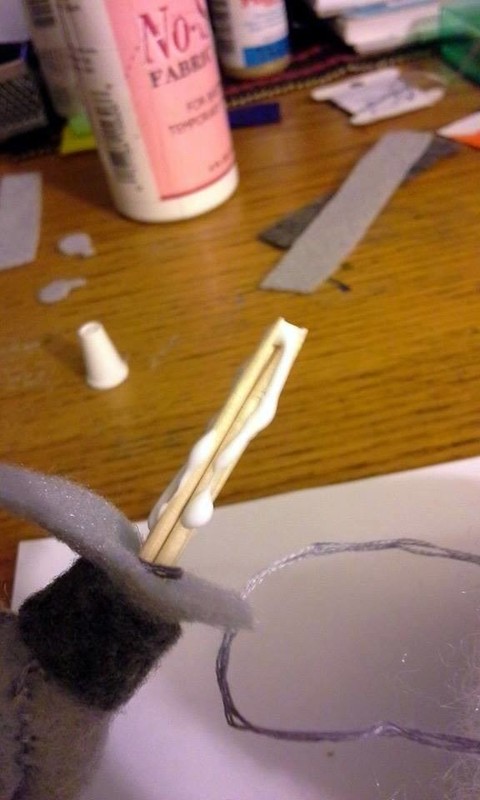
 Step 14
I put a little glue onto four toothpicks then stuck them through the hole in the panel.
-
 Step 15
I also glued a dark grey strip around the neck.
-
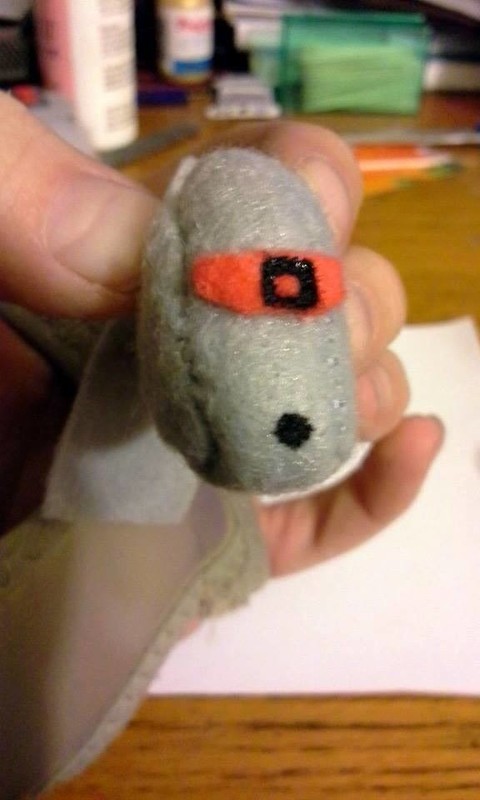
 Step 16
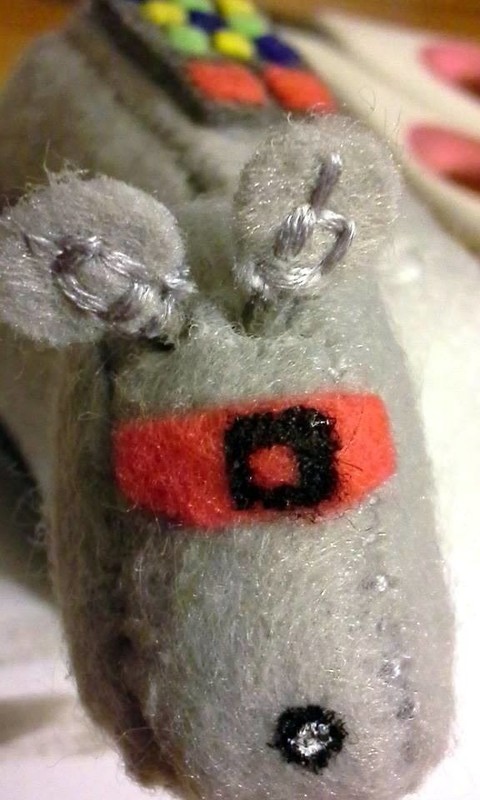
Then I glued the red visor onto the head piece.
-
 Step 17
I used black puffy paint to add the nose detail and the detail to the visor.
-
 Step 18
While all the paint and glue were drying I cut anther toothpick in half.
-
 Step 19
I stuck the flat side of the toothpick into black acrylic paint then set it aside to dry.
-
 Step 20
Back to the head piece I put No-Sew Glue onto the other end of the toothpicks.
-
 Step 21
Then I pushed the toothpicks into the body piece. I used the toothpicks so that the head would stay in the position I wanted it to rather then drooping. Then I sewed the front panel to the body.
-
 Step 22
I took another toothpick and cut off the tips then painted them grey. I just put the paint on my finger and rolled the toothpick around until it was coated.
-
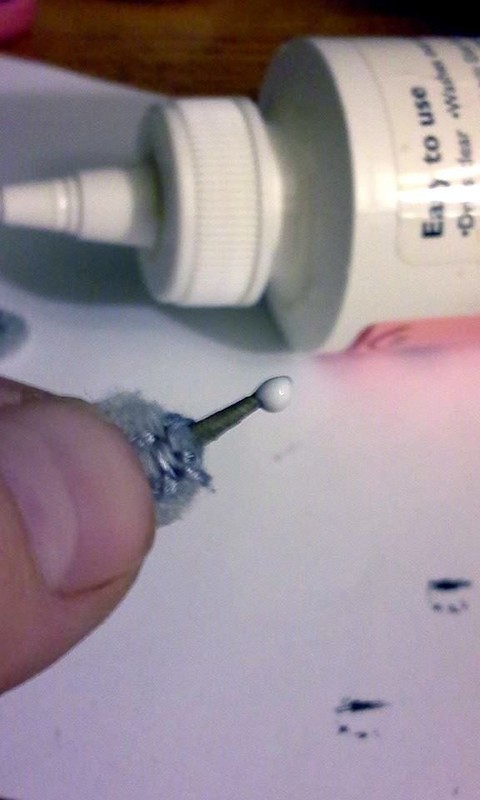
 Step 23
Next I glued a small circle to the flat side of the toothpick.
-
 Step 24
Then I glued another circle to the other side, I made two of these for the "ears".
-
 Step 25
The black paint had dried so I pushed the sharp tip into my table to flatten it a bit, then put a dot of glue onto the black paint.
-
 Step 26
I cut a tiny slit into the back panel and stuck the toothpick into the slit, this is the tail.
-
 Step 27
I painted the rest of the tail dark grey, then used black paint to make a small circle around the area where the tail is.
-
 Step 28
I decided to add a white dot to the nose using another toothpick (made a nice small dot).
-
 Step 29
I used dark grey embroidery thread to add some details to the "ear" pieces.
-
 Step 30
Add a small dot of glue.
-
 Step 31
Then I cut a small slit into the head to push the toothpicks into.
-
 Step 32
Let everything dry.
-
 Step 33
Here is a view of the bottom.


 1
Stud Earrings »
Miraculous Ladybug Earrings
1
Stud Earrings »
Miraculous Ladybug Earrings


