


About
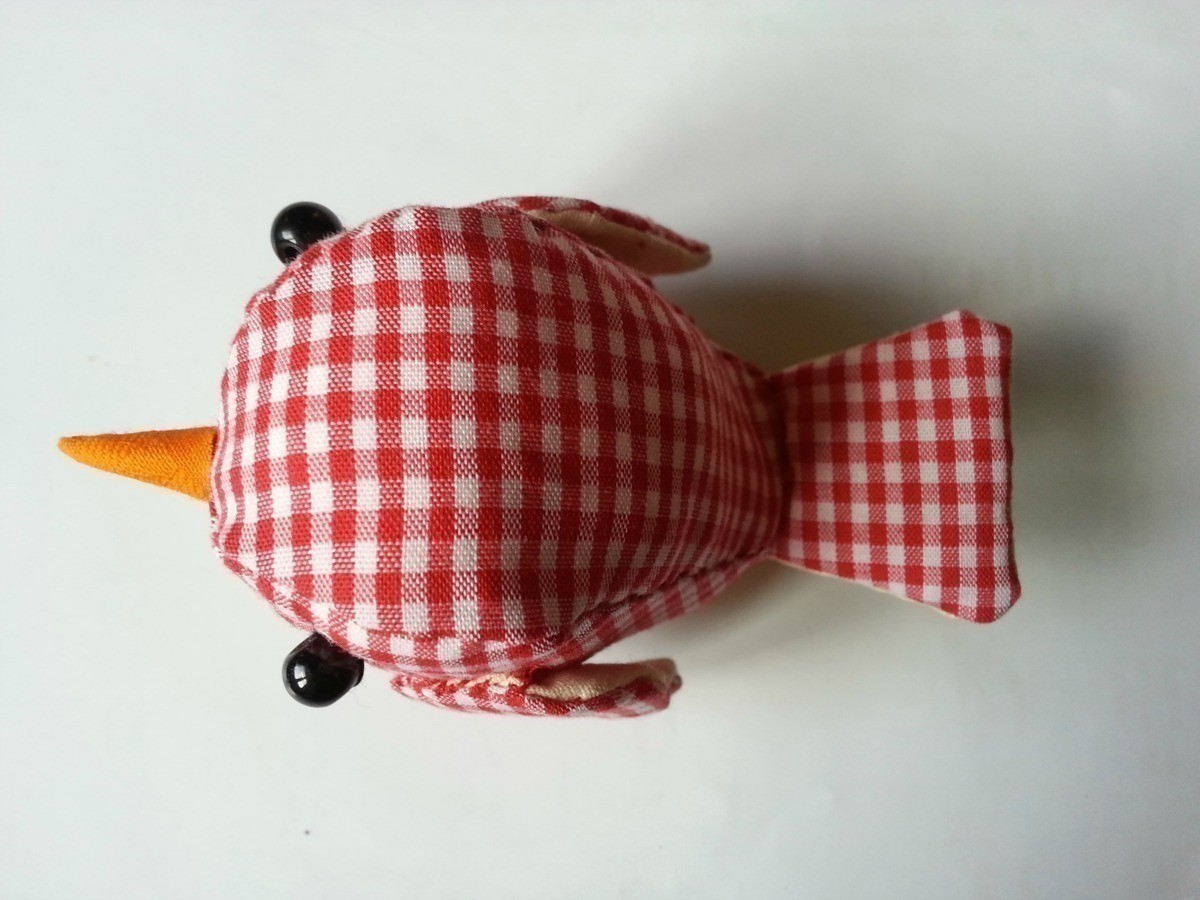
D.I.Y Cute Fluffy Bird!
Check out the tutorial to find out how I made this cute little plushie bird :)
Tags
-
 Key West Witch favorited Cute Plushie Bird
01 Jul 00:17
Key West Witch favorited Cute Plushie Bird
01 Jul 00:17
-
 Ms Dorito added Cute Plushie Bird to Plushie
12 Jun 17:43
Ms Dorito added Cute Plushie Bird to Plushie
12 Jun 17:43
-
 Luna D. favorited Cute Plushie Bird
25 Apr 06:47
Luna D. favorited Cute Plushie Bird
25 Apr 06:47
-
Deb E. favorited Cute Plushie Bird
03 Dec 00:19
-
Deb E. commented on Cute Plushie Bird
03 Dec 00:19
-
 Sarah Sylvia S. favorited Cute Plushie Bird
19 Jul 05:34
Sarah Sylvia S. favorited Cute Plushie Bird
19 Jul 05:34
-
D S. favorited Cute Plushie Bird
04 May 02:52
-
 wondertide favorited Cute Plushie Bird
02 Apr 07:03
wondertide favorited Cute Plushie Bird
02 Apr 07:03
-
 Jenica T. favorited Cute Plushie Bird
25 Mar 15:55
Jenica T. favorited Cute Plushie Bird
25 Mar 15:55
-
JJ W. favorited Cute Plushie Bird
18 Apr 17:07
You Will Need
-
 Step 1
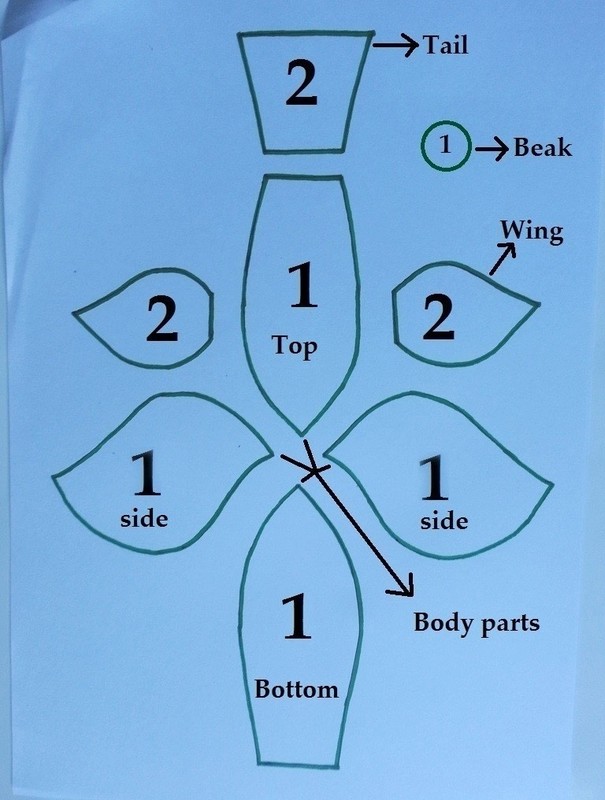
Here's the template I drew for the bird. You can also try out a different pattern or simply come up with a pattern of your own.
The template includes:
Tail: 2 pieces (1 plain fabric, 1 patterned fabric),
Wings: 4 pieces (2 plain fabrics, 2 patterned fabrics),
Body parts: sides- 2 pieces (both patterned fabrics), top-1 piece (patterned fabric), bottom- 1 piece (plain fabric).
Beak: 1 small round piece (orange fabric). -
 Step 2
Cut the pieces out of the template and place them on the required fabric, trace around the edges and cut out fabric pieces.
Don't forget to iron the fabric to flatten it. -
 Step 3
In this picture you can see that I've colored the sides of each body parts. You have to sew the similar colored sides together.
There are 2 unmarked sides on the bottom part and top part, don't sew these sides, as you'll have to keep an open area for turning the right side out after stitching all the body parts together. -
 Step 4
Sew the sides by keeping the fabrics' wrong sides out and after you're done sewing the colored (marked) area turn the right side out.
-
 Step 5
Start stuffing the body through the open end,
I used wool for stuffing and a pencil to push the wool in,
Use a small amount of wool at a time,
Don't push too hard, otherwise you might ruin the stitches and the body shape.
Use enough wool to make the bird look fluffy! but not too much, or else it'll ruin the shape. -
 Step 6
For the tail place the patterned fabric (facing inside) and plain fabric together and sew around the edges but don't forget to keep a small area open so that you can turn the right side out.
After turning the right side out, stuff the tail with a very small amount of wool, just to give them a fluffy look.
Now attach the tail at the back of the stuffed body using needle and thread. -
 Step 7
Similarly sew the wings and don't forget to stuff it a little to give it a fluffy look.
Use needle and thread to attach it with the body on both sides. -
 Step 8
Cut a small round shaped piece out of orange fabric for the beak. Fold the round piece to form a cone shape and sew it, so that the folds don't come off.
Now, stick the cone (beak) using hot glue where the 4 body parts are joint together in the front -
 Step 9
Simply attach 2 small black beads using needle and thread for the eyes.
This was my third attempt on making a plushie bird and I was really surprised to find out how cute and fluffy it turned out :)


Comments


 1
Stud Earrings »
Miraculous Ladybug Earrings
1
Stud Earrings »
Miraculous Ladybug Earrings
 2
Pouches, Purses & Wallets »
Water Bottle Pack
2
Pouches, Purses & Wallets »
Water Bottle Pack


