

About
Jurassic Rawww!
Because dinosaurs have hearts too! And rib cages. But mainly the hearts!
Add an extra element to your amigurumi using Dandelyne's mini embroidery kits. Kits are available from her Etsy shop, or http://dandelyne.com/
A note on crochet terminology (US):
Sc = single crochet
Ch = chain
SL ST = Slip Stitch
INC = Increase
DEC = Decrease
FO = Finish Off
Instructions in { } are repeated around the round. Work in continuous rounds.
-
 panteznabnch favorited T Re X Ray
01 May 01:27
panteznabnch favorited T Re X Ray
01 May 01:27
-
 ZombieUnicorn favorited T Re X Ray
14 Jan 21:47
ZombieUnicorn favorited T Re X Ray
14 Jan 21:47
-
 Neko-San K. favorited T Re X Ray
31 May 21:08
Neko-San K. favorited T Re X Ray
31 May 21:08
-
 Chudames commented on T Re X Ray
13 Apr 22:03
Chudames commented on T Re X Ray
13 Apr 22:03
-
Chudames favorited T Re X Ray
13 Apr 22:02
-
 Julie R. added T Re X Ray to Crochet
11 Nov 03:04
Julie R. added T Re X Ray to Crochet
11 Nov 03:04
-
lin d. favorited T Re X Ray
13 Aug 21:30
-
 HotPinkCrayola published her project T Re X Ray
12 Aug 06:00
HotPinkCrayola published her project T Re X Ray
12 Aug 06:00
You Will Need
-
 Step 1
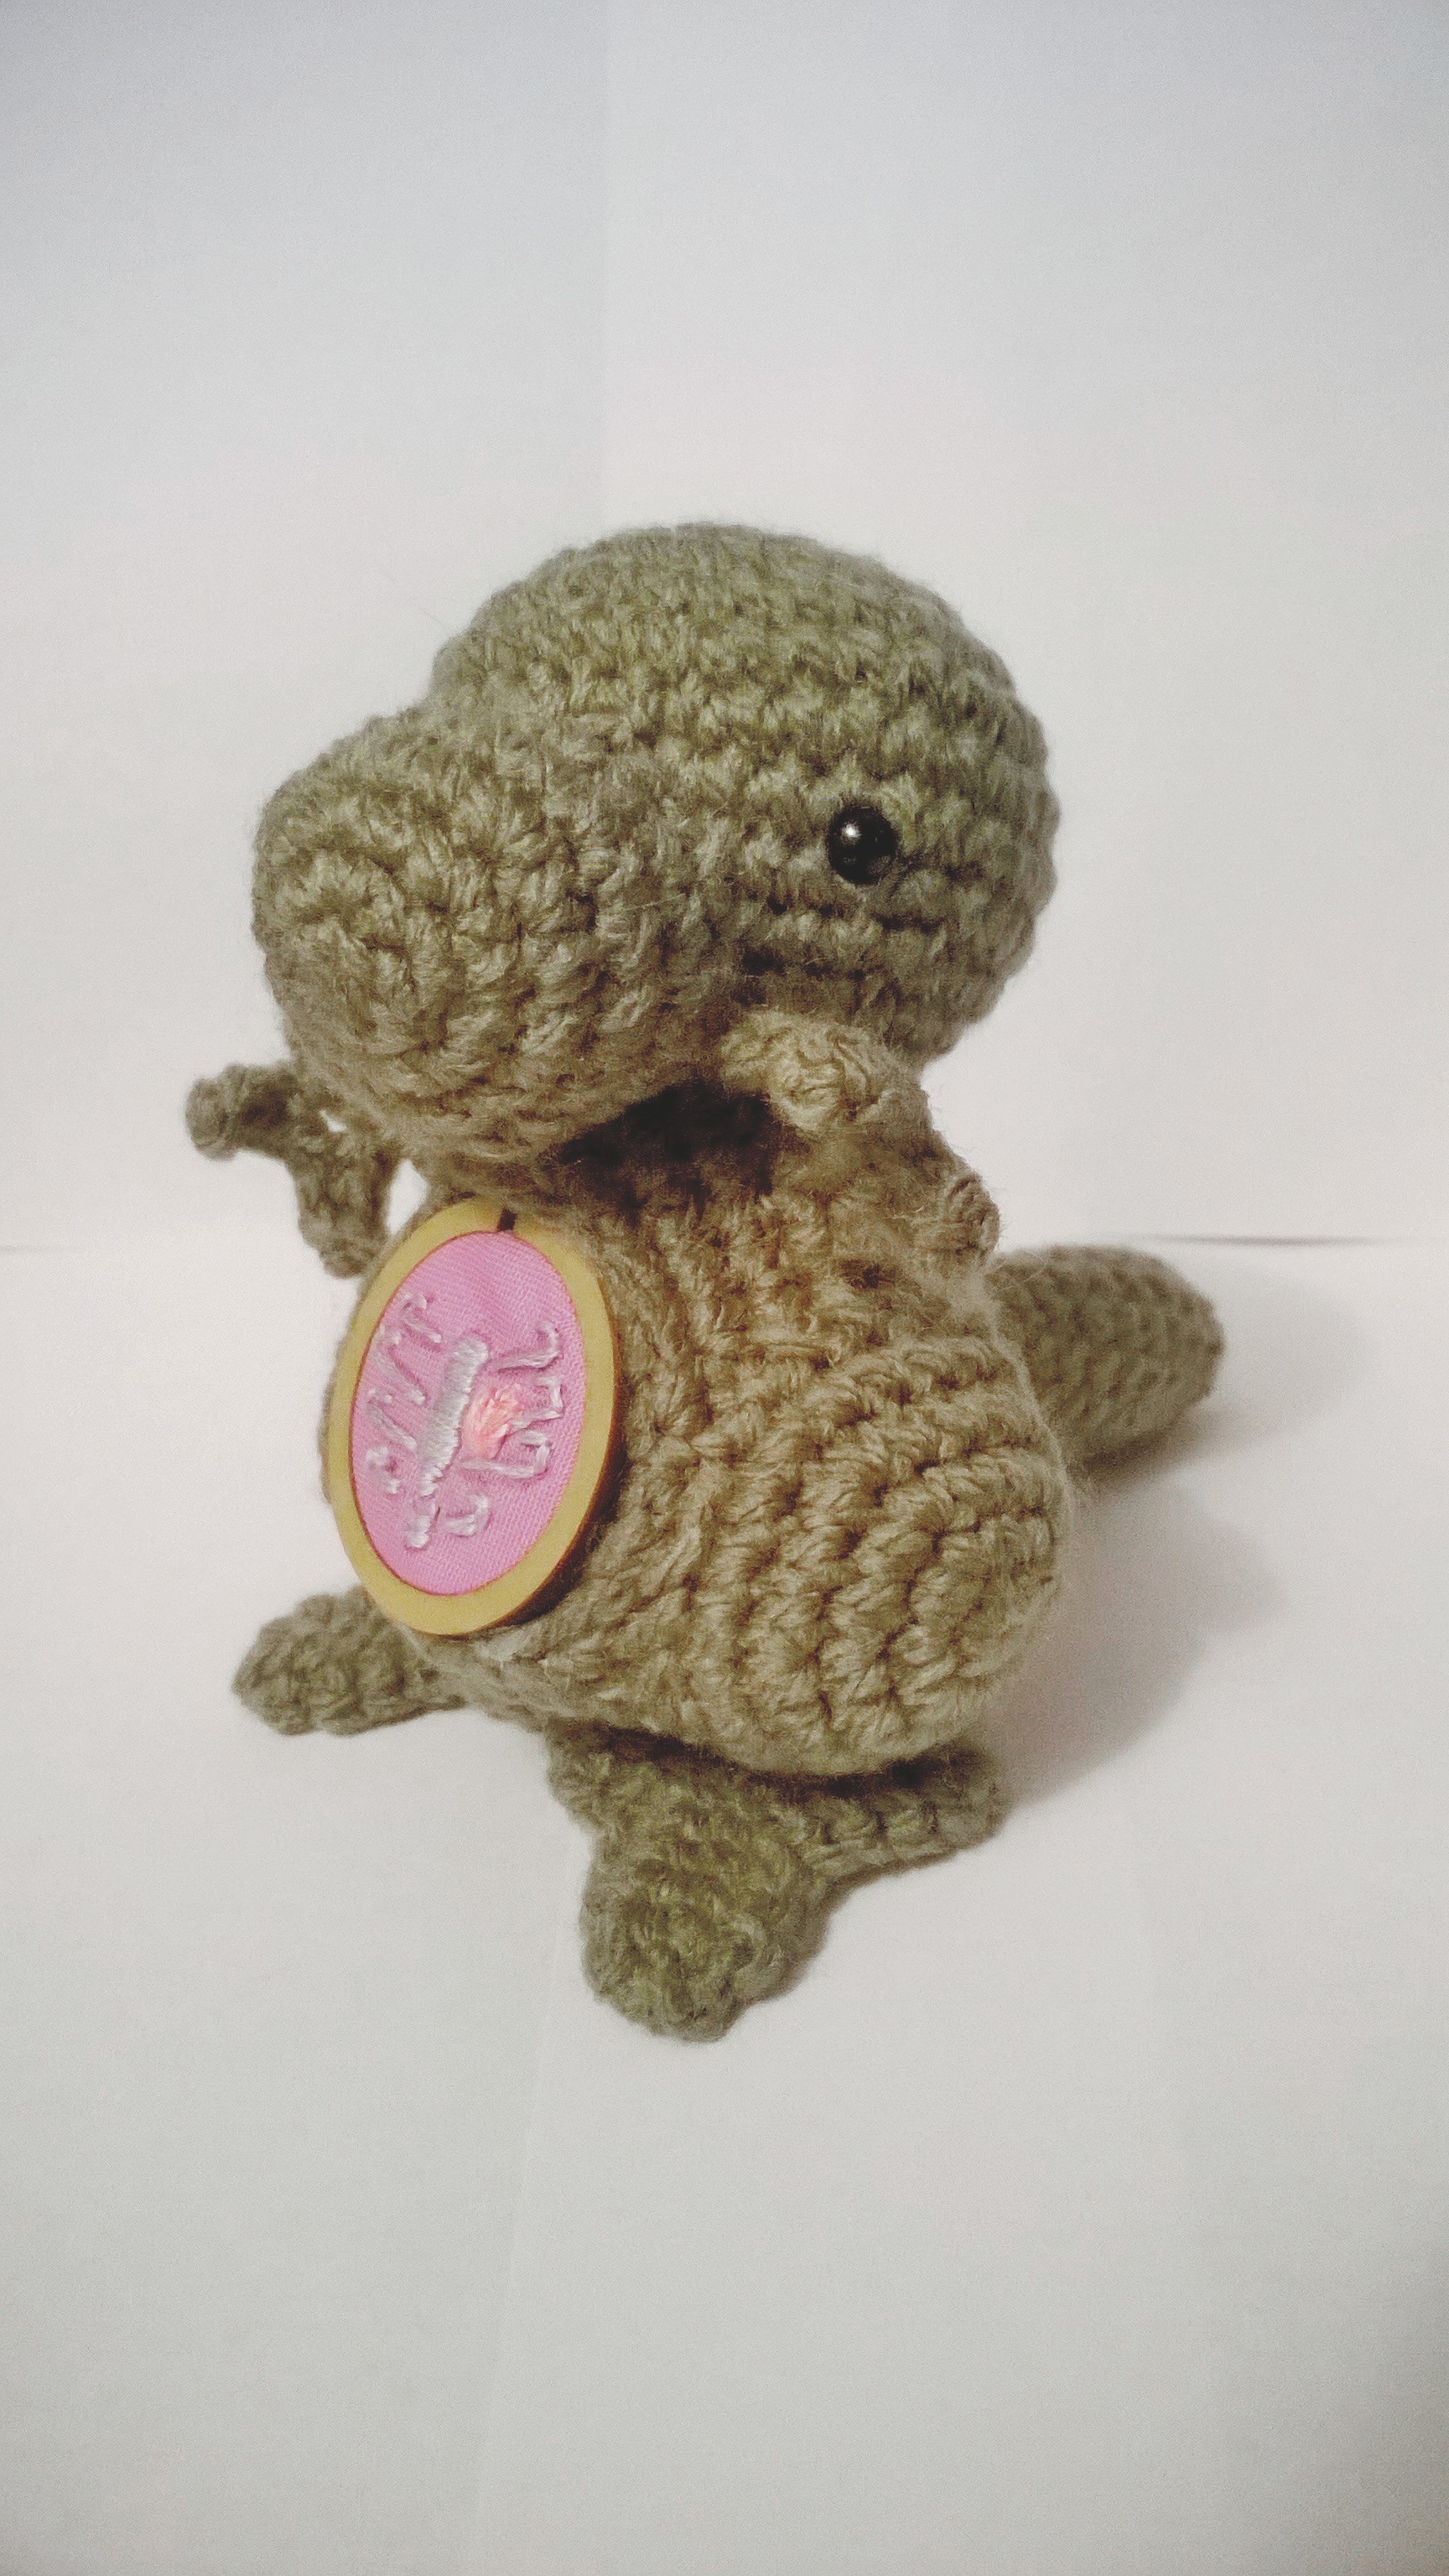
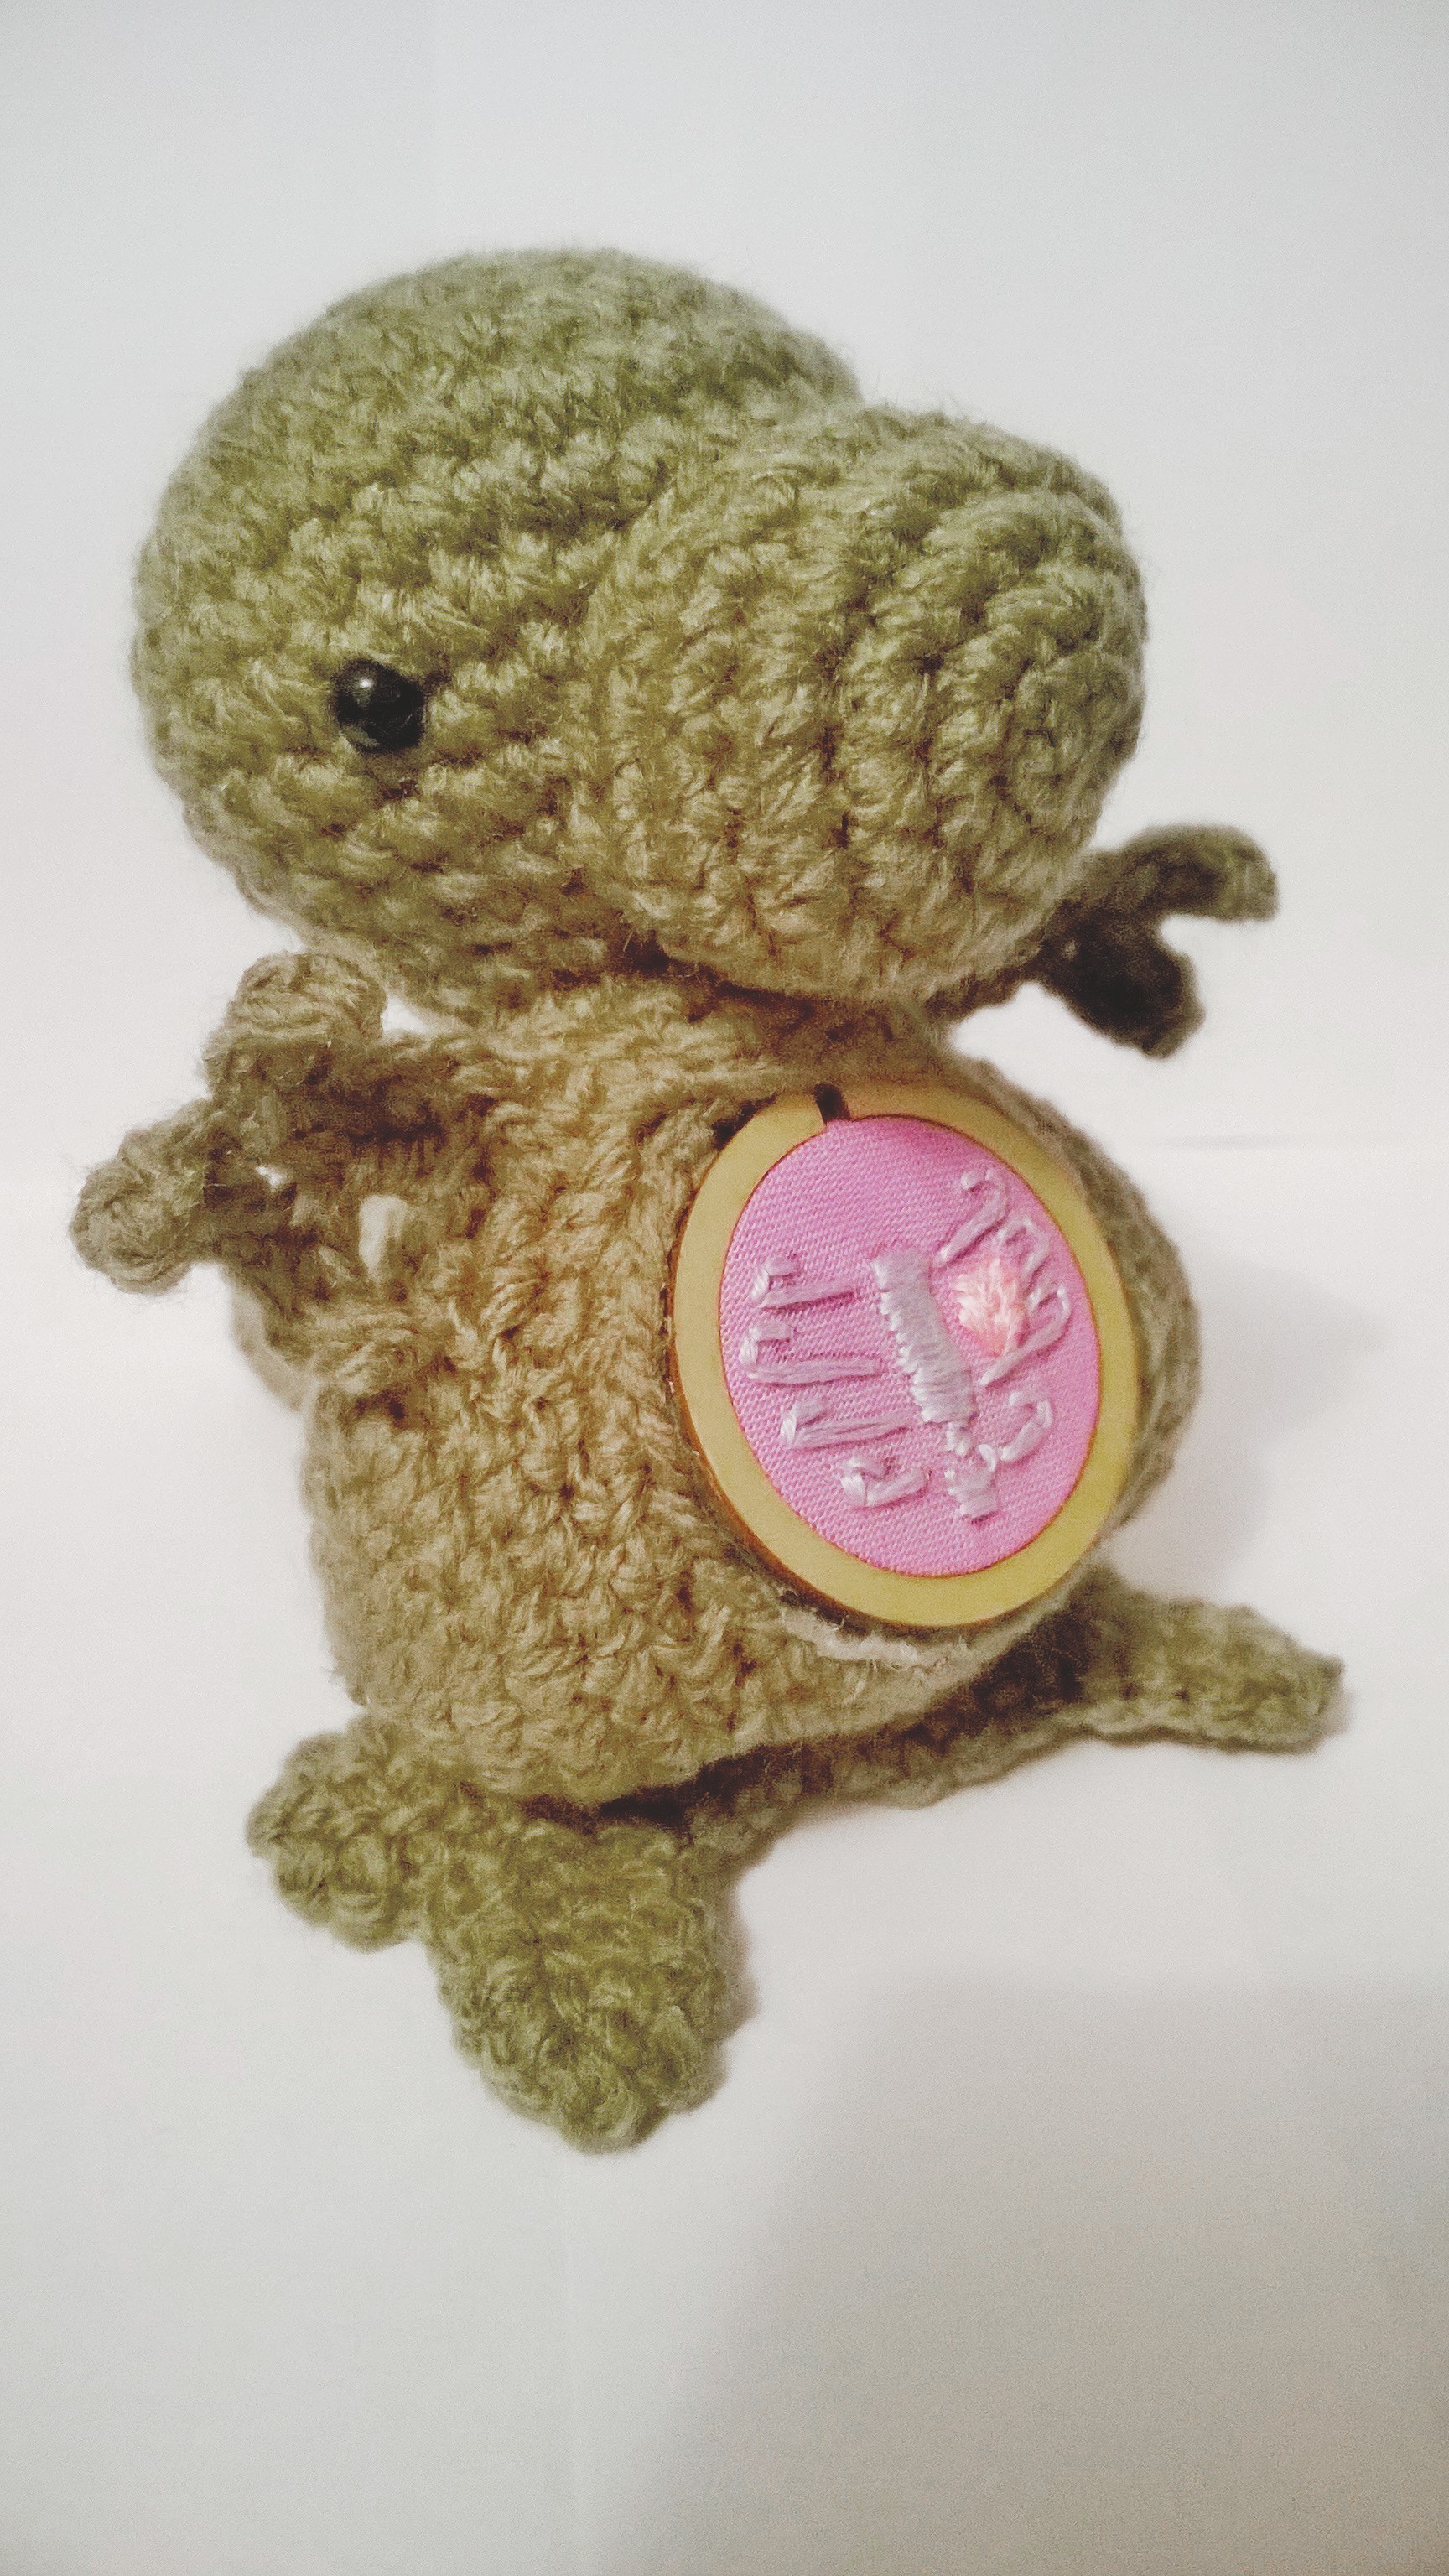
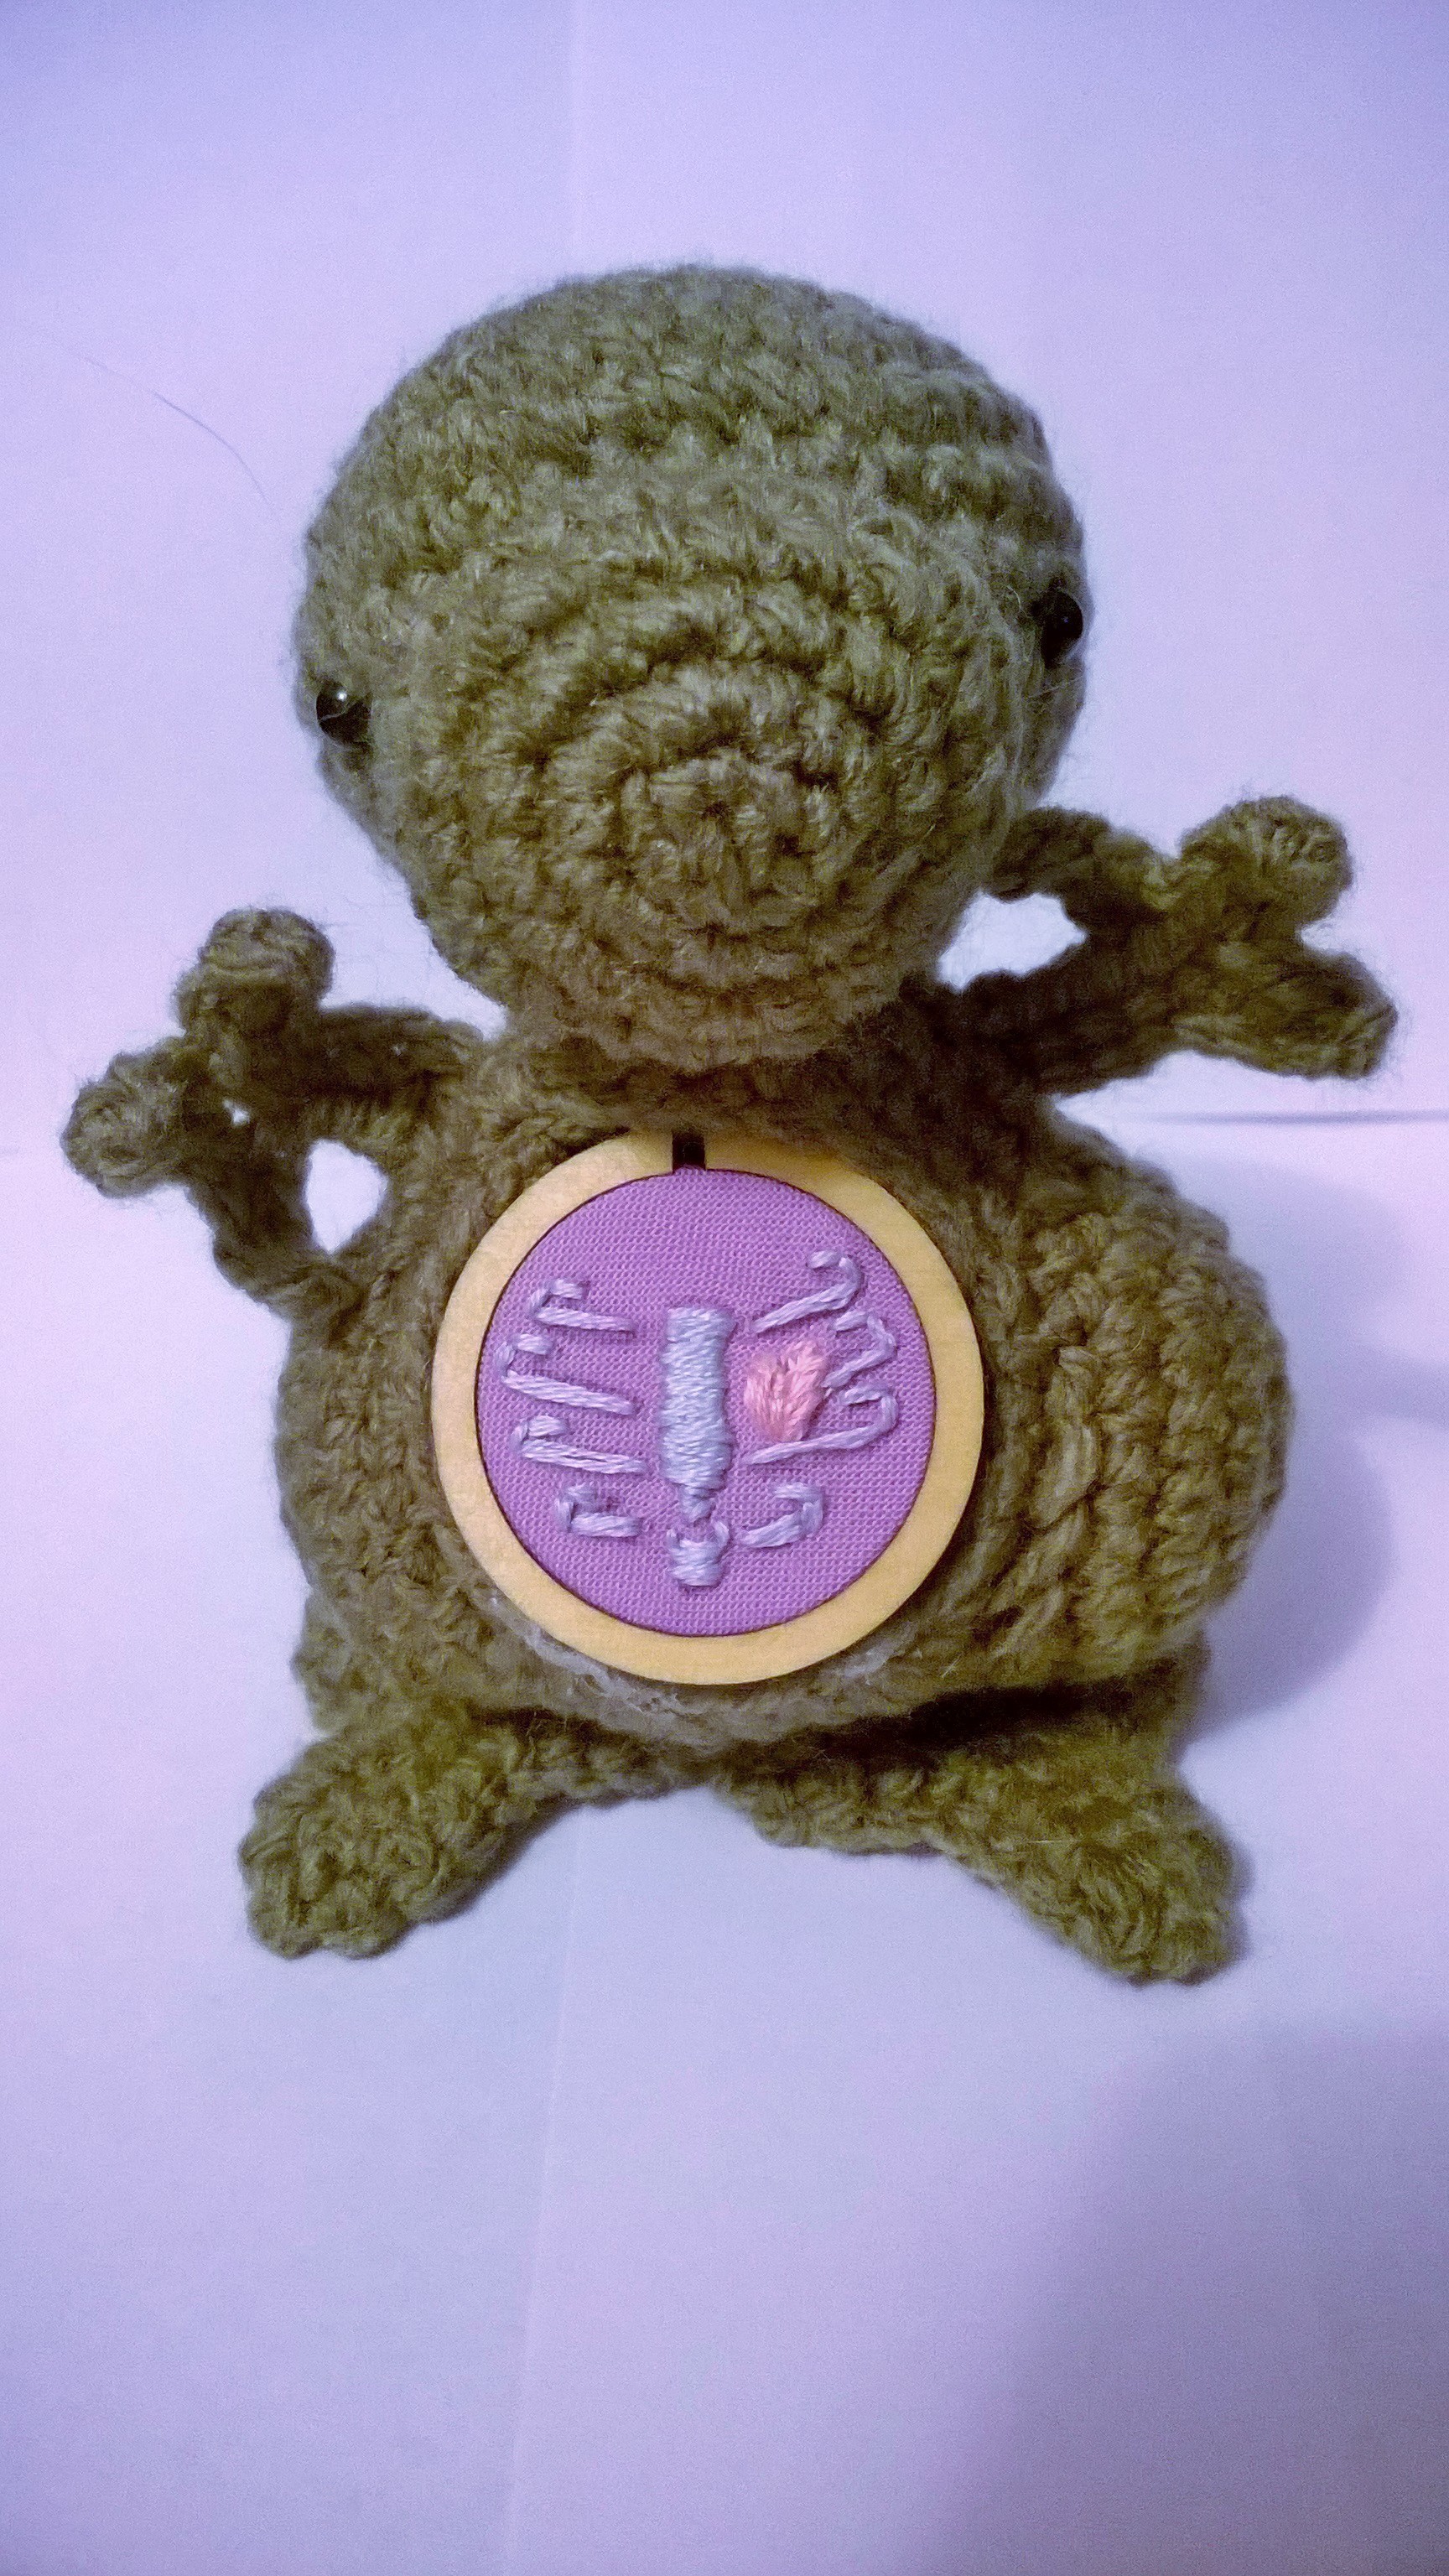
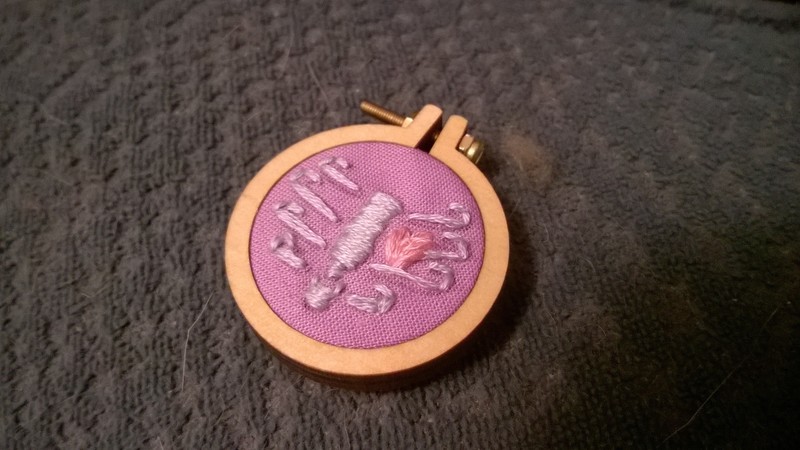
Following the instructions in Dandelyne's kit (or on my 'Pants Drawer Label' or 'Elements of Harmony Necklace' tutorials), embroider your rib cage and heart design using a mixture of satin stitch and backstitch. Use the 4cm hoop and remove the necklace chain.
-
 Step 2
US crochet terminology will be used in this pattern - for UK terminology, replace 'Sc' with 'Dc'.
Body and Tail:
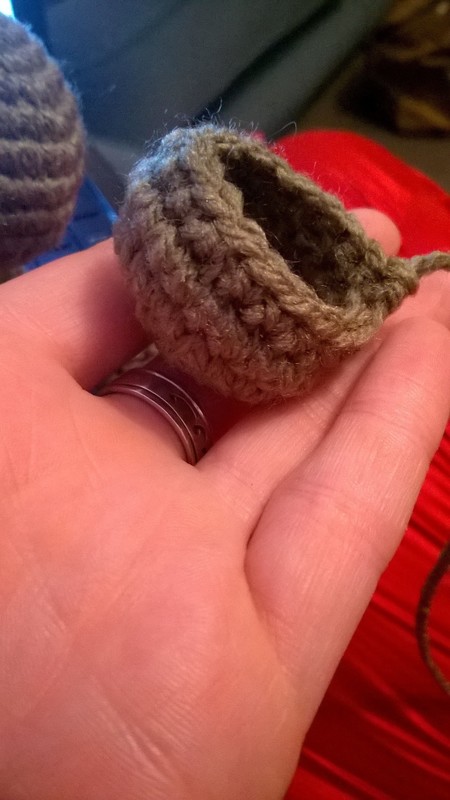
Ch25 and join with a SL ST to form a circle [24 stitches].
Round 1: {3sc, INC} repeat around [30]
Round 2: {4sc, INC} repeat around [36]
Round 3-7: Sc around [36]Stop but don't cut the yarn.
-
 Step 3
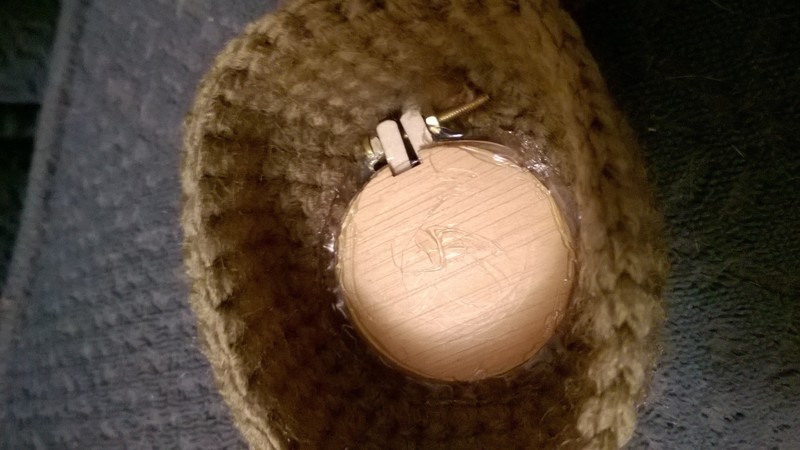
Slot your embroidered rib cage into the hole, covering the bolt at the top.
-
 Step 4
Use your glue gun to carefully secure the mini-embroidery frame.
Be sparing at the front, but liberal at the back - it's going to be inside so noone will ever see the mess!
-
 Step 5
Continue with the body and tail:
Round 8: Round 13: {4sc, DEC} repeat around [30]
Round 9: {3sc, DEC} repeat around [24]
Round 10: {2sc, DEC} repeat around [18]Stuff the body firmly at this point.
Round 11: {1sc, DEC} repeat around [12]
Round 12-21: Sc around [12]
Round 22: {2sc, DEC} repeat around [9]
Round 23: {sc, DEC} repeat around [6]FO and weave in any tails (except the chunk dinosaur one of course...)
-
 Step 6
Hips (make 2)
Magic ring
Round 1: 6sc into centre of the magic ring [6]
Round 2: INC around [12]
Round 3: {1sc, INC} repeat around [18]
Round 4: {2sc, INC} repeat around [24]
Round 5-6: Sc around [24]FO leaving a long tail for sewing
-
 Step 7
Sew your hips in place either side of the tail. Sew through 18 of the stitches, then stuff firmly, then sew the remaining stitches.
-
 Step 8
Head
Magic ring
Round 1: 6sc into centre of the magic ring [6]
Round 2: INC around [12]
Round 3: {1sc, INC} repeat around [18]
Round 4: {2sc, INC} repeat around [24]
Round 5: {3sc, INC} repeat around [30]
Round 6: {4sc, INC} repeat around [36]
Round 7-9: Sc around [36]
Round 10: Round 13: {4sc, DEC} repeat around [30]
Round 11: {3sc, DEC} repeat around [24]
Round 12: {2sc, DEC} repeat around [18]FO leaving a long tail for sewing
Add the safety eyes wherever you think looks cutest, but leave at least 2 inches between them for the nose. Stuff the head firmly.
-
 Step 9
Sew the head on to the body - take care around the top of the embroidery frame that you don't hit any solid glue or metal!
-
 Step 10
Nose
Magic ring
Round 1: 6sc into centre of the magic ring [6]
Round 2: INC around [12]
Round 3: {1sc, INC} repeat around [18]
Round 4: {2sc, INC} repeat around [24]
Round 5: Sc around [24]
Round 6: {2sc, DEC} repeat around [18]FO leaving a long tail for sewing.
-
 Step 11
Sew nose between the eyes.
If you wanted to leave off the nose that would work too, but I found it didn't quite look as dinosaur-y as I wanted.
-
 Step 12
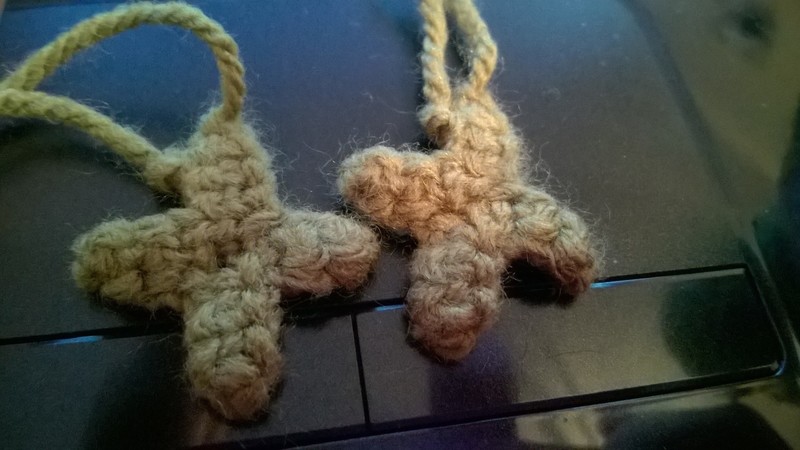
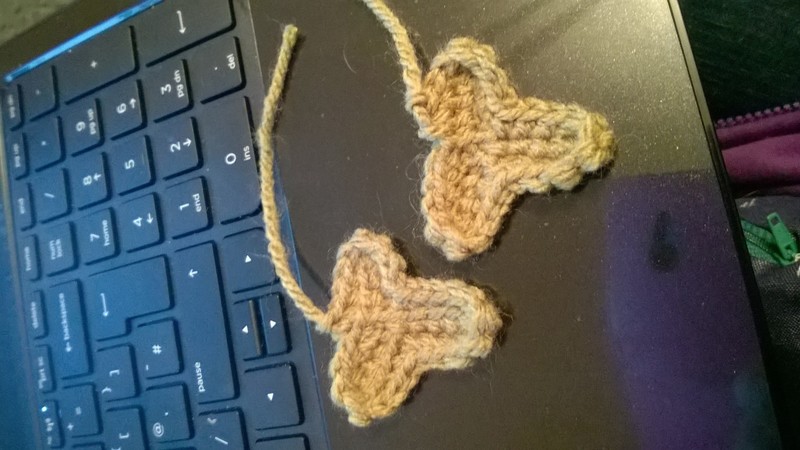
Arms (make 2)
Ch8 leaving a long tail at the start
Row 1: 3sc, ch4.
Row 2: 3sc, ch4
Row 3: 3sc, then continue into original chain for 4scFO leaving a long tail for sewing. Use one tail to sew up the holes in the palms.
Leave your arms under a heavy book for 24 hours to flatten (or block using your preferred method). I suggest you make your feet now too because you need to do the same with them.
-
 Step 13
Sew your arms in place so dino can raww!
-
 Step 14
Feet (make 2)
Ch6 leaving a long tail at the start
Row 1: 4sc, ch6.
Row 2: 5sc, ch5
Row 3: 4sc, then join with a SL ST into remaining chain of Row 1Round 1: Sc around the edge of all three sections [27]
FO leaving a long tail for sewing. Use one tail to sew up the holes in the middle.
Leave your feet under a heavy book for 24 hours to flatten (or block using your preferred method).
-
 Step 15
Sew your feet in place under the hips. Make sure the right side of the work is facing down - this will counteract any curled edges.
Alternatively, you could sew them to the front of the hips to make your dino look like he's sitting down.
-
 Step 16
T-ReX-Ray is finished! Find him an island to live on with a few other dinosaurs and a dodgy wiring system. Because nothing has ever gone wrong with that plan in the history of film...
Alternatively, keep him to love. Probably safer.


Comments

 1
Stud Earrings »
Miraculous Ladybug Earrings
1
Stud Earrings »
Miraculous Ladybug Earrings
 2
Pouches, Purses & Wallets »
Water Bottle Pack
2
Pouches, Purses & Wallets »
Water Bottle Pack


