


About
Cute way to accessorise your books
I love giving gifts to my friends after special events and the occasion for this one was completion of the school play "Hello Dolly". I also love giving personalised items that are easy to make and I fell upon a corner bookmark tutorial. So I decided to have it match the play's theme.
Tags
-
 Kimya J. favorited Japanese Doll Bookmarks
24 Jun 18:01
Kimya J. favorited Japanese Doll Bookmarks
24 Jun 18:01
-
 Pramodini Arela entered her project Japanese Doll Bookmarks to Japan Crate
22 May 03:58
Pramodini Arela entered her project Japanese Doll Bookmarks to Japan Crate
22 May 03:58
-
Pramodini Arela entered her project Japanese Doll Bookmarks to Kawaii Box
15 Sep 21:16
-
 angel.zoey favorited Japanese Doll Bookmarks
07 Sep 15:14
angel.zoey favorited Japanese Doll Bookmarks
07 Sep 15:14
-
 Conner W. added Japanese Doll Bookmarks to book crafts
06 Sep 01:47
Conner W. added Japanese Doll Bookmarks to book crafts
06 Sep 01:47
-
 Zombie Babe favorited Japanese Doll Bookmarks
24 Aug 07:27
Zombie Babe favorited Japanese Doll Bookmarks
24 Aug 07:27
-
 Penny F. added Japanese Doll Bookmarks to TO MAKE!
22 Jul 15:20
Penny F. added Japanese Doll Bookmarks to TO MAKE!
22 Jul 15:20
-
 George S. favorited Japanese Doll Bookmarks
10 Jul 10:02
George S. favorited Japanese Doll Bookmarks
10 Jul 10:02
-
 mr.nawaabfuzzumspompom favorited Japanese Doll Bookmarks
08 Jul 08:34
mr.nawaabfuzzumspompom favorited Japanese Doll Bookmarks
08 Jul 08:34
-
 harley r. favorited Japanese Doll Bookmarks
05 Jul 20:49
harley r. favorited Japanese Doll Bookmarks
05 Jul 20:49
-
Step 1
MAKE A BASIC CORNER BOOKMARK. There are lots of great tutorials out there and even here on CutoutandKeep. But I used the first tutorial of the monster one: http://tallystreasury.com/2011/02/corner-page-bookmarks-3/. Just remember not to put any embellishments on them. Only the base. I suggest a stronger paper like construction paper for this.
-
 Step 2
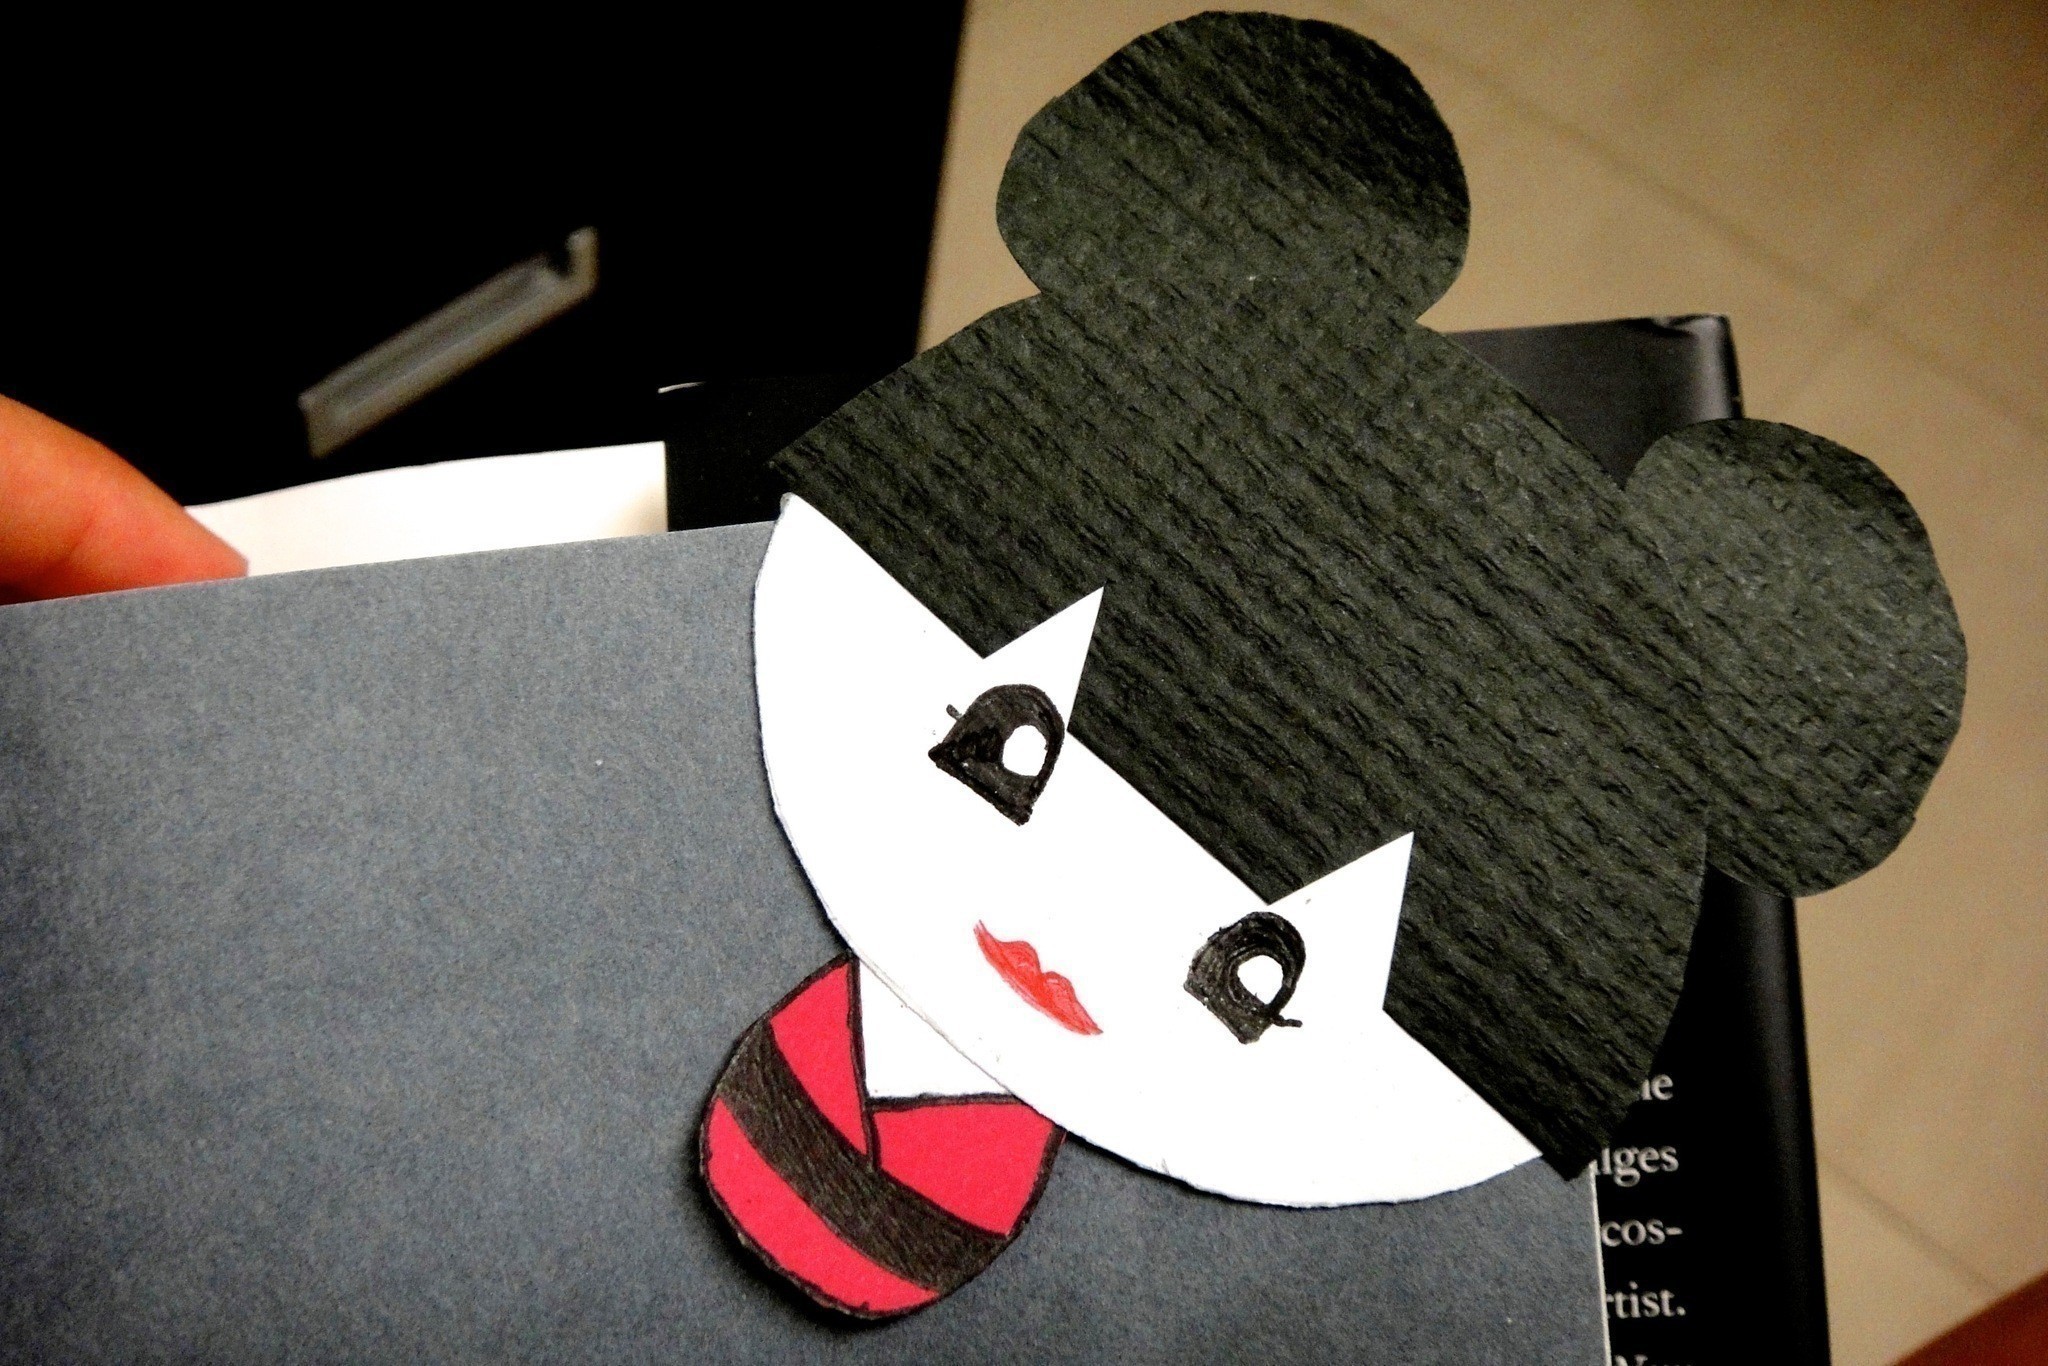
CREATE THE FACE SHAPE. flip the bookmark over so the diamond side is facing you and round out the bottom half to look like a face. If you are making multiple, this can act as your template and you need to cut out several more.
-
Step 3
GLUE DOWN THE TRIANGULAR TABS. Be careful not to glue it to the front face part
-
Step 4
MAKE THE FACE. Using a skin coloured or white paper (I suggest thinner) trace the bottom face area and then draw a straight line connecting one end to the other. Cut it out and glue it on.
-
 Step 5
DRAW THE HAIR PORTION. Place the bookmark with the pointed end facing away from you and the face end toward you. lightly sketch a rounded hair/head shape around the pointed end. Then remove the bookmark and connect the two ends with a straight line. Cut it out. Again, this can act as a template.
-
Step 6
"STYLE" YOUR BANGS. Now you can make the bangs whatever style you can't. But make sure that you don't go very high too far to the left or right because then there will be a hole. glue it on.
-
 Step 7
MAKE THE BACK OF THE HAIR. roughly trace around the whole head to create a circle. Then you can add whatever hair style you want to it like braids or pigtails. Cut it out and glue it to the back.
-
Step 8
DRAW THE FACE. using your marker, draw the face.
-
 Step 9
MAKE THE BODY. draw a teardrop shape that is a little flat on the bottom for the body and cut it out. With your marker, draw a Kimono by making a thick band across the middle, filing that in, a diagonal one from the left to the middle of the thick band, and a shorter diagonal one from the right meeting the other line 2/3 of the way down.
-
Step 10
ADD A TRIANGLE FOR THE NECK. With the paper you used for the face, cut a triangle to fit above the neckline of the body to make it match the face and glue in place.
-
Step 11
ATTACH BODY AND HEAD. Glue the body must to the front face piece.
-
Step 12
MARK YOUR PLACE.


Comments

 1
Stud Earrings »
Miraculous Ladybug Earrings
1
Stud Earrings »
Miraculous Ladybug Earrings
