About
A mid-level project
Upcycle a plain glass plate with reverse decoupage.
-
 Summer favorited Decoupage A Glass Plate
25 Jul 02:05
Summer favorited Decoupage A Glass Plate
25 Jul 02:05

-
 Step 1
Separate each napkin, remove the two bottom layers and keep the top one only. Cut out enough shapes to create an all-over design on the plate. Please note that napkin paper is very fragile and therefore the smaller the shapes, the easier it is to glue them.
-
 Step 2
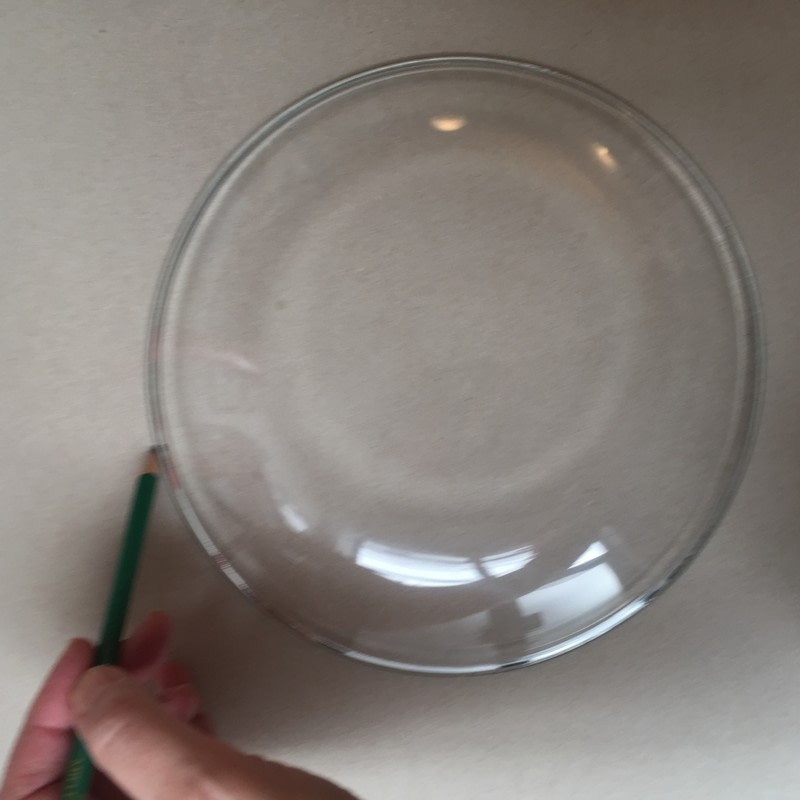
Turn the plate upside-down on your piece of parcel paper or card (any piece of plain paper will do) and draw the outline with a pencil.
-
 Step 3
Cut out the shape: you will use this as a template for your design.
-
 Step 4
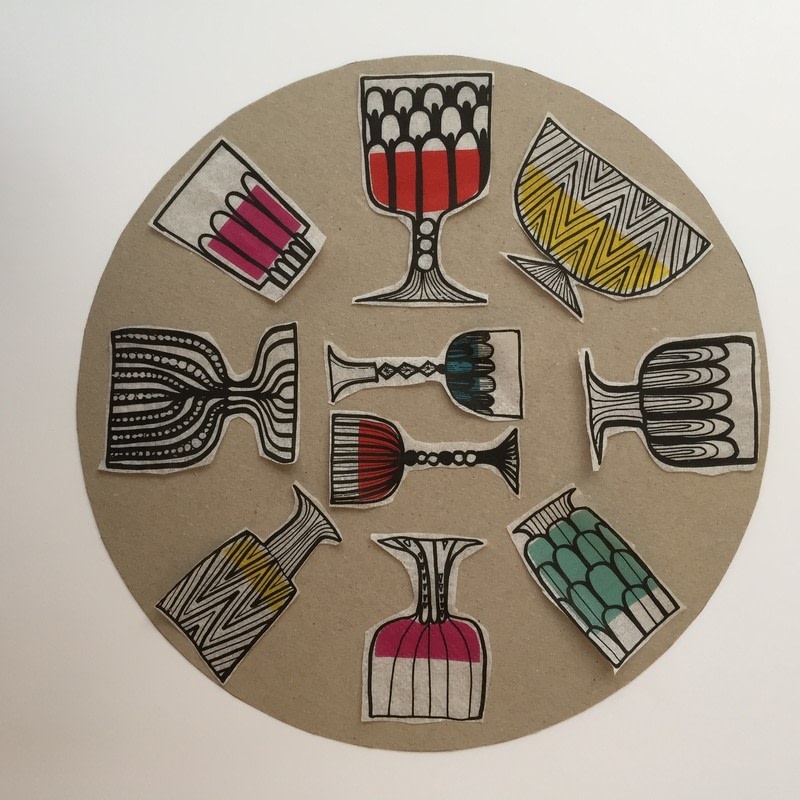
Play around with the shapes on your paper template until you're happy with the design.
-
 Step 5
With the plate upside-down, start glueing the pieces of napkin paper from the centre.
-
 Step 6
Brush the glue on the plate first, then carefully tap the piece of paper in place and add another layer of glue on top.
-
 Step 7
Let the plate dry (you can use a hairdryer to accelerate the process if you prefer) until the glue no longer feels tacky.
-
 Step 8
Cover the back of the plate with acrylic paint: 2-3 coats should be sufficient. Once the paint is dry, finish with a coat of polyurethane varnish. Any unevenness along the edge can be tidied up with sandpaper.