Crystal Spike Necklace
Extract from DIY Statement Necklaces • By Erin Pruckno • Published by Adams Media


About
DIY Statement Necklaces
In the mood for a major-impact necklace? Look no further than this project, a glam and edgy
necklace inspired by Fallon’s classic designs. While there are several steps involved in making this necklace, the technique of pushing head pins through the sew-on settings of crystals and gluing the crystals and spikes together is straightforward. It’s important to note that this necklace should be made in two stages. After you glue together the crystals and spikes to make the pendants, you’ll need to let them sit overnight so the glue can fully cure. Once dry, you can begin attaching them to the chain.
Statement Necklace Supplies
Spending more on crystal rhinestones, instead of plastic or glass, is worth the investment. You can purchase online from bead stores or suppliers like Swarovski. The result is a more high-end appearance that will have everyone begging to know where you bought your necklace!
-
 Key West Witch added Crystal Spike Necklace to Jewelry
30 Jun 01:36
Key West Witch added Crystal Spike Necklace to Jewelry
30 Jun 01:36


-
 Step 1
Start by laying out the design of the necklace and deciding where you will place the crystals. The following instructions are for making the necklace design shown in the photos, but you can create your own design using different sizes and shapes of crystals.
-
 Step 2
To create the center focal point of the necklace, first push a head pin through the holes of one of the larger round crystals.
-
 Step 3
Next, put a dab of glue on a marquis crystal and attach this to the large crystal by pressing into place. Repeat to add additional crystals to the focal point and allow to dry per package instructions.
-
 Step 4
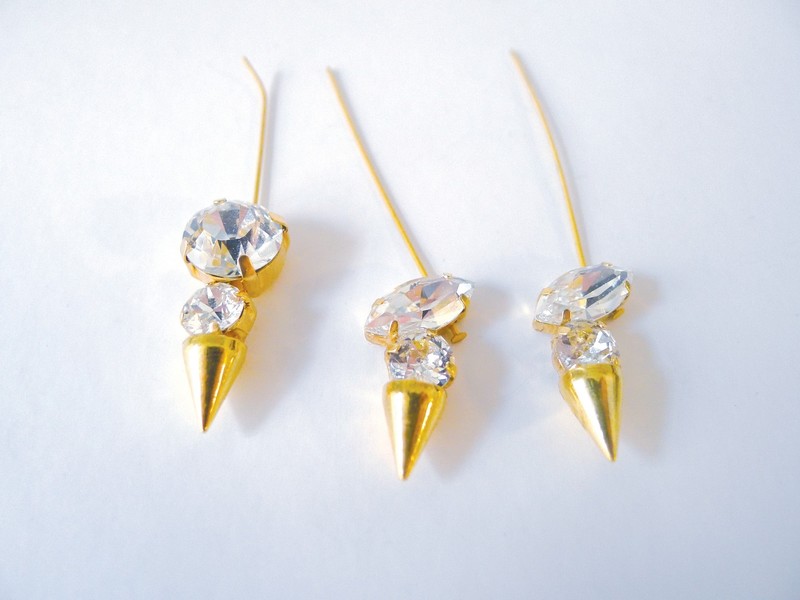
To create the small pendants, start by pushing a head pin through a small round crystal and then through a large round crystal.
-
 Step 5
Next, add a drop of glue to a spike and press firmly onto the bottom, smaller crystal. Repeat to create a second small pendant and let dry.
-
 Step 6
Use the same process to make the last four pendant pieces for the necklace, but this time push the head pins through only the marquis crystals. Then, glue the marquis crystals to the small 7mm crystals and spikes. When making the crystal pendants, remember that the design should mirror itself on either side of the focal point.
-
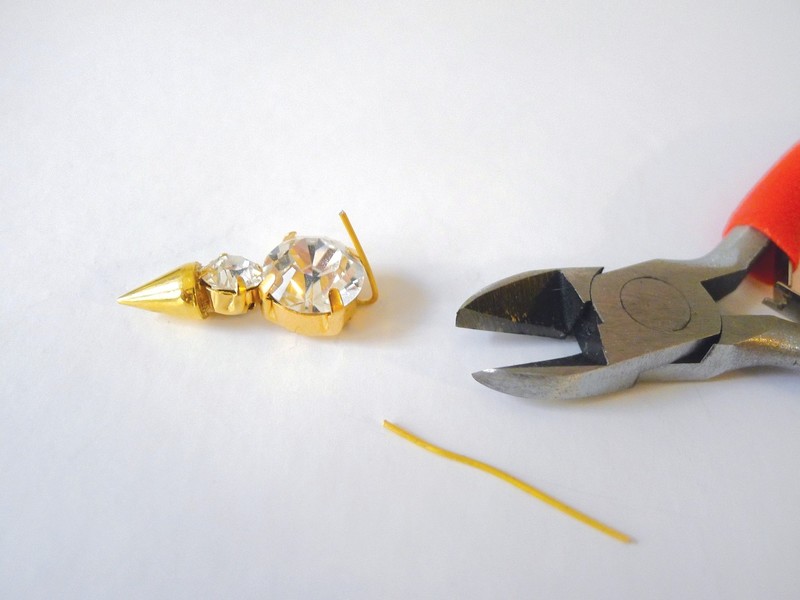
 Step 7
Once all the crystal pendants have dried overnight, use the round-nose pliers to bend the head pin wire at a 90-degree angle, then use the wire cutters to trim the head pins to about ½ inch.
-
 Step 8
Hold the wire below the bend with the round–nose pliers. Then, grip the end of the wire with the round-nose pliers and bend the wire around the round pliers to form a loop. Be sure to leave the loop open.
-
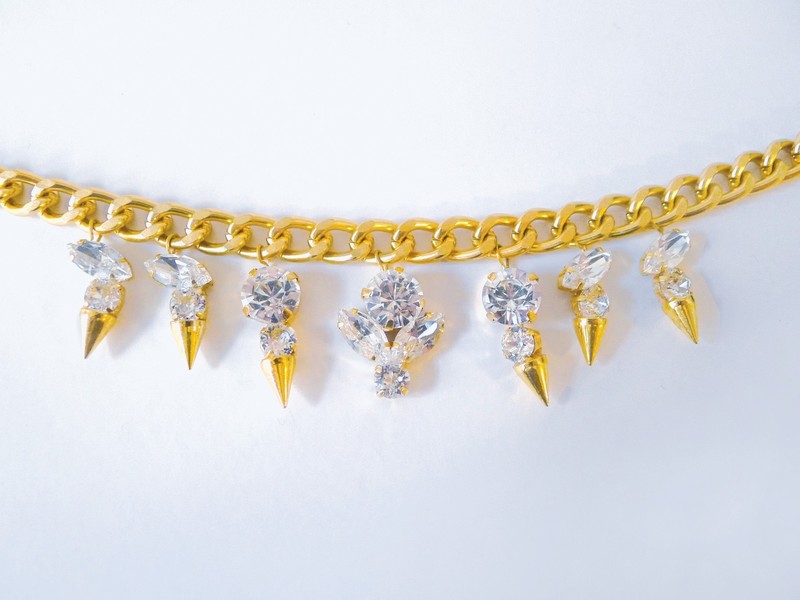
 Step 9
Hook the loop of the focal pendant around the center link of the chain and bend the loop shut. Attach the rest of the pendants to the chain, spacing them evenly, about 1 inch apart.
-
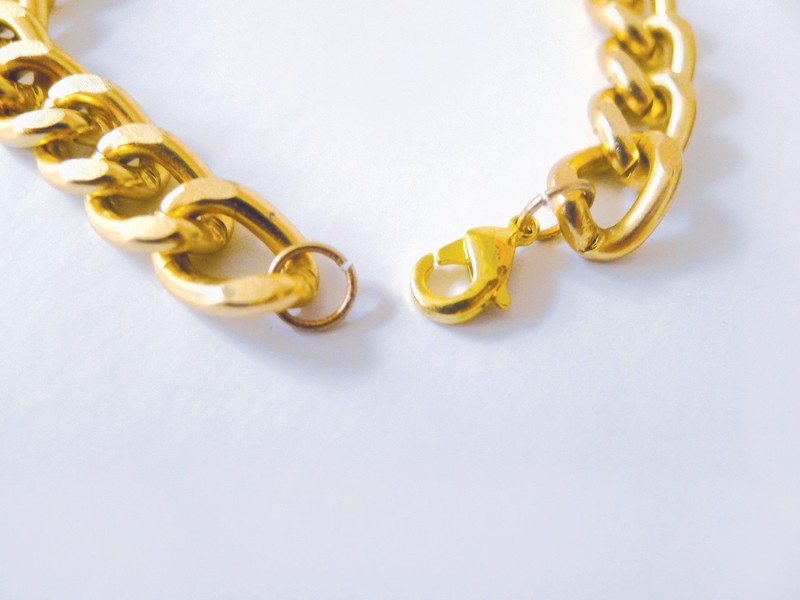
 Step 10
Open your jump rings by using two sets of pliers to grab on either side of the seam in the ring. Twist the pliers and ends of the jump rings away from each other in a north-south motion. Attach a jump ring to each end of the necklace, add a clasp to one side, then close each ring by twisting the ends back toward each other so the ends of the ring are flush.