
About
A lovely, romatic card for the sweethearts in your life.
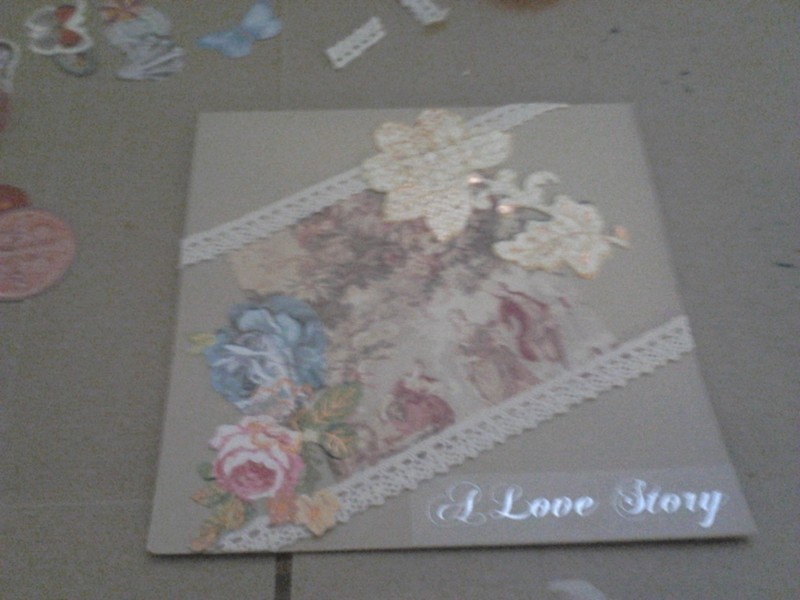
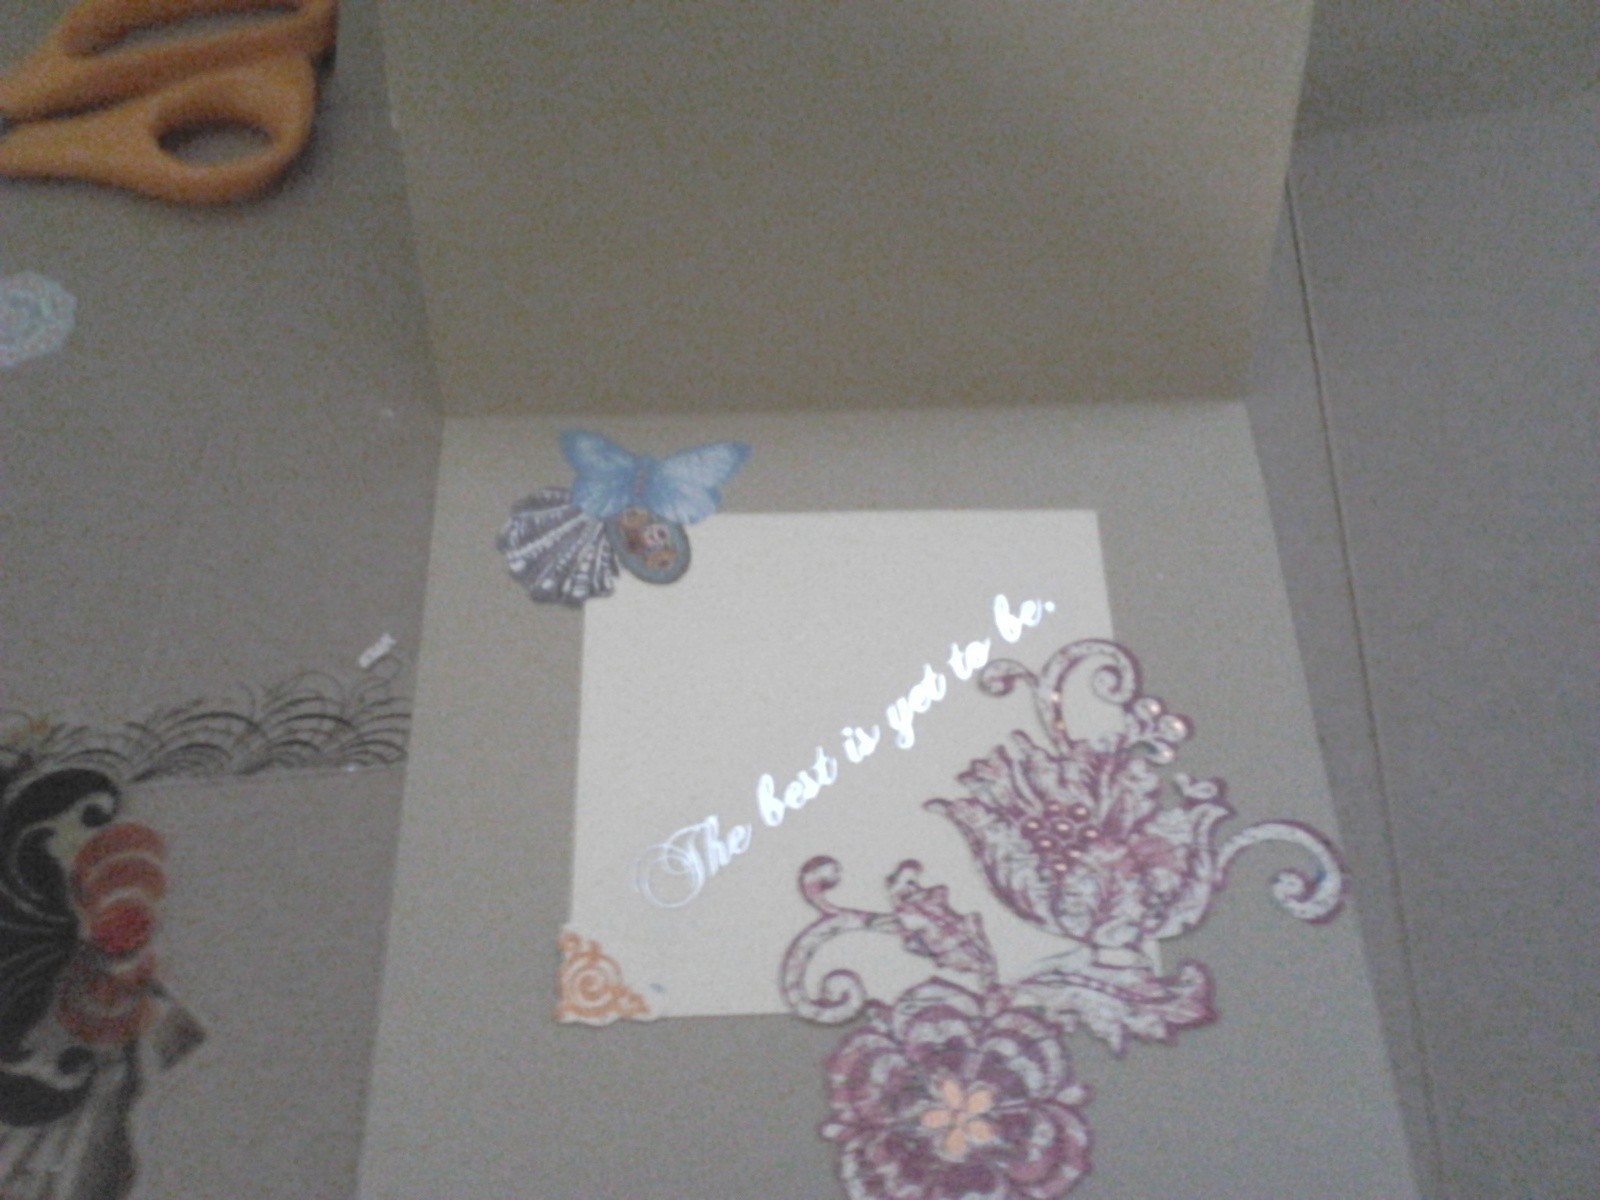
So this ended up being a pretty expensive project, mostly because I bought an acid-free glue stick (much pricier than the regular kind) and a bag of awesome embellishments. It was about $10 for the supplies all together--but to be fair, I have tons of the cream cardstock, scrapbooking paper, ribbon, and embellishments left. So far I've made two cards in this style (WHY are there so many autumn weddings?!?) and all I'd need to buy more of is the slate-grey cardstock. Just to let you all know, the card reads "A Love Story" on the front and "the best is yet to be" on the inside.
Tags
-
 marion c. favorited Wedding Card
14 Oct 11:38
marion c. favorited Wedding Card
14 Oct 11:38
-
 Lorraine E. added Wedding Card to Vintage romance
20 Dec 22:15
Lorraine E. added Wedding Card to Vintage romance
20 Dec 22:15
-
 Step 1
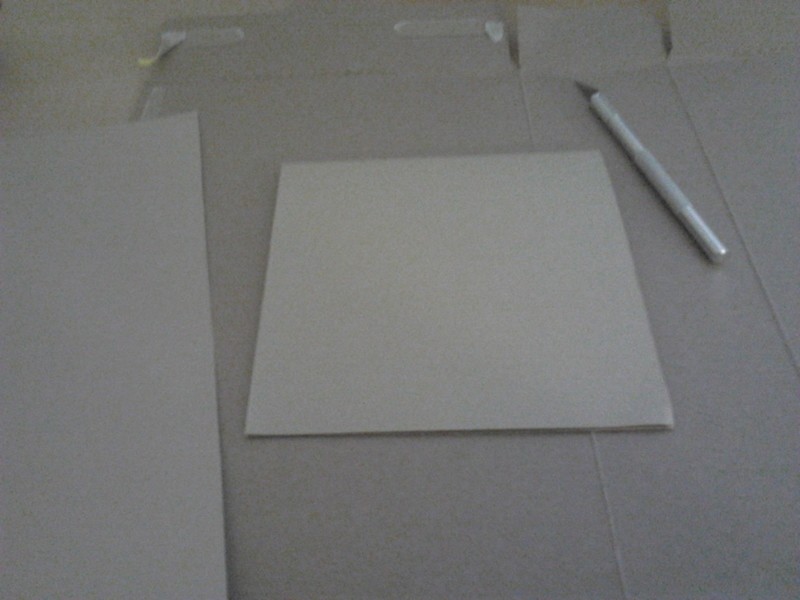
Gather your supplies. I wanted a feeling of vintage romance for this card--it's for my older sister's wedding, a really special event (she and her fiancee are 28 now...and have been dating since the 6th grade!!! How amazing!!!). I chose one regular-sized piece of slate-grey cardstock as the base of the card, a half-sheet of textured cream cardstock as the contrast, and a piece of French wallpaper-inspired scrapbooking paper as the front-of-card contrast. I also bought a roll of lace ribbon, a bag of vintage-inspired chipboard embellishments, and a package of quote stickers (I chose a set that was themed "true love"). You'll also need an x-acto knife, scissors, a perfect square to trace (or a ruler), and scissors. Make sure you also have your adhesive at hand, as well as a piece of cardboard (I ALWAYS use a flattened-out cereal box) to protect your cutting surface.
-
 Step 2
Begin by placing your cardboard on your cutting surface, and taking out your piece of slate-grey base cardstock. Fold the piece of cardstock neatly in half lengthwise. Then, using your x-acto knife, cut along the fold line to produce two equal pieces.
-
 Step 3
Take one half of the cardstock in hand. Fold in half widthwise to make a fat, top-fold card.
-
 Step 4
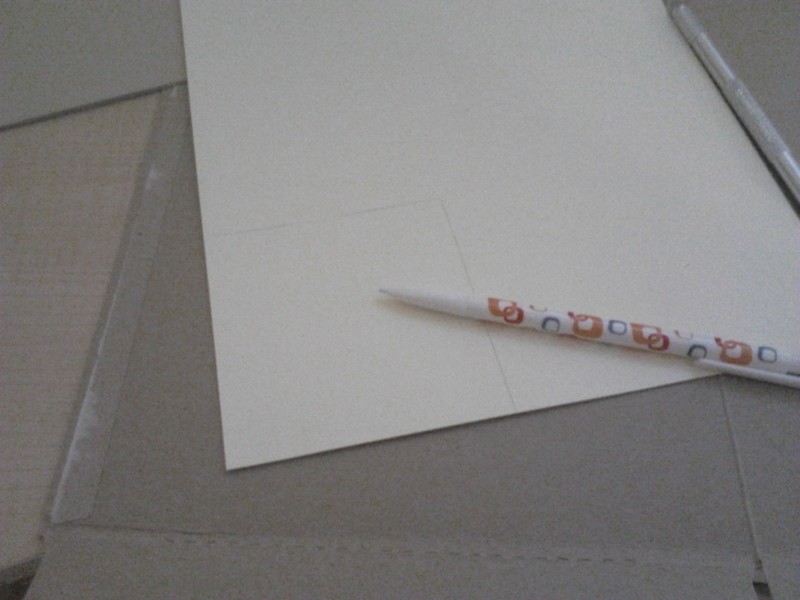
Now take your textured cream cardstock in hand.
-
 Step 5
Use your square object (I used a drink coaster) or ruler and pencil to mark out a perfect square.
-
 Step 6
Use your x-acto knife to cut out.
-
 Step 7
Same deal with your piece of scrapbooking paper. Mark out a perfect square and cut.
-
 Step 8
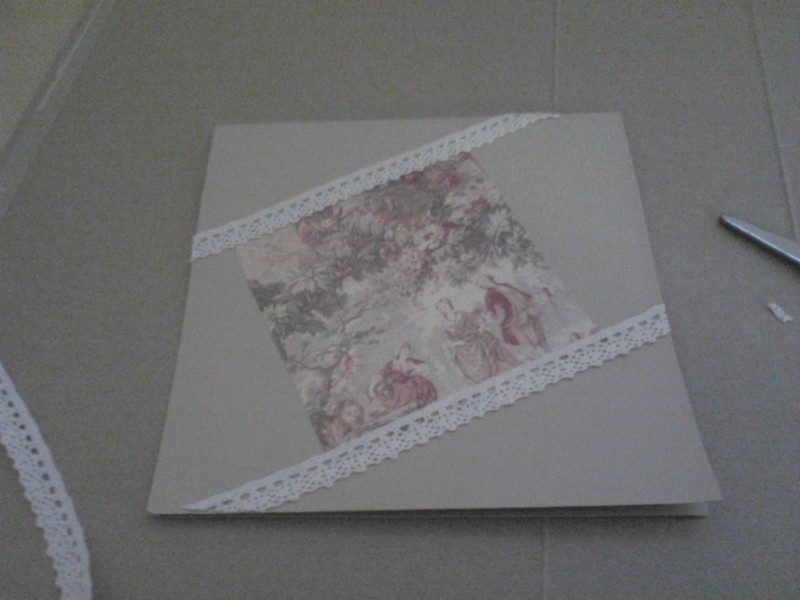
Now use acid-free adhesive to glue the square of scrapbooking paper onto the front.
-
 Step 9
I chose to place my square at an angle, like this. Press down and smooth out any air bubbles.
-
 Step 10
Choose a sticker you like from your package of quote stickers and place onto the cream cardstock square.
-
 Step 11
Use adhesive to stick the cream cardstock with quote onto the inside of the card.
-
 Step 12
Now add ribbon. Since I was using a glue stick, I just drug the ribbon along the top of the stick, pressing with my fingers to make sure glue was spread evenly onto the back side of the ribbon. I used a blue dry-clear gluestick and ivory lace ribbon, and there are no blue stains anywhere on the ribbon, so don't worry about that! (: I placed the ribbon glue-side down and trimmed the edges flush with the cardstock.
-
 Step 13
I chose embellishments from my package and used more adhesive to glue on. I also added another quote sticker in the same font to the front of the card.
-
 Step 14
Then I embellished the inside, but chose not to use ribbon here.
-
Step 15
The last step is to let the card dry thoroughly. I was paranoid about the card gluing itself together as it dried, so I dried the card open for 24 hours by propping it slightly open on my desk. Then, I dried it for another 24 under a stack of big books to flatten it out. No sticking! (((: I'll be making an envelope for it before I give it to her (probably using superstar Cat Morley's method), but other than that I'm pretty happy with the result. Hope you find it useful!