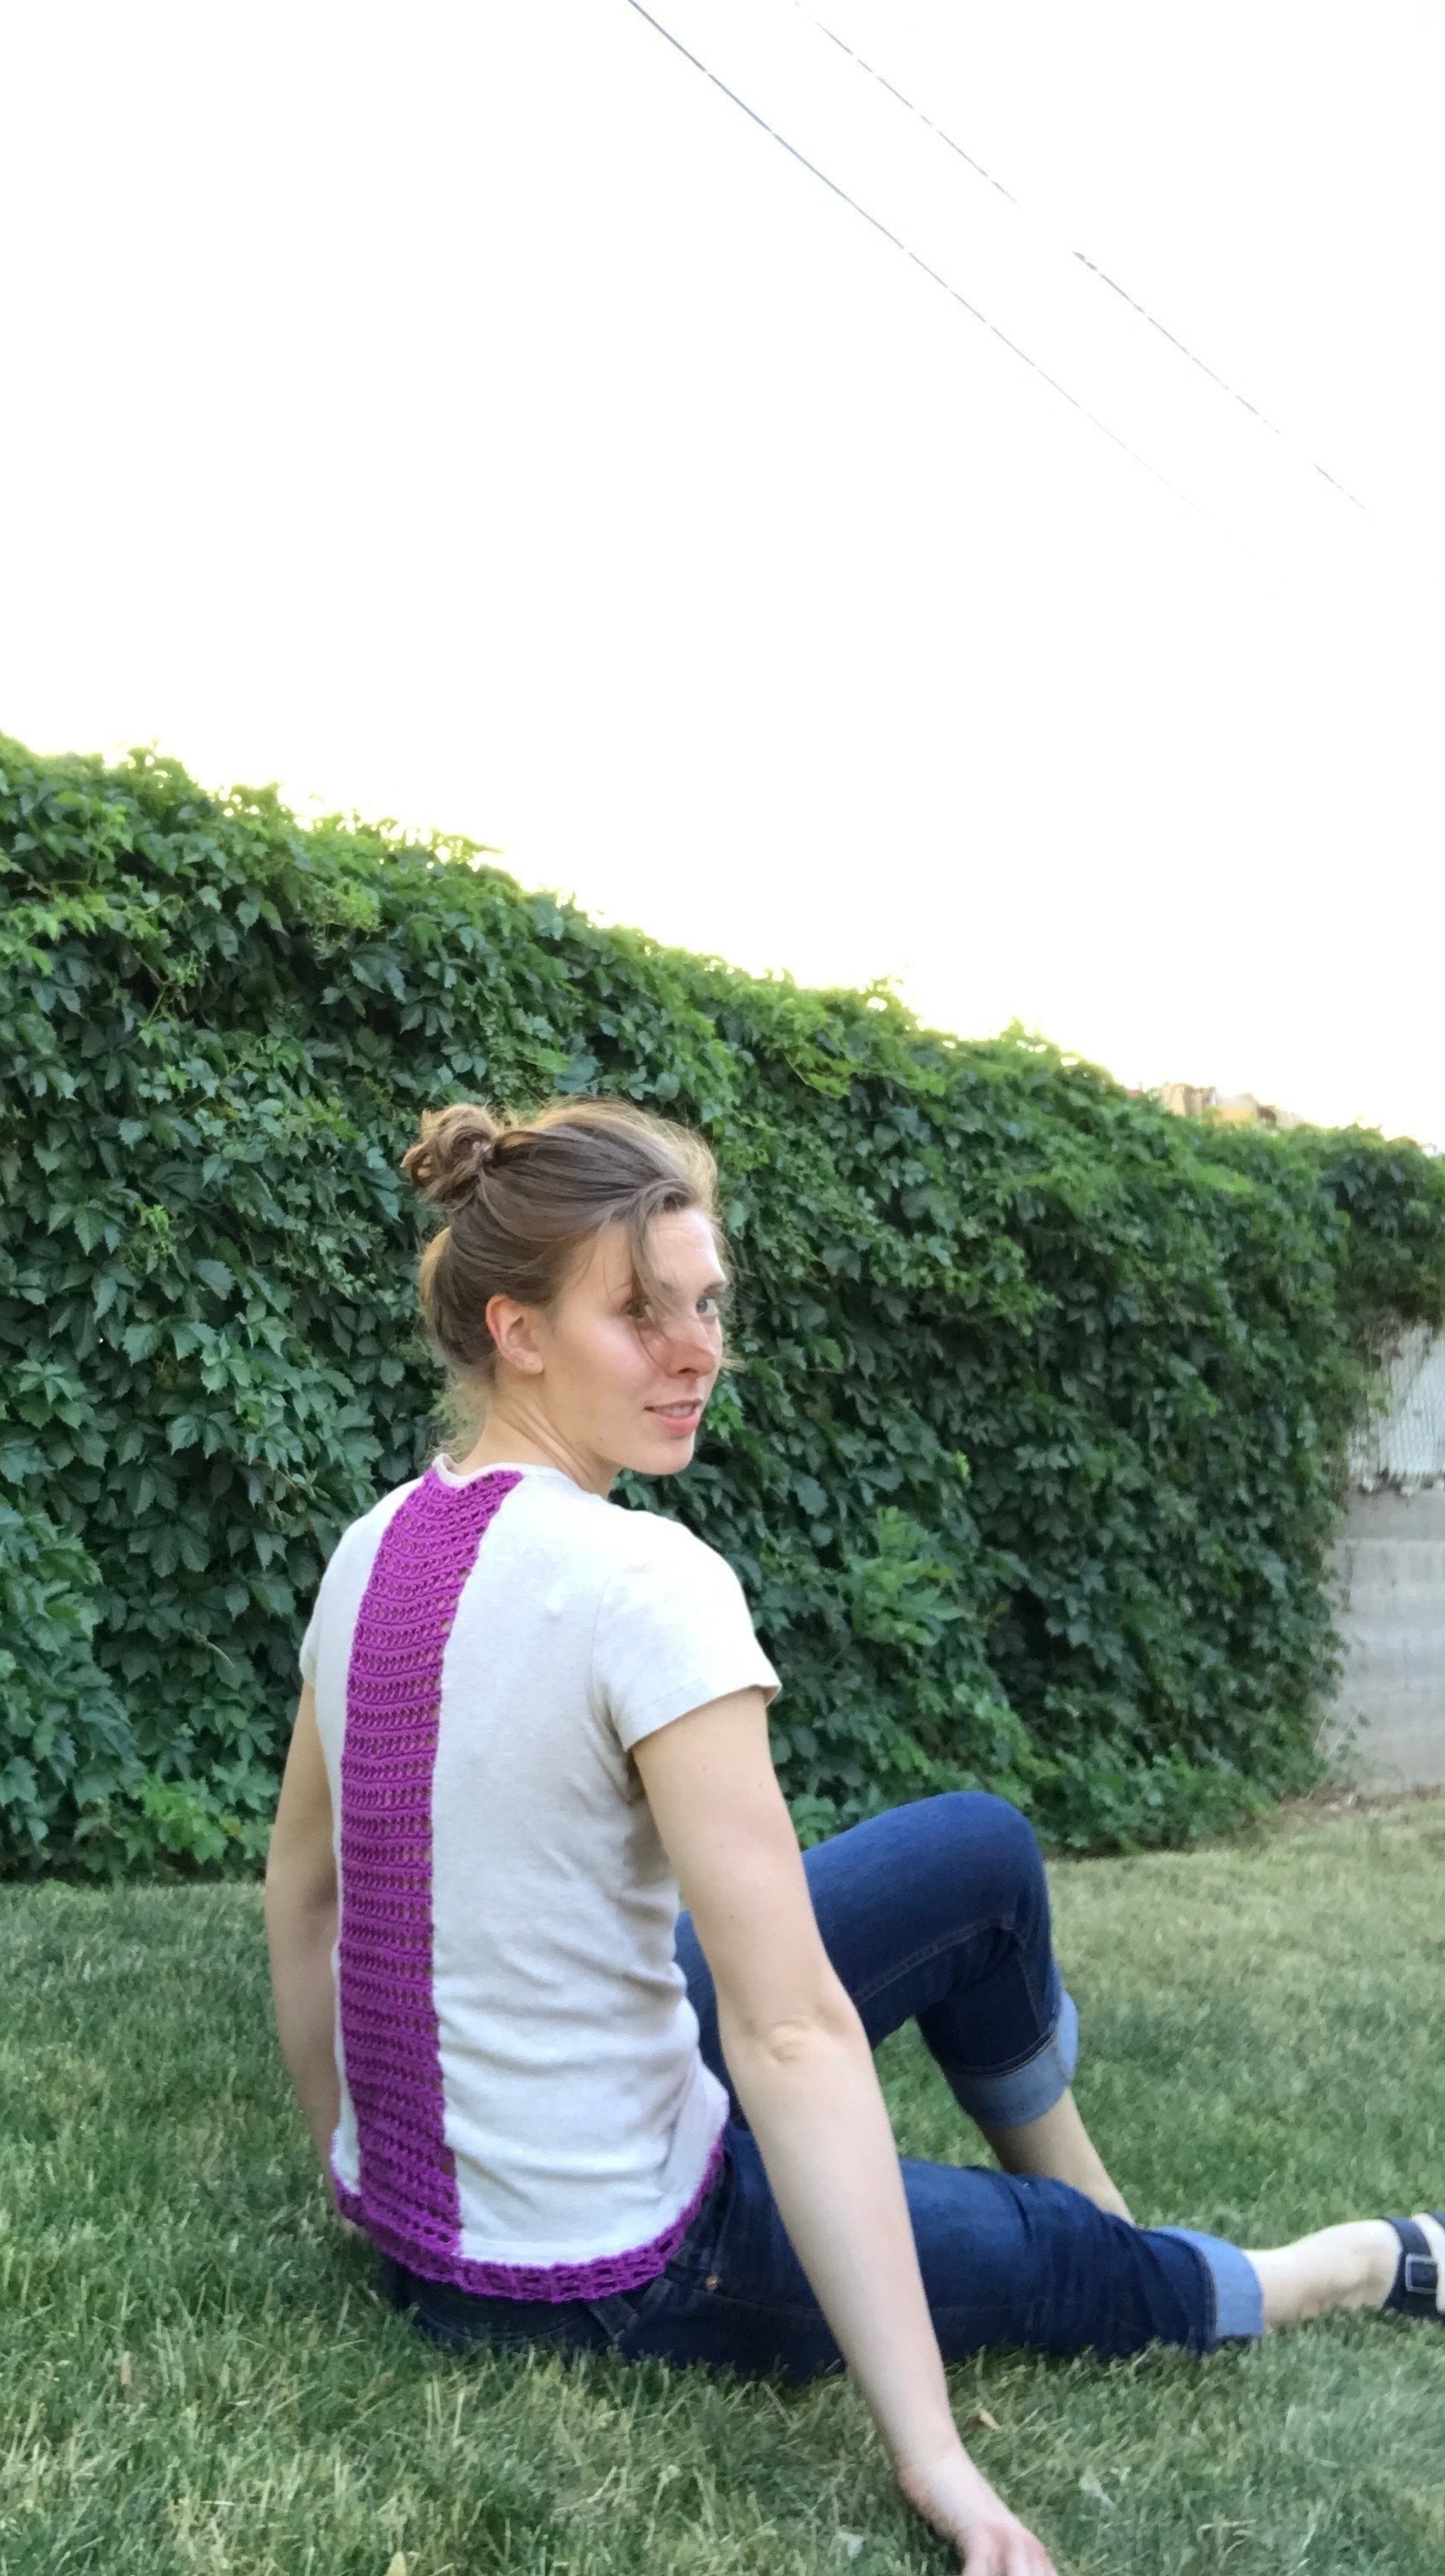

About
turn a plain tee into a chic summer fashion piece
Part of my "fashion upgrades" series on Make it Lucky, this tutorial can work with a t-shirt you already own that just needs a little extra. A basic crochet motif is used for the inlay and trim. Assembly requires some hand-sewing, but is totally beginner friendly.
-
 JadeSucksAtLife favorited Tee Crochet Inlay
01 Mar 17:31
JadeSucksAtLife favorited Tee Crochet Inlay
01 Mar 17:31


You Will Need
-
 Step 1
Create the back inlay:
Start – ch 26
Row 1 – sc in 2nd ch from hook, continue sc across (25)
Row 2 – ch 2, *dc, ch, sk 1 sp, dc, and repeat from * across
Row 3 – ch 1, sc across
Rows 4 – ? – Repeat rows 2 & 3 as needed to create a swatch long enough to stretch the entire back of your chosen shirt -
 Step 2
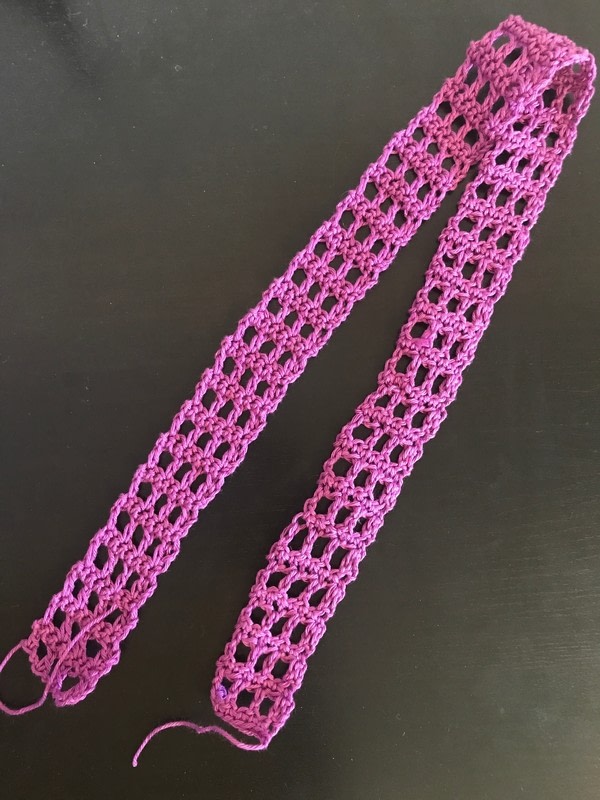
Create the trim:
Start – ch 6
Row 1 – sc in 2nd ch from hook, continue sc across (5)
Row 2 – ch 2, *dc, ch, sk 1 sp, dc, and repeat from * across
Row 3 – ch 1, sc across
Rows 4 – ? – Repeat rows 2 & 3 as needed to create a swatch long enough to stretch around the entire bottom perimeter of the shirt – don’t finish off right away, leave a little extra yarn to give yourself room to extend if you need to. -
 Step 3
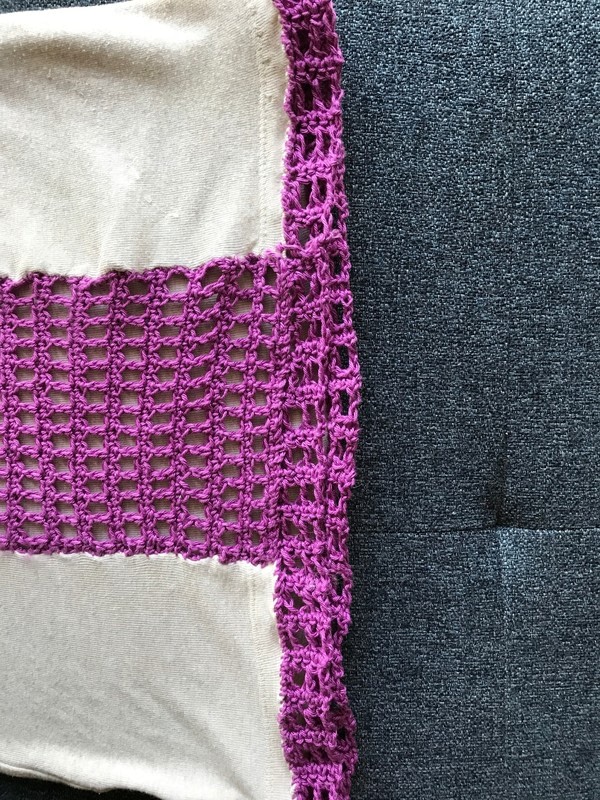
Find the middle line bisecting the back of your shirt.
You want the inlay to fall exactly at the middle, so using a ruler, draw a line in pencil on either side that is the same distance from the middle as half the width of the inlay.For example, my inlay was 5 so I drew a line all along the shirt that was 2.5″ to the left and 2.5″ to the right.
Cut out this section of the shirt, leaving the seam at the collar intact
Use the yarn and an embroidery needle to whip stitch the inlay into the part of the shirt you removed.
-
 Step 4
Take the trim and whipstitch it around the entire perimeter of the bottom of the shirt. Weave in ends.