


About
DIY: Men's Button-Down Shirt to Sexy Bustier Dress
As most of you probably already know, I did a DIY refashion of a Men's Shirt to a Cute Summer ShirtDress that I posted back in August.
I decided to do another shirt dress tutorial for Fall...this time using a men's plaid shirt as the base, and changing up the front embellishment.
Are you ready? Here we go...
How to Make a Bustier Dress with a Peplum, Faux Waistband, Zip Back, Bust Darts, Tulip Skirt, & Front Cascading Folds
(say that 10 times fast!)
-
 Rachel B. added Sexy Bustier Dress to DIY and Crochet Clothes
10 May 03:07
Rachel B. added Sexy Bustier Dress to DIY and Crochet Clothes
10 May 03:07


You Will Need
-
 Step 1
PREP YOUR PARTS
-
 Step 2
Cut shirt as follows:
cut button placket off front
cut sleeves off body
rip pocket off front with seam ripper
cut bottom off shirt, going straight across from underarms, through front and back -
 Step 3
For each sleeve:
cut cuffs off sleeves -
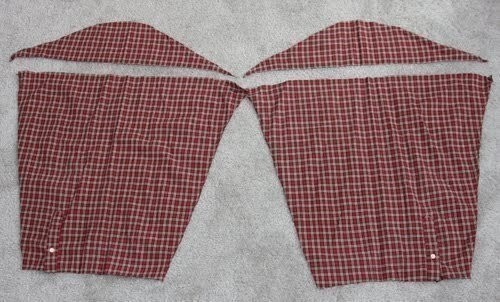
 Step 4
cut top rounded part off sleeves (we won't use the tops)
-
 Step 5
Remove buttons from button placket.
Bye-bye buttons! -
 Step 6
Use seam ripper to open topstitched edges of button placket, making it into a flat piece of fabric.
-
 Step 7
Iron it completely flat.
-
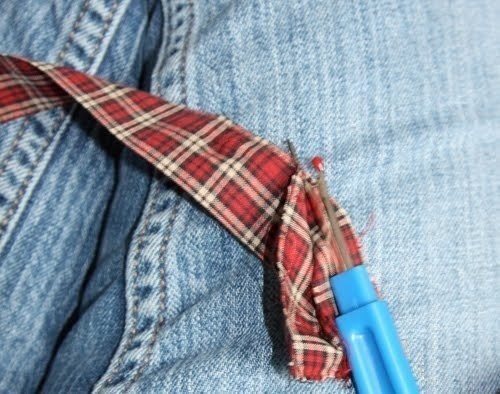
 Step 8
3. Use seam ripper and open cuffs up at edge seams...
-
 Step 9
all the way to buttonholes; remove buttons.
-
 Step 10
Cut off ends of cuffs where the buttonholes are (we won't use those parts). Peel off any interfacing that's stuck to your cuffs and discard.
-
 Step 11
PIN
4. Turn shirt bottom inside out and cut off buttonhole placket. Pin edges together (where button placket formerly was). This will be your skirt. (top piece in photo; the shirt bottom is folded in half and flat) -
Step 12
5. Pin the two sleeve pieces right sides together, matching the line where you cut the rounded tops off them. This will become the bodice of the dress. (bottom in photo above)
-
 Step 13
6. Pin cuffs together, matching short ends, to make a long line. (I matched the center two so the curved parts of the cuffs will be in the center.) This will be your waistband. (I haven't yet removed the interfacing in the photo below. My bad.:-)
-
 Step 14
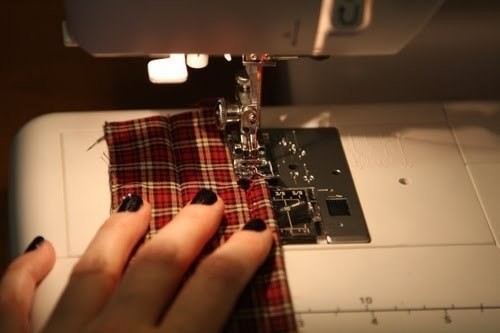
SEW
7. Topstitch sleeve opening plackets closed on the back side of your bodice.
Sew both bodice pieces together where you pinned. (not pictured) -
 Step 15
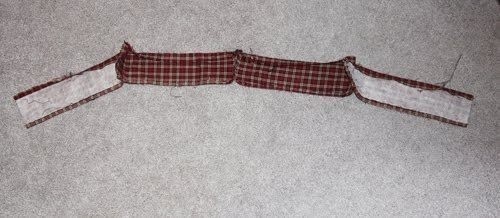
8. Sew all cuffs together at their ends.
-
 Step 16
This is what the waistband will look like once all your cuffs are connected.
-
 Step 17
Turn under about 1/4" on each long side of the button placket you ironed back in Step 2). Sew 1/8" from edges.
-
Step 18
10. Sew along line you pinned on the shirt bottom in order to make the skirt, leaving about 5" unsewn at the top of the skirt. (not pictured)
-
 Step 19
DART THE BUST
11. Cut off bottom of sewn bodice piece straight across. (This is the edge closest to your sleeve opening plackets.) -
 Step 20
12. Wear a well-fitting sports bra or tank top that can support the weight of your dress bodice, and pin bodice (wrong side out) to your top in the center and at each of the side seams under your arm. (I'm referring to the side seams of the bra/tank top you are wearing.)
-
 Step 21
13. Using your fingers, start "pinching" the fabric outwards starting right below the fullest part of your bust on the right (usually where your nipple is). Pin as you go, moving downwards towards your waist. Do the same for your left side. Stand with both arms flat at your sides, move around, bend, etc...and see if the fabric pulls in strange ways. Alter your darting until both darts are relatively the same size and begin and end at symmetrical points to either side of your center front seam. (Measuring by the plaid pattern helps.)
-
 Step 22
14. Create side seams by the same method, using the side seams on your sports bra/tank as guidelines.
I know it looks like it's pulling in a lot of directions - mostly it's because I'm raising one arm to take the photo. -
 Step 23
15. Take off the bodice and sew the darts on your machine, starting at the bottom and moving up to the bust point. Leave two long threads at the end and knot the threads.
-
 Step 24
Sew the side seams, and trim the seam allowance, notching where necessary.
-
Step 25
16. Try the bodice on again, this time right side out. Are you pleased with the fit? No weird bobbles or anything? If it's a little off, go back and fix. Also, does your bodice go all the way around your body? If not, now's the time to add in some fabric salvaged from the leftover bits of your shirt - and add it to both sides of the open back. (You need enough fabric to touch at your center back PLUS 1/2" on EACH SIDE.)
-
 Step 26
SEW THE TOP TO THE BOTTOM; MAKE THE PEPLUM
17. Pin the bodice back on your shirt/bra top. Pin the skirt underneath (onto a pair of tight-fitting leggings/underwear that you're wearing underneath). Make sure the skirt underlaps the bodice part all the way up to your waist, since that will be the connection point of the skirt and the bodice. You need to match the side seams of that skirt to the side seams of what you're wearing on the bottom...and place the seam that you sewed down the front of the shirt...at your center back. Place waistband over bodice at your natural waist, matching center fronts. Pin waistband to bodice all the way to the side seams. Make sure top of skirt underlaps bottom of waistband (or top of waistband, if you want a super-short miniskirt). Pin skirt bottom to bodice in center and at side seams only.
Take everything off. -
 Step 27
17. Place dress on a flat surface. Continue pinning waistband all the way around to back parts of bodice. Pin skirt back to bodice back (pinning thru waistband) and gathering skirt at back where needed. Gather skirt at front between pins, and pin gathers in place.Creating gathers in the skirt part with my fingers.
-
 Step 28
18. Topstitch top of waistband through all layers.
-
 Step 29
19. Topstitch bottom of waistband through all layers, preserving gathers in skirt as you stitch through them.
See the little w-shaped center to the waistband? A new day - you can see I've ditched the black nails.:-) -
 Step 30
20. Using a seam ripper, open the front bodice darts below the waistband to create a flared peplum. Fold under the ends of your peplum at an angle towards the center back, and topstitch edges.You can see the angle of the peplum at the center back.
-
Step 31
PLACE THE ZIPPER
21. Try dress on inside out. Have a friend pin the dress at center back to create the seam allowance for the zipper. Also measure the zipper against the back of the dress and place a pin in the center back at the point where the zipper ends. (not pictured) -
Step 32
22. Take the dress off again. Sew the CB seam on your skirt up to the pin your friend placed. (not pictured)
-
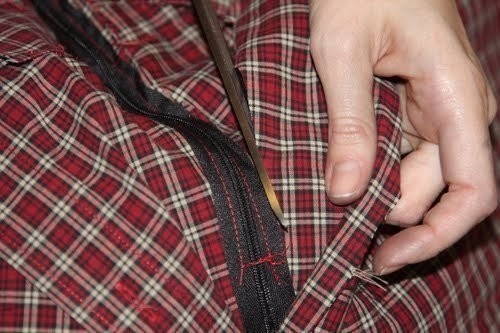
 Step 33
23. Place the dress on a flat surface and pin the zipper to one side of the CB opening. Sew the zipper on one side, using a zipper foot. (Pre-basting if necessary.) Close the zipper, pin to other side of CB opening, and sew. Make sure not to catch the peplum in your stitching. (not pictured) Trim seam allowance next to zipper.
-
Step 34
FINISHING TOUCHES
24. Put the dress on again. Fold under top of bodice to create a straight line, and pin. Take dress off; trim seam allowance under top. Stitch a 1/4" seam at the top. (not pictured) -
Step 35
25. Try the dress on yet again. If the bodice seems too loose, zigzag-stitch a piece of elastic on each side of the back bodice, at the top on the wrong side of the garment. (not pictured)
-
 Step 36
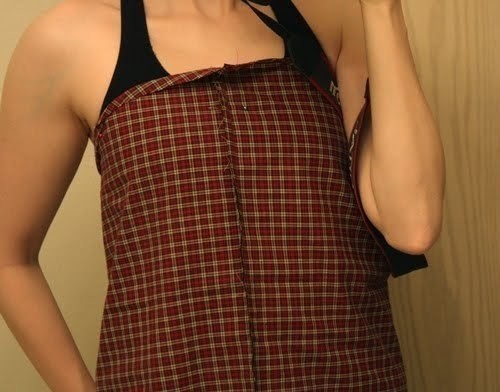
26. Place top of flattened button placket on underside of top of bodice, matching edge of placket to edge of bodice top seam allowance. Center on bodice. Stitch placket to bodice on right side, going through all layers.
-
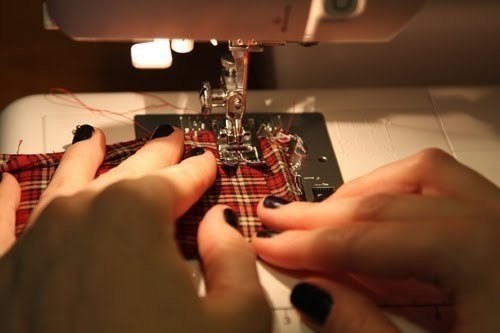
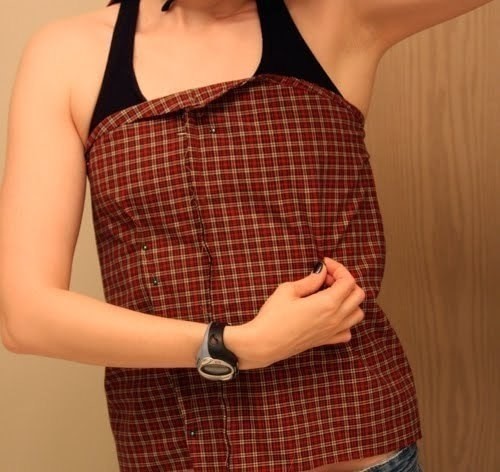
 Step 37
27. In order to make the cascading folds in the placket, measure out about 2" from secured top of placket, and fold under, underlapping about 0.5". Push placket fabric up and out of the way, and sew straight across placket to secure at 1" down from top of bodice. Repeat another 4 times to create cascading ripples down the front of the bodice; cut placket at appropriate length. The bottom looped ripple will cover up the end of the placket if you sew the end about 0.5" above the bottom of the loop, and where the waistband top hits. (Your bottom loop will overlap the waistband slightly.)Sewing the first fold. The loop will actually hang a little below the line of sewing, camouflaging it.
Work from the top to the bottom of the bodice in this way. -
Step 38
28. Add a hook-and-eye closure above the zipper in the back. (not pictured)
-
 Step 39
29. To create a tulip-like effect to the skirt, overlap the edges at the side seams slightly, pin, and topstitch.
-
 Step 40
Believe it or not, you're finally done!!
I'm a Misses' Size 4/6 (usually a S in dresses though sometimes a medium because my waist is kind of thick). A Men's M shirt was sufficient for my size...if you are larger, choose a larger shirt to work with!
-
 Step 41
Not loving the ripply back, though. It might need a little nip in the back to make it sit right.
Whew! This took me awhile to write. I know the darting method I'm using is not exactly accurate (and most patternmakers would have my head), but as you can see, it works fairly well! The poor man's (er, woman's) version of bust darts.LOL
Thoughts: I'm thinking this is just too many elements for one dress. The point is for you to add and take away as you like. The peplum is not as full as I would like it - instead of being fashioned out of the bodice, it needs to be made from a completely rectangular piece of fabric to create the necessary flare. I'm also not liking the skirt gathers; I think instead the skirt should have pleats in the front to create the tulip shape; the gathers just look messy to me. I'm going to do a little makeover on this piece, but otherwise, I hope this gives you the tools to make your own!
Happy DIY'ing!
xxoxo
Carly


I think your shirt dresses are both GORGEOUS - lovely job!
I'll be featuring them on my site soon if that's okay with you~
xoxo
Carly
http://belesprit.typepad.com/blog/
I appreciate the feedback!
xoxox
Carly
xoxo
Carly
i love it. your amazing.
i might even try it ..
Thanks so much for your comments!
xoxo
Carly