


About
To loop, or not to loop, Does it need to be questioned?
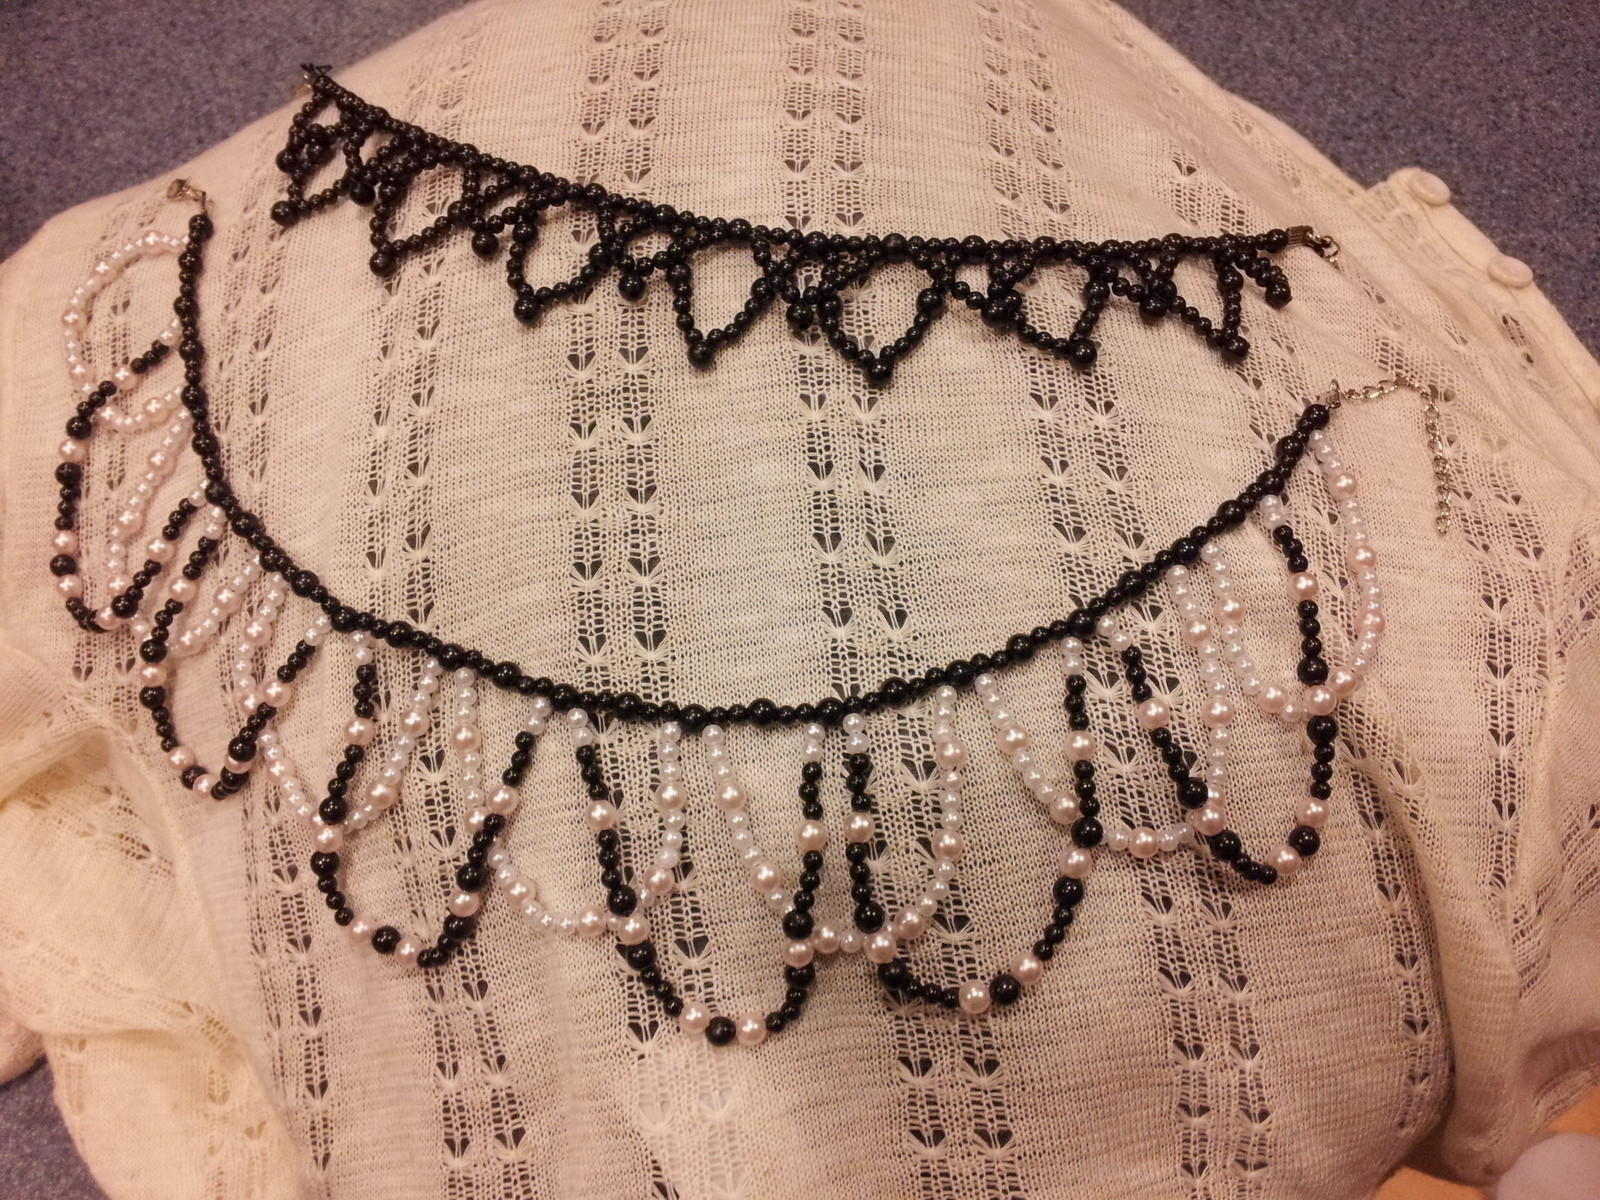
I was looking for a tutorial on a loopy choker and to my disappointment, I never found one. Instead, I decided to try my hand at making one myself! Of course this means that I'm a beginner at bead work and jewellery making, so those with more experience may find mistakes in technique or lacking in direction.
Sorry for the poor picture quality- my lack of camera means I had to improvise with my computer's webcam.
Have fun! I'd love to see versions if you guys make them!
Tags
-
 Key West Witch added Loopy Beaded Choker to Jewelry
30 Jun 03:36
Key West Witch added Loopy Beaded Choker to Jewelry
30 Jun 03:36
-
 Rhiannon R. added Loopy Beaded Choker to Jewlery
09 Apr 03:53
Rhiannon R. added Loopy Beaded Choker to Jewlery
09 Apr 03:53
-
Rhiannon R. favorited Loopy Beaded Choker
09 Apr 03:53
-
 Jessica S. favorited Loopy Beaded Choker
22 Feb 05:51
Jessica S. favorited Loopy Beaded Choker
22 Feb 05:51
-
 Cindy S. favorited Loopy Beaded Choker
04 Nov 02:37
Cindy S. favorited Loopy Beaded Choker
04 Nov 02:37
-
 Lanie favorited Loopy Beaded Choker
27 Oct 00:23
Lanie favorited Loopy Beaded Choker
27 Oct 00:23
-
 molahyah.hawkins added Loopy Beaded Choker to cool beaded choker
24 Oct 14:28
molahyah.hawkins added Loopy Beaded Choker to cool beaded choker
24 Oct 14:28
-
 Niknak favorited Loopy Beaded Choker
09 Oct 06:32
Niknak favorited Loopy Beaded Choker
09 Oct 06:32
-
Fabi C. favorited Loopy Beaded Choker
21 Sep 22:35
-
 SilverLupe favorited Loopy Beaded Choker
05 Dec 03:34
SilverLupe favorited Loopy Beaded Choker
05 Dec 03:34
-
 Step 1
Alright! First we measure our neck circumference for the base of the choker. Make sure to add a few inches so you can tie the ends when we're finished.
-
 Step 2
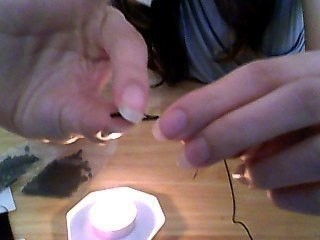
OPTIONAL: If you happen to have thread that frays at the ends easy, you could always put a little glue or wax on them and press the frayed part together. It would be a pain to try and thread on beads with frayed string!
-
 Step 3
Either tie a little knot at one end or loosely around a bead and start beading a pattern. Here, I started with one big bead followed by two little ones. The bigger beads will be our marker of sorts when we do the next step.
-
 Step 4
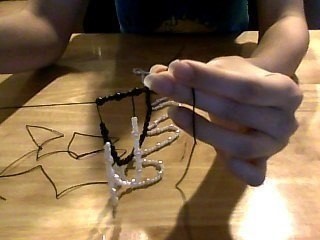
Cut another piece of string that's at least twice the length of your first one. Then, thread the new string into the first bead of your choker. It's time to bead your first loop! Remember: the bigger you want to make the loops, the more string you need. It's better to have too much than not enough!
-
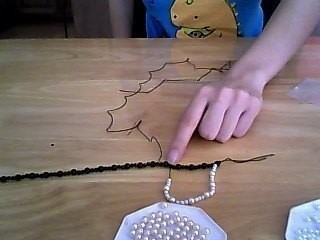
 Step 5
When your loop is beaded to your liking, thread your string into one of the big beads on your choker. In this one, I skipped three big beads and threaded my loop on the fifth big bead on the line. Repeat the process until you reach the end of your choker. Also, make sure the string is somewhat tight when beading.
-
 Step 6
It's time to repeat step 4! Instead of threading through just the first bead, we are going to thread the string through all the the beads on the choker until you reach the big bead you want to start with. On mine, this is the third big bead on the line. Now we repeat step 5!
-
 Step 7
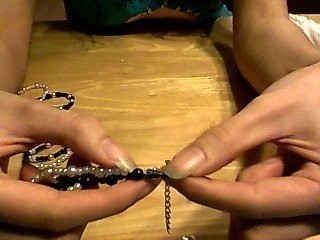
Once you're finished, attach your preferred closures.
-
 Step 8
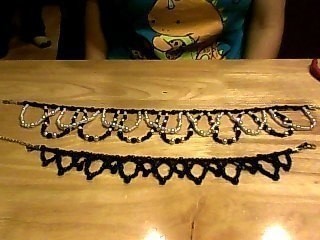
Now sit back and enjoy your hard work! I found that here is a lot of different styles and patterns that you can do with this method, so don't be afraid try out different things. Good luck!


Comments

 1
Wire Charms »
Time Turner Inspired Fidget Necklace
1
Wire Charms »
Time Turner Inspired Fidget Necklace
