

About
A cute splash of fabric to adorn your wrist
I adore bracelets and wrist cuffs and decided I had to try and make my own!
Tags
-
 Key West Witch favorited How To Make A Dainty Button Cuff (Simple!)
28 Jun 23:33
Key West Witch favorited How To Make A Dainty Button Cuff (Simple!)
28 Jun 23:33
-
 Jasmin F. favorited How To Make A Dainty Button Cuff (Simple!)
11 Aug 14:17
Jasmin F. favorited How To Make A Dainty Button Cuff (Simple!)
11 Aug 14:17
-
 Miss_Fit favorited How To Make A Dainty Button Cuff (Simple!)
08 Jul 19:36
Miss_Fit favorited How To Make A Dainty Button Cuff (Simple!)
08 Jul 19:36
-
 Sarah W. favorited How To Make A Dainty Button Cuff (Simple!)
21 Apr 12:46
Sarah W. favorited How To Make A Dainty Button Cuff (Simple!)
21 Apr 12:46
-
 justique added How To Make A Dainty Button Cuff (Simple!) to Kawaii is the new black
08 Oct 12:48
justique added How To Make A Dainty Button Cuff (Simple!) to Kawaii is the new black
08 Oct 12:48
-
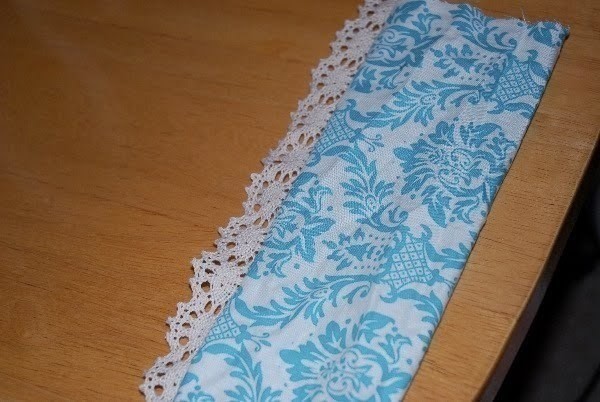
 Step 1
Lay your piece of fabric out flat, right side up. Lay your lace on the edge of the fabric piece, making sure the part of the lace you want to fringe your hand is pointing downward!
-
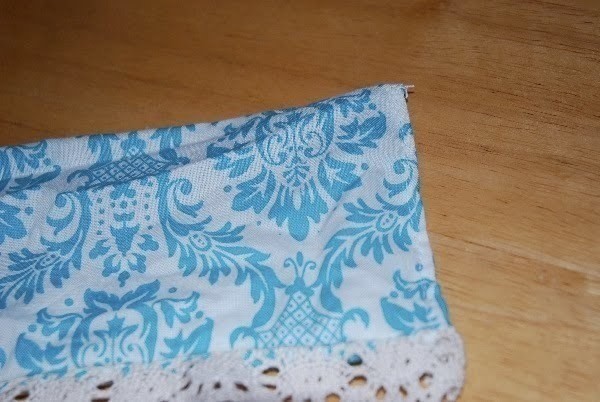
 Step 2
Fold the top of your fabric over, pinning it flush to the other side, making sure to pin your lace in between! You should now have a lace sandwich, with 1.5 inches of lace sticking out both sides.
-
 Step 3
Sew two straight lines through the edge of your fabric. Don't forget to backstitch so it won't unravel. Make your stitches about medium length. Make sure also to sew through both layers and the lace layer, fixing it to the fabric securely.
-
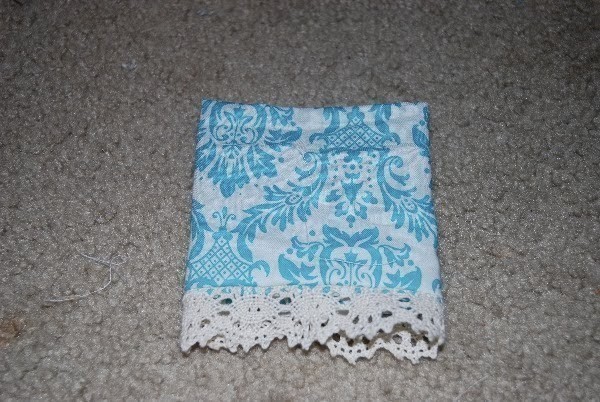
 Step 4
Pull your fabric right side out. You now have a pretty little tube! Now would be a good time to iron if you need to
-
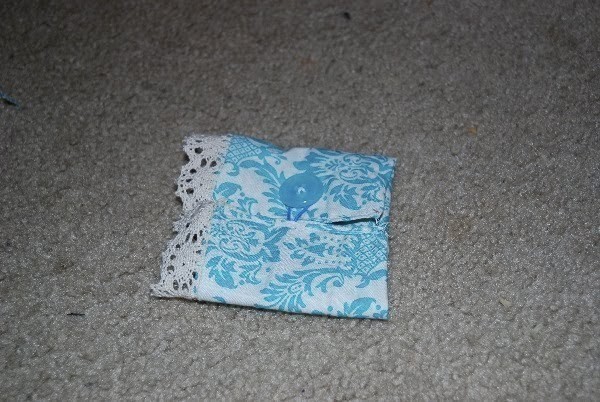
 Step 5
Fold both corners inward, pulling the lace inside also. This is harder then it sounds. Sometimes it will rumple your lace, or snag it...just play around with it until it lays like you want it. Pin.
-
 Step 6
Measure your button with your twine/ribbon. I do this by hand. Pinch it so you can see how much you need to leave outside your cuff
-
 Step 7
Tie a knot in each end of your twine to help it not "escape" in case the sewing comes loose. (You don't need to do this if you are using skinny ribbon, as that will just sew right in)
-
 Step 8
Secure your measured loop into the cuff. Make sure to center it!
-
 Step 9
Sew two lines down to enclose your loop. Sew back and forth a bit over the part that encases your loop, shortening your stitch length to help it stay in place.
-
 Step 10
Sew the other side down, two lines also.
-
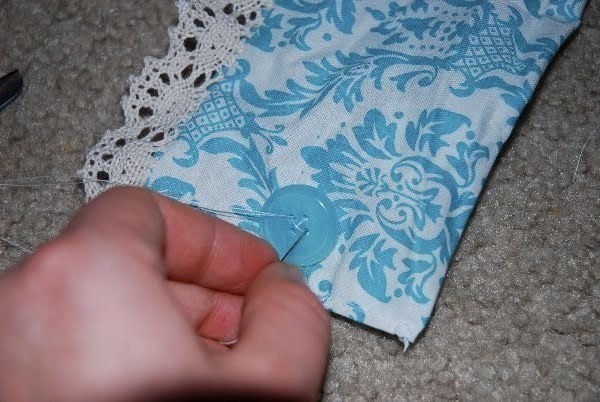
 Step 11
I hand sew my button on, through both layers. If you want to sew it through one, put the button on before step 5. =)
-
 Step 12
Done! Wear or gift to a friend =) (Yes those are Hello Kitty PJs I <3 Hello Kitty)
follow me on my blog: www.ruthography.blogspot.com if you like this!


 1
Mint & Trinket Tins »
Miniverse Trinket Boxes
1
Mint & Trinket Tins »
Miniverse Trinket Boxes
 2
Pouches, Purses & Wallets »
Water Bottle Pack
2
Pouches, Purses & Wallets »
Water Bottle Pack
 3
Christmas Decorations »
Christmas Table Centerpiece
3
Christmas Decorations »
Christmas Table Centerpiece
