About
No transfers required
Quick and simple way to put complicated designs on your nails, no art skills required!
Tags
-
 Munnazah C. added Harry Potter Nails to Make up and body care mwa!
31 Oct 16:40
-
 Munnazah C. favorited Harry Potter Nails
31 Oct 16:40
-
 ronald.pendletonii favorited Harry Potter Nails
24 Jul 03:09
-
 Regan Douglas favorited Harry Potter Nails
14 May 02:02
-
 Ichigo M. added Harry Potter Nails to Harry Potter
04 Mar 03:07
-
 Leslie D. favorited Harry Potter Nails
18 Oct 05:30
-
 Brianna_Banana favorited Harry Potter Nails
14 Aug 16:53
-
 Meow!!! favorited Harry Potter Nails
06 Aug 03:48
-
 GSNETart favorited Harry Potter Nails
19 Jul 06:45
-
 Cheryl favorited Harry Potter Nails
18 Jul 23:42
You Will Need
-
Step 2
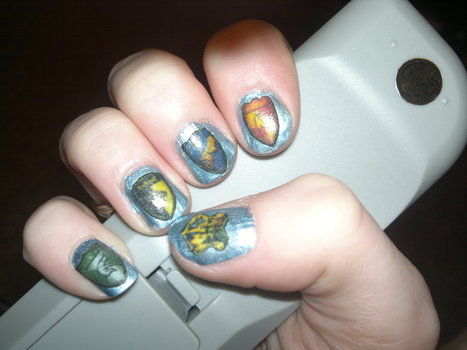
Paint your nails with a base coat. I used this metallic blue because it's really hard wearing and I was dressing as a Ravenclaw, but you can use any colour.
-
Step 3
While your base coat is still tacky, dip your printed off crest in the water (quickly - don't submerge for too long or the ink will run). Then put it in place on your nail. The wet paper will mould to the curved shape of your nail whereas dry doesn't (believe me, I tried!). Make sure to really push it down though (your base coat shouldn't come off onto your wet finger).
-
Step 4
Once the base coat is dry, put lots of thin layers of top coat clear polish on. I did three, making sure to let each one dry between applications. Three made mine solid as a rock, but keep going until you can no longer feel a distinct ridge where the paper starts.
-
Step 5
When it's time to remove them, simply soak a cotton ball or pad in nail polish remover, hold it tight over the nail, and after a minute the paper should peel off and the base coat can be removed as normal. If not, just scrub until it does peel off!


