


About
Pretty and easy!
Stumbled across this on Pininterest one day (I can't find the link now D: ) and decided to try it myself. :D
[ http://pinterest.com/ ]
Tags
-
 Stephy entered her project Diy Frosted Glass Vase to Instacube
12 Oct 23:33
Stephy entered her project Diy Frosted Glass Vase to Instacube
12 Oct 23:33

You Will Need
-
 Step 1
Get your Glass Vase. I ended up buying two of these from the Dollar Tree ($1 each). Make you you wash them, and dry them completely.
-
 Step 2
Now, get your rubber bands and arrange them around your vase.
I decided to go a little crazy with their placement.
You could do just solid horizontal lines, or small circular designs, etc.
(At this point, you could also stick other things to your vase- like foam letters or shapes with adhesive backing, to make a pattern or phrase.) -
 Step 3
Now, get your 'Glass Frosting' Spray paint ready.
I used the Krylon brand because it was all that I could find. This was at my local Hobby Lobby for about $8, but I still had plenty left in the can after this project for other projects, like frosting my bathroom window so my creepy neighbor can't look in. -
 Step 4
Spray your vase. Make sure you do it in even strokes, going from the top to the bottom, in a light layer, otherwise it will drip down. If you accidently spray too much, and it starts dripping, you can quickly wash it off before it dries and start over.
I did three light layers on my glass, letting it dry about 10 minutes in between coats (yeah, I know it says to wait longer, but I was excited.) -
 Step 5
Once it is dry, remove the rubber bands to check out your clear design on your new frosted glass vase!
Make sure you let it dry completely after the last coat, so you don't smudge any paint on there, and so the design doesn't mess up. I know it's exciting, but work on another craft while it dries! -
 Step 6
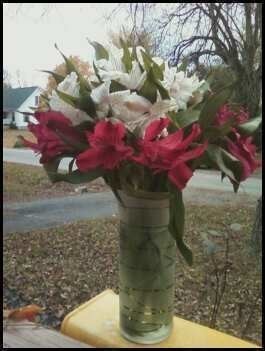
Lastly, add some flowers, or pretty rocks, or other things to your new awesome vase!
These kinds of vases look pretty classy and are easy to do yourself on the cheap, so they can be used in all kinds of situations (party decorations, weddings, house decor, etc.)


