


About
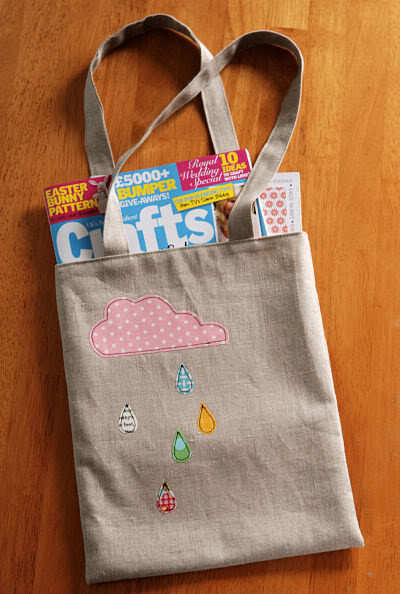
Rainy days aren't so gloomy with this cute and easy tote
Raw-edged applique with sunny colors makes this a perfect rainy-day project. The bag is just the right size for magazines or children's picture books, and I love it as a library tote. The natural linen will get a bit crinkly with use, I think it adds personality!
Downloads
- RM__CloudyDay_Applique.pdf 116 KB [ Download ]
-
 Kelly Jade favorited Cloudy Day Applique Tote
28 Feb 14:35
Kelly Jade favorited Cloudy Day Applique Tote
28 Feb 14:35
-
 ellie j. added Cloudy Day Applique Tote to cool stuff i can do
07 Jan 22:56
ellie j. added Cloudy Day Applique Tote to cool stuff i can do
07 Jan 22:56
-
ellie j. favorited Cloudy Day Applique Tote
07 Jan 22:55
-
ellie j. commented on Cloudy Day Applique Tote
07 Jan 22:55
-
ellie j. commented on Cloudy Day Applique Tote
07 Jan 21:48
-
 Rebecca L. favorited Cloudy Day Applique Tote
01 Sep 07:33
Rebecca L. favorited Cloudy Day Applique Tote
01 Sep 07:33
-
 Chudames favorited Cloudy Day Applique Tote
26 Mar 14:55
Chudames favorited Cloudy Day Applique Tote
26 Mar 14:55
-
 Pimke added Cloudy Day Applique Tote to Nähmuster
18 Feb 16:50
Pimke added Cloudy Day Applique Tote to Nähmuster
18 Feb 16:50
-
 Alex B. favorited Cloudy Day Applique Tote
13 Dec 19:42
Alex B. favorited Cloudy Day Applique Tote
13 Dec 19:42
-
Aurelie L. added Cloudy Day Applique Tote to Sacs
14 Mar 18:18
-
 Step 1
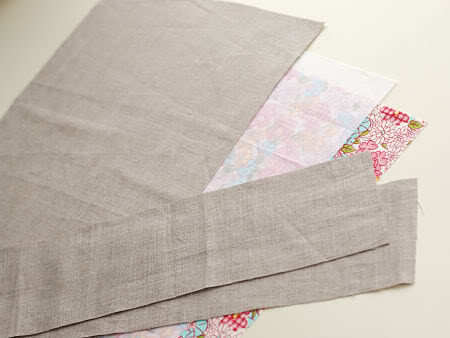
a. Cut one piece of linen, lining fabric, and fusible interfacing that are each 26" x 11".
b. Cut two strips of linen that are 24" x 4", these will be your tote straps.
c. Attach the interfacing to the wrong side of the linen according to interfacing instructions (typically this means fusing the bumpy side of the interfacing to the wrong side of the fabric).
-
 Step 2
a. Cut two strips of linen that are 24" x 4", these will be your tote straps.
b. Fold one of your linen strips in half lengthwise, wrong sides together, and press with a hot iron. Open up strip.
-
 Step 3
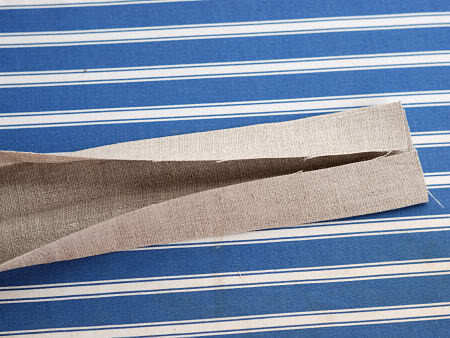
Fold both long edges to meet in the middle, press again. Fold the strip along the original middle fold and press one more time. Repeat for the other strip.
-
 Step 4
Topstich the long edges of the linen strips, on both sides. Sew the side where the two folded edges meet first. I use a slightly longer stitch length (3.0 on my machine) for this step. Set aside someplace safe.
-
 Step 5
a. Print the appliqué template onto regular paper (make sure under print settings that your Page Scaling is set to "Actual Size", or your pieces will print a bit small). Cut out the cloud and raindrop.
b. Cut a rectangle of Wonder Under that is a little bit bigger than the cloud piece. Fuse the rough side of the Wonder Under to the wrong side of your cloud fabric.
-
 Step 6
a. Remove the paper backing from the fabric, then cut out the fabric right along the edge of the fusible web.
b. Place your cloud template piece on the wrong side of the fabric, it will stick a little to the fusible web, which is helpful, because now you want to cut around the cloud template. Peel off the template paper. Repeat this process for the raindrops (I made 5).
-
 Step 7
Fuse the cloud to the linen with a hot iron. Fuse the raindrops to the linen below the cloud, the lowest raindrop at least 2-3" above the midline.
-
 Step 8
Sew around the edge of each of your appliqué pieces using a straight stitch.
***
You might find it helpful to roll up the bottom part of the linen and pin it on each side, to make it easier to maneuver the fabric while sewing. -
 Step 9
a. Pin one of your bag straps to a top edge of the right side of the appliquéd linen, raw edge to raw edge. The outer edge of each side of the strap should be 2-1/2" from the edge of the appliquéd linen (see photo). Measure to make sure the strap is centered, and also check to see that the strap isn’t twisted. I like the side of the strap where the folded edges meet to be toward the center of the bag. Repeat for other strap.
b. Sew both ends of each strap to the bag, close to the edge (about 1/4”).
-
 Step 10
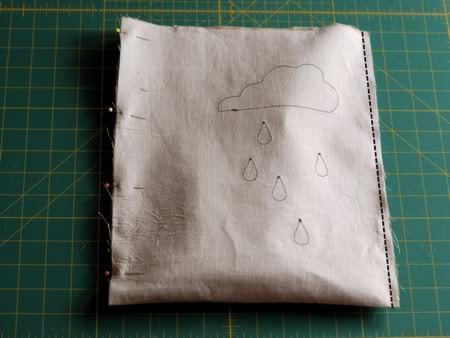
Fold your appliquéd linen in half, right sides together, and short sides (top and bottom) together. Pin the long sides.
-
 Step 11
a. Sew with a triple stitch all the way along the long sides (which will be the edges of the bag) with a 1/4" seam allowance. Trim bottom corners, but do not clip the stitching.
b. Turn the linen right side out, and use a chopstick or point turner to push out the corners.
-
 Step 12
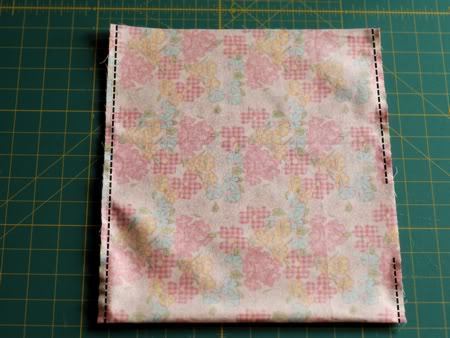
Fold your bag lining in half, right sides together, and pin the sides. Sew one of the long sides with a triple stitch and 1/4" seam allowance, and go all the way from the top to the bottom. On the other side, you will do the same thing, except leave a 3" hole unsewn, somewhere toward the bottom, at least a couple of inches from the bottom (see photo). Trim the bottom corners. Do not turn the lining right side out.
-
 Step 13
Place your linen bag piece inside the lining. Make sure that the straps are hanging down on the inside of the lining. The right side of the linen should be facing the right side of the lining.
-
 Step 14
Match up the side seams with the top of the seam allowances open, and pin the pieces together, all the way around the top, matching the raw edges.
-
 Step 15
Sew a 1/2" seam around the top of the bag, using a triple stitch. If your machine has a free arm, now is the time to use it!
-
 Step 16
Turn your bag right side out through the turning hole, and leave the lining outside the bag.
-
 Step 17
Turn under the edges of the fabric around the turning hole to create a straight line with the rest of the seam. Press with an iron, then sew the lining shut. You can either hand stitch it closed with a blind stitch or ladder stitch, or you can use your machine and sew very close to the edge (a zipper foot is helpful for this method).
-
 Step 18
a. Put the lining into the bag. Press the bag around the top edge, making sure the lining does not stick up beyond the top edge of the bag so the top of the bag will look neat after topstitching.
b. Topstitch around the opening of the bag, using a slightly longer stitch length of 3.0 to 3.5
-
 Step 19
You're finished!


 1
Wire Charms »
Time Turner Inspired Fidget Necklace
1
Wire Charms »
Time Turner Inspired Fidget Necklace

(i made one as a project at school recently)