About
Binder Cover Tutorial
Seam allowances are 1/2" unless otherwise noted.
Measurements of your binder may vary.....adjust measurements of pattern accordingly!
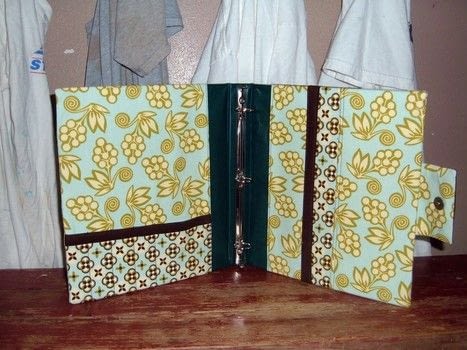
The binder I used was a 1 inch Economy Binder
that measured 11.5 inches tall x 22.5 inches (open )
Interface every piece, except lining and accent pieces, with a Fusible Craft Interfacing.
Mark the pieces, with thier name, as you cut them. I use masking tape on the wrong side of the fabric. This helps to make it less confusing.
You need 4 different fabrics
Fabric 1 (berry looking)-main fabric for body of cover
Fabric 2(flowers)-contrast piece used for pencil pocket, and on outside
Fabric 3(dark brown)- accent used in small quantity
Random lining fabric
Cut everything out and fuse interfacing before you start.
Fabric 1 - Outside of Cover cut 1 @ 13 x 24, Inside Flaps cut 2 @ 10 x 13, Right Flap pocket cut 1 @ 5 x 13, inside of Snap Flap cut 1 @ 5 x 5.
Fabric 2- Pencil Pocket cut 1 @ 5x10, Contrast on Right Flap pocket cut 1 @ 3 x 13, Outside of Snap Flap cut 1 @ 5 x 5, Contrast on Outside cover cut 1 @ 10 x 15.
Fabric 3- accent for Right Flap pocket cut 1 @ 2 x 13, Pencil pocket accent 1 @ 2 x 10, accent for Snap Flap 1 @ 2 x 5, Accent for contrast on outside cover 2 @ 2.5 x 15 and 2 @ 2 x 13.
Random Lining fabric- Inside flaps lining cut 2 @ 10 x 13, Right flap lining cut 1@ 7 x 13, pencil pocket lining cut 1 @ 5 x 10, inside center facing cut 2 @ 2 x 8.
-
 Carolyn B. favorited Binder Cover
02 Jan 19:26
-
 Key West Witch favorited Binder Cover
27 Sep 23:52
-
 autumnrose.lee favorited Binder Cover
27 Jan 02:48
-
 Kay T. favorited Binder Cover
15 Nov 01:25
-
 Jen P. favorited Binder Cover
22 Jul 04:34
-
 Emma H. favorited Binder Cover
09 Jul 19:46
-
 Ashly C. added Binder Cover to DIY The Room - Leslie Knope
07 Jun 22:36
-
 nicola.lane.716 favorited Binder Cover
13 Nov 00:04
-
 Carmen T. added Binder Cover to Office
05 Jan 19:29
- blouhell favorited Binder Cover 27 Jul 17:38
You Will Need
-
Step 17
Not pictured. Place accent piece along top of Outside Snap Flap. Stitch along top edge at 1/2". Press accent piece (raw edge) under 1/2" and top stitch it down . Now put inside and outside right sides together. Stitch around edges , leaving a 3 " opening at bottom.
-
 Step 21
The ultimate sandwich....the end is near!!! Lay the Outside cover face up. Place Flap pocket piece (face down with raw edge on outside edge) on the end with the snap flap. Place pencil pocket flap ( face down with raw edge on outside edge). Pin in place. Take inside center facings and pin along center top and bottom. Stitch around entire sandwich at a scant 1/2".
-
 Step 22
Turn it right side out and press all seams!!! Now you have to figure out where to put the other piece of your snap. Fold cover in half, matching short ends. Fold snap flap over and mark where the center of snap hits opposite side of cover. Put washer over mark, mark and cut the slits (only through the outside layer of fabric...not through inside flap). Poke posts of bottom of snap through the holes, place washer on the back and fold posts over.
You're DONE!!!! Stuff your binder into the cover. The fit is usually a little tight, but stuff it in anyway!!!
Versions
Comments


 1
Stud Earrings »
Miraculous Ladybug Earrings
 2
Pouches, Purses & Wallets »
Water Bottle Pack
