

About
Papercut Landscapes
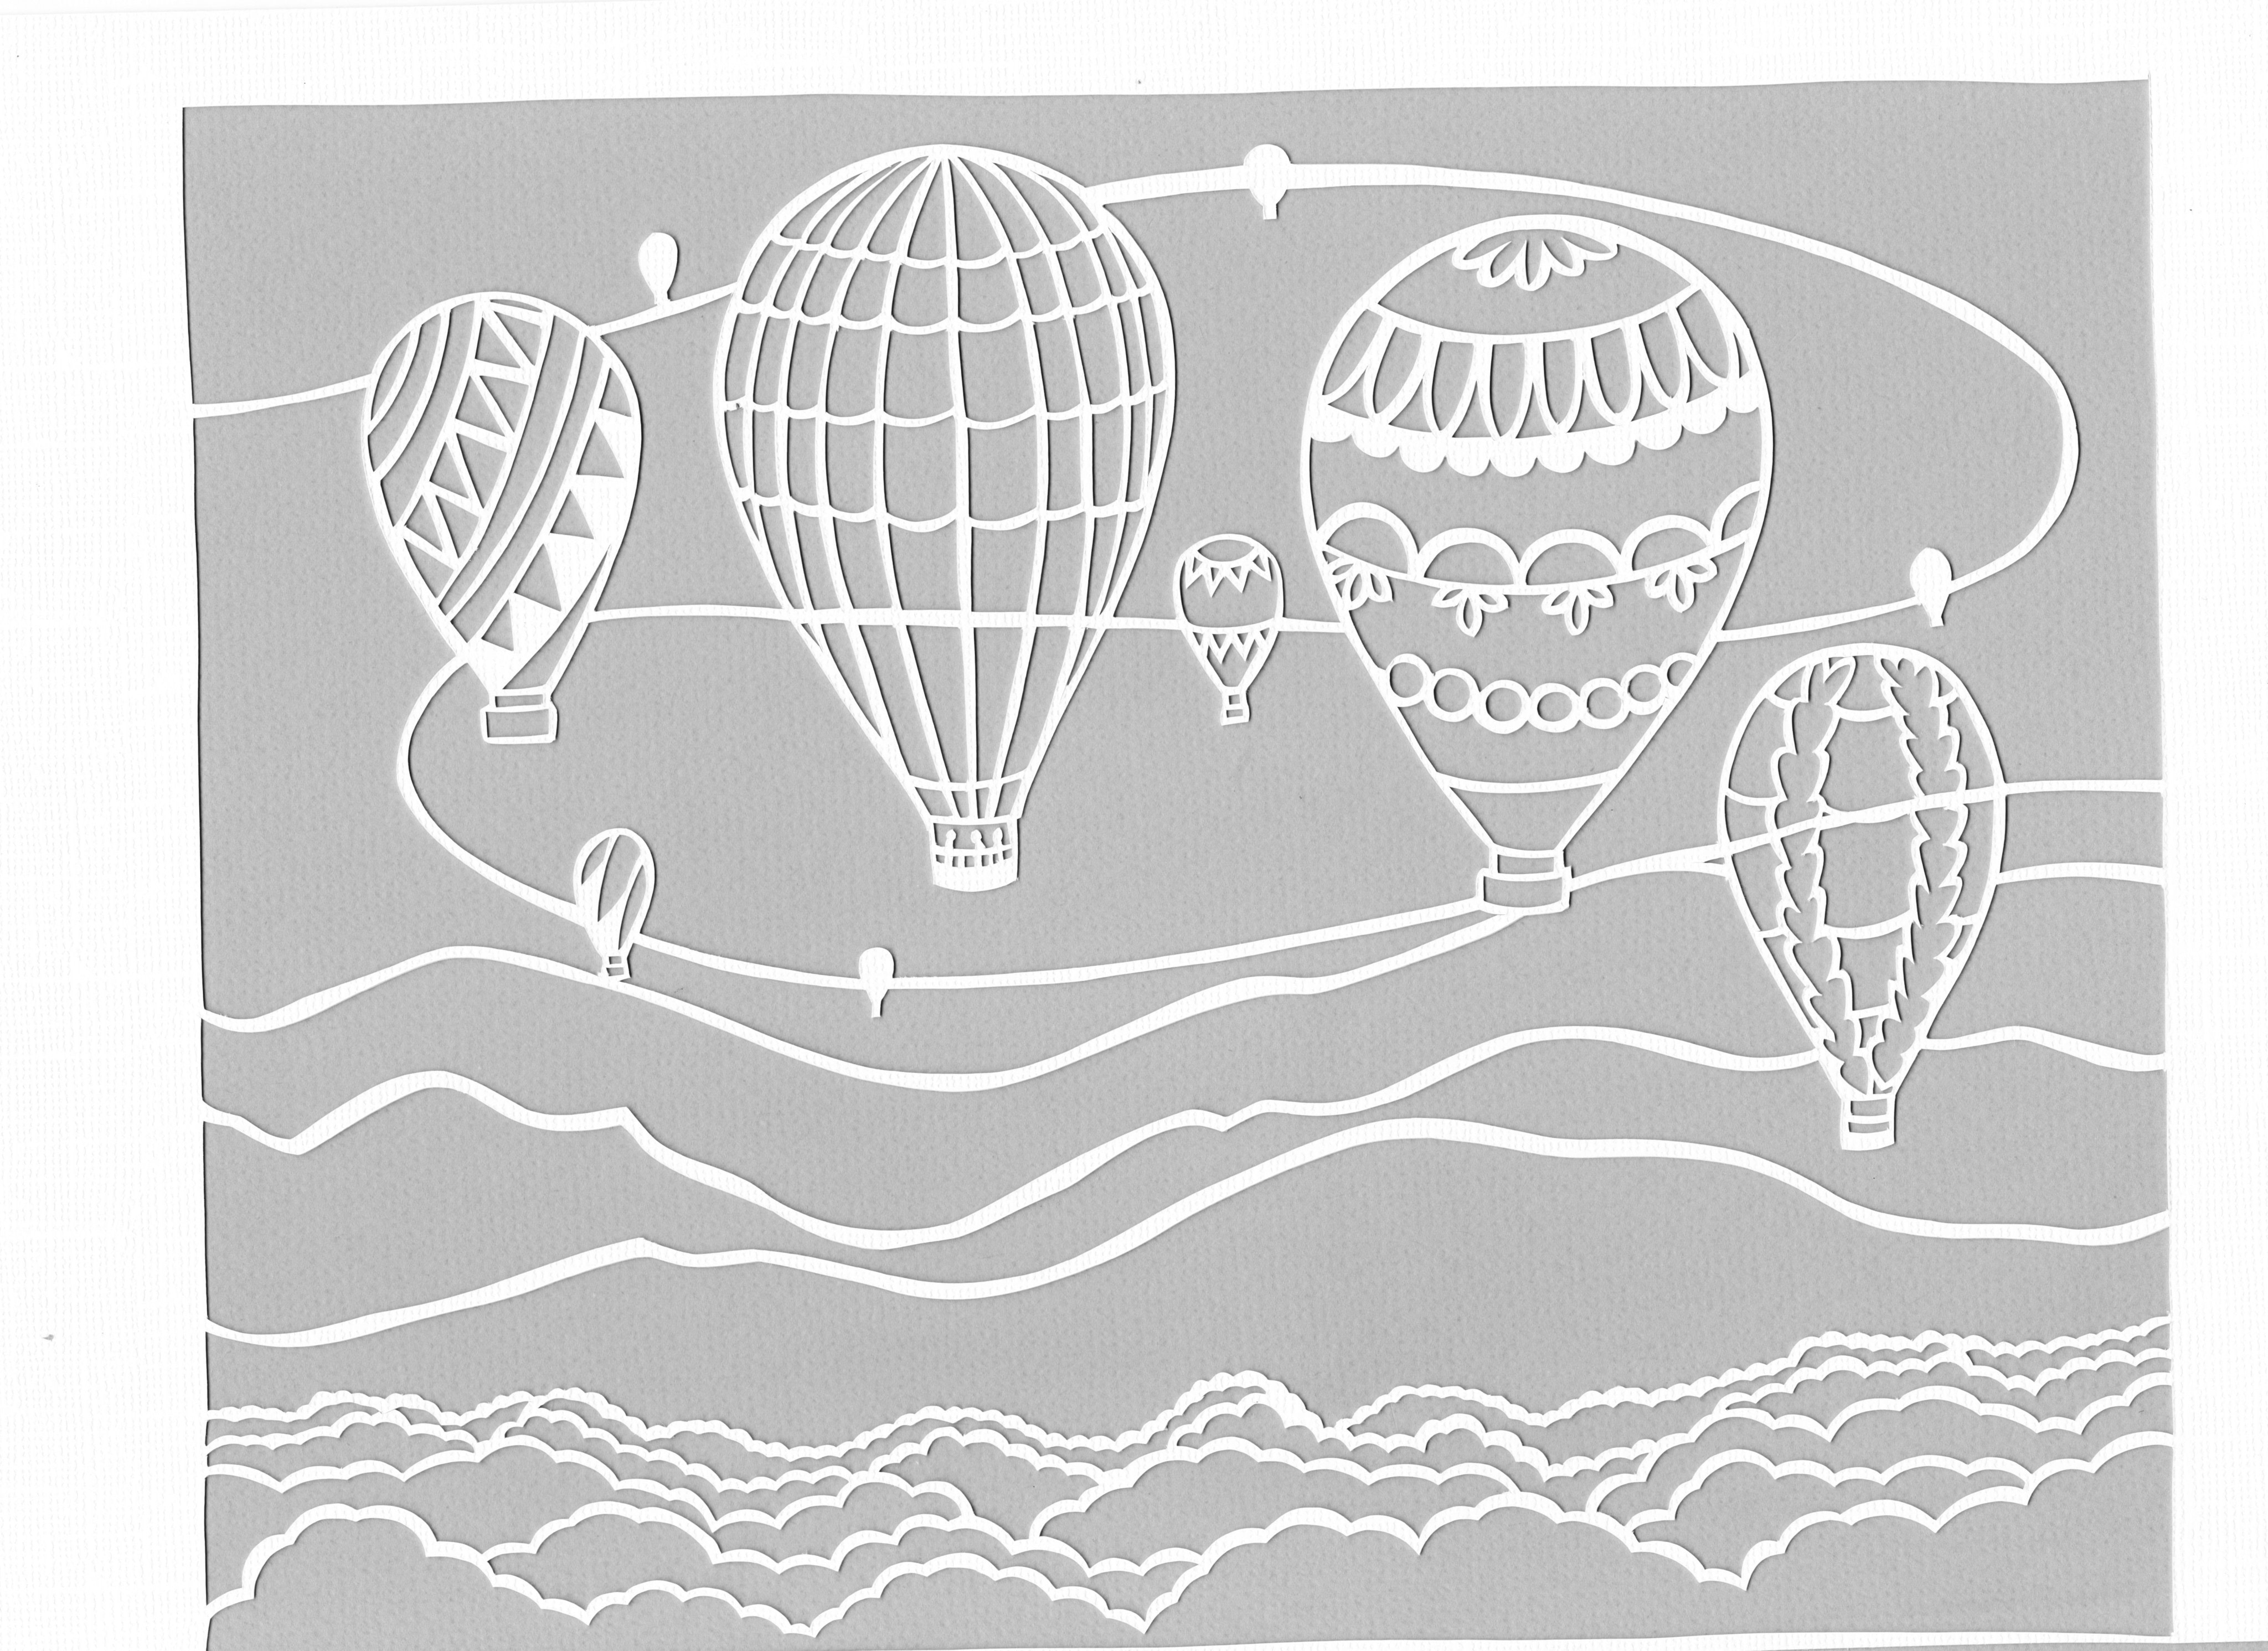
I went on a hot air balloon trip with my mum once. It was an amazing experience, so I am very fond of them and often put balloons in my pictures to add colourful detail to summery skies.
When you are designing your own papercut, remember that any objects in the sky need to be connected to an anchoring line so they don't just fall off the page when you cut them out. In this picture I used one wavy line, to represent a gentle breeze that passes through each of the balloons and connects at opposite edges of the picture.
Project hints and tips
When choosing your colours, bear in mind that it's best not to use the same colours on the balloons as those you use in the background. Otherwise, your balloon will appear to be invisible. I used a small amount of blue in the rainbow-coloured balloon and made sure it was darker than any of the blues I chose for the sky.
I used 160gsm hammered paper to colour this picture and a combination of glue pen for tiny edges and PVA glue. I like PVA because it's quick and easy to spread, and very secure. However, when gluing large pieces, like the hills and sky, or the treetops across the bottom of the picture, be very careful not to use too much PVA. 160gsm paper is quite thick to cut but will wrinkle or bow very quickly with excess glue.
If your piece does start to bow, putting a heavy book on it straight away should flatten it out. If your infill paper is lighter than 160gsm, or you’re worried about gluey drips ruining your carefully cut out silhouette cut, use a cocktail stick, or even a blunt scalpel blade, to scrape glue from a glue stick and smear dabs on the paper instead.
Order of work
Start by colouring the balloons first because they are in front of the sky and the hills, and the trickiest parts of the cut. For the background scenery, work from the bottom row of trees and progress up the page as it goes into the distance.
When you have completed all your coloured infills, apply a fresh piece of paper or card across the entire reverse of the picture. I use a glue stick for this part as it provides a secure hold and will be wrinkle-free. This will secure your infills and neaten up the back of the piece.
-
 Amanda P. favorited Basking Balloons
22 May 09:12
Amanda P. favorited Basking Balloons
22 May 09:12
-
 Emma H. favorited Basking Balloons
01 Apr 12:47
Emma H. favorited Basking Balloons
01 Apr 12:47
-
 Crafterella featured Basking Balloons
28 Mar 23:00
Crafterella featured Basking Balloons
28 Mar 23:00
-
 Kassie R. favorited Basking Balloons
18 Mar 18:51
Kassie R. favorited Basking Balloons
18 Mar 18:51
-
 Search Press published her project Basking Balloons
18 Mar 09:00
Search Press published her project Basking Balloons
18 Mar 09:00
You Will Need
-
 Step 1
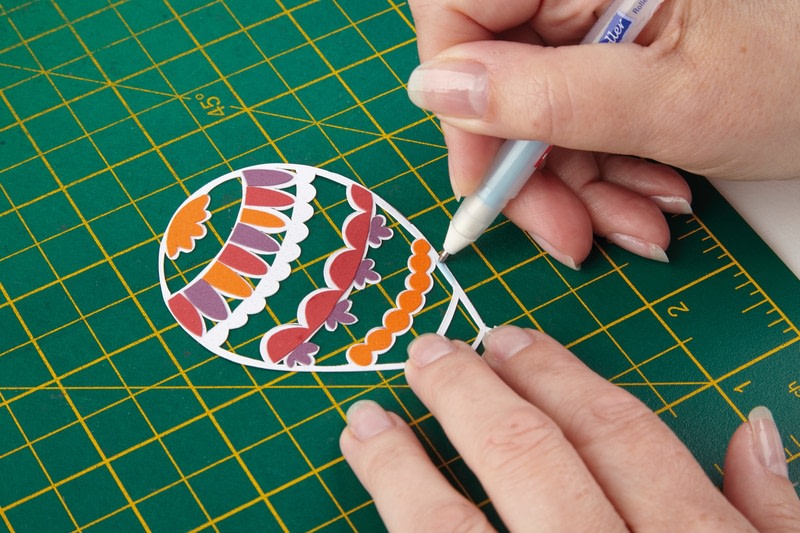
Focus on... Building layers of colour within objects
Fill in the tiny details of each balloon in turn first.
-
 Step 2
Use the glue pen for fine edges.
-
 Step 3
Use a combination of a glue pen for the fine edges, then a dab of PVA glue or glue stick on parts that are already infilled, for extra security.
-
 Step 4
Focus on… Freehand sky
In this cut, you will notice that the coloured paper in the sky doesn't follow any of the template lines. That's because I decided to cut two lighter blue infills freehand to give more movement to the sky. To do this, use what is left of your template to identify the width and depth of the paper infill you need, then cut one wavy line or sweeping line across the width of your coloured paper. When you have cut your two pieces, turn your sky infills right side up then hover your papercut right side up over the infills, to see how they look. Have a play around with the positioning of the pieces – sometimes I intend an infill to be at the bottom of the sky but decide to turn it upside down and put it at the top instead! When you’re happy, glue the lighter blue pieces in place, then cut one large rectangle of darker blue that will completely cover the space between the two lighter blue pieces and glue it down.Tips
In this case, the width is almost exactly right, so there’s no need to make a mark for that here. However, if you have a small sky area to fill, or a large piece of sky background paper, mark the width as well.Use what is left of your template to check the width and depth of paper you need to fill the sky area.
-
 Step 5
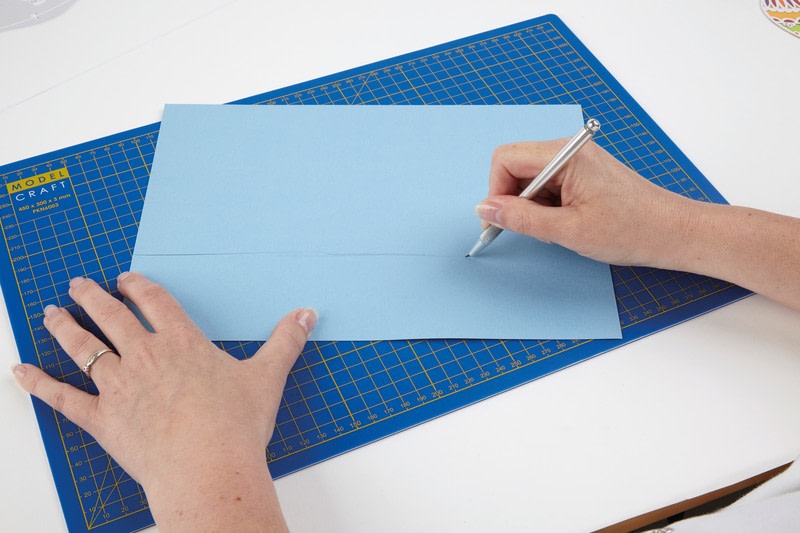
Leaving a little extra at the edges, use an HB pencil to mark the bottom of the area you need (see also tip above).
-
 Step 6
Put the template to one side, then cut the sky background paper roughly to size.
-
 Step 7
Cut a freehand wavy line across the whole width of the sky background paper.
-
 Step 8
Turn the sky background pieces over, so they are right side up, and move them apart slightly.
-
 Step 9
Next, hold the papercut right side up over both pieces to check how it will look. (Note that the papercut here is simplified, for clarity). There should be a gap in the centre of the sky as shown.
-
 Step 10
Glue the two sky pieces in place on the back of the papercut.
-
 Step 11
Using a different blue paper or card for contrast, cut a piece large enough to fill the gap, then stick it in place on top of the other sky pieces.
-
 Step 12
Turn the papercut over to reveal the finished sky then trim any excess to finish.
-
 Step 13
The finished project
There’s no sun in the sky, but the use of warm colours suggests this balloon fiesta is taking place on a hot, dry day. Hot air balloons are perfect for experimenting with bright splashes of colour and patterns.