


About
Take an old button up and make yourself a dress ^^
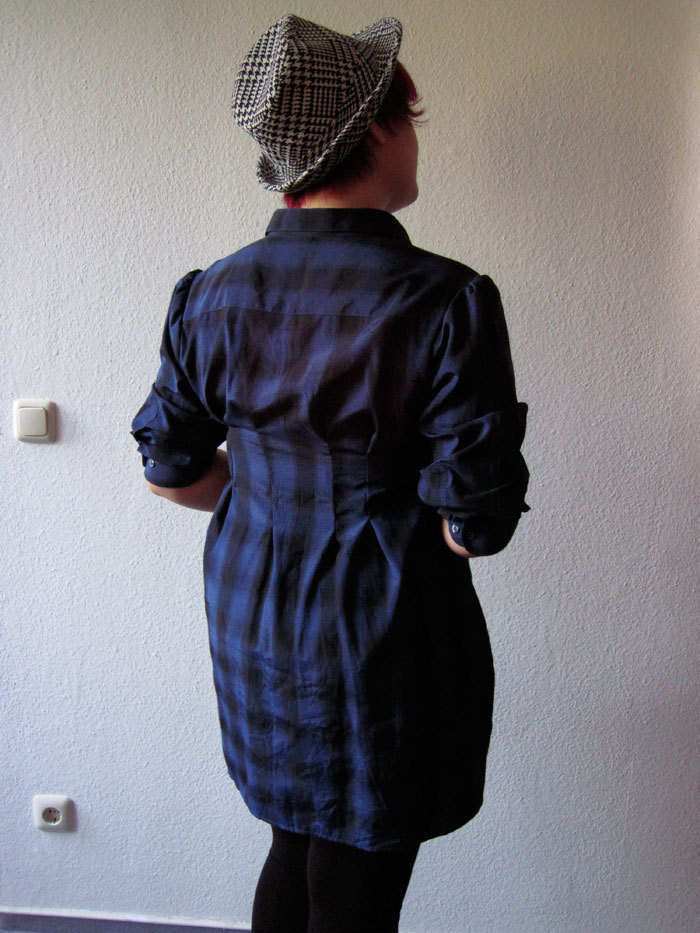
My cousin and I went to our local second hand shop and bought some old flannel shirts to make them into dresses.
The pictures show the first attempt.
and now the promised tutorial to make your own =)
some helpful tutorials to support your creation are easily to find on threadbanger. This for instance shows how to pinch and pin http://www.threadbanger.com/episode/THR_20081010
and this explains how to hem
http://www.threadbanger.com/threadheads/episode/THR_20080530
-
 Alma added Button Up Dress to Dresses
25 Jun 11:29
Alma added Button Up Dress to Dresses
25 Jun 11:29
-
 Key West Witch favorited Button Up Dress
12 Sep 12:30
Key West Witch favorited Button Up Dress
12 Sep 12:30
-
 Surf jewels favorited Button Up Dress
10 Apr 10:29
Surf jewels favorited Button Up Dress
10 Apr 10:29
-
 Ashleigh P. favorited Button Up Dress
15 Sep 06:00
Ashleigh P. favorited Button Up Dress
15 Sep 06:00
-
 Emma H. favorited Button Up Dress
27 Jun 23:00
Emma H. favorited Button Up Dress
27 Jun 23:00
-
 Nete H. favorited Button Up Dress
06 Jun 18:35
Nete H. favorited Button Up Dress
06 Jun 18:35
-
 Alice S. favorited Button Up Dress
31 Mar 14:34
Alice S. favorited Button Up Dress
31 Mar 14:34
-
Ziv J. favorited Button Up Dress
27 Sep 16:44
-
 Dswee3 added Button Up Dress to t shirt clothes
14 Jul 18:23
Dswee3 added Button Up Dress to t shirt clothes
14 Jul 18:23
-
WearyWater favorited Button Up Dress
14 Jul 06:38
-
 Step 1
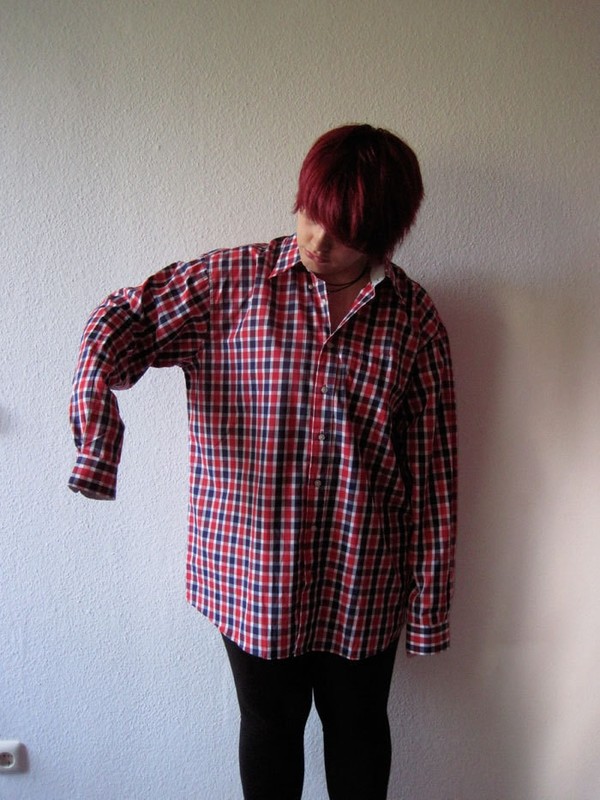
take a large button-down (from your boyfriend or buy one in your local thrift store)
if you want it to be dresslike in the length, you need at least XXL or more! -
 Step 2
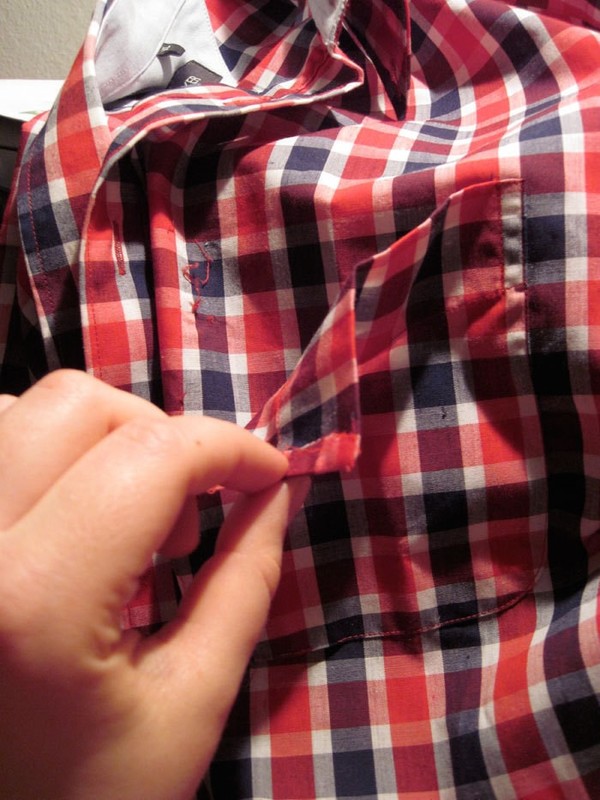
detach the pocket with your seamripper
-
 Step 3
cut off both sleeves at the seams (you can use the seamripper, too, but cutting is faster ;-) )
-
 Step 4
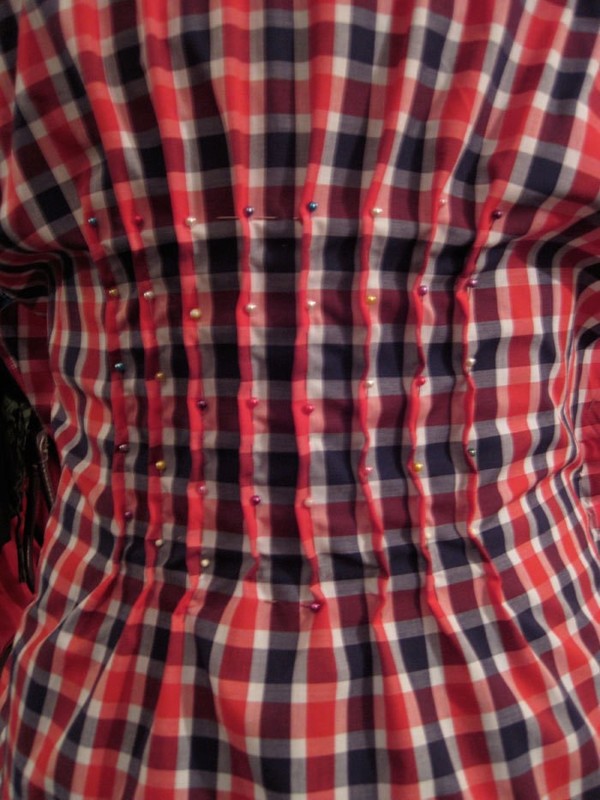
turn your shirt inside out, put it on your dressform (or yourself, but I recommend the dressform!) and use the pinch and pin method to make it fit you.
Since I had a checkered shirt I followed the pattern and pinched alle the red lines near the buttons and in the back, that created a nice effect
-
 Step 5
I ended up with 8 rows in the front and 8 in the back...this is very time consuming so put on some good music
-
 Step 6
Since all the rows I pinned are straight, I had to shape my figure in pinning the side seams, but you mustn't take more than 4cm (1.6")away at each side, cause the pattern doesn't work anymore if you do and your seams will be all crumpled up! I speak from experience -.-
-
 Step 7
Before you sew, you should try the shirt on to be sure yo have left enough ease, that it fits you but that you can still move in it with the buttons closed.
Now sew all your rows and seams, this is as well a bit time consuming
-
 Step 8
Put it on you or your dressform again and if necessary put in some darts in the front and/ or the back (to do this turn it inside out and again pinch and pin in the areas still crumpling )
see how cool it looks, with the red lines all gone?
-
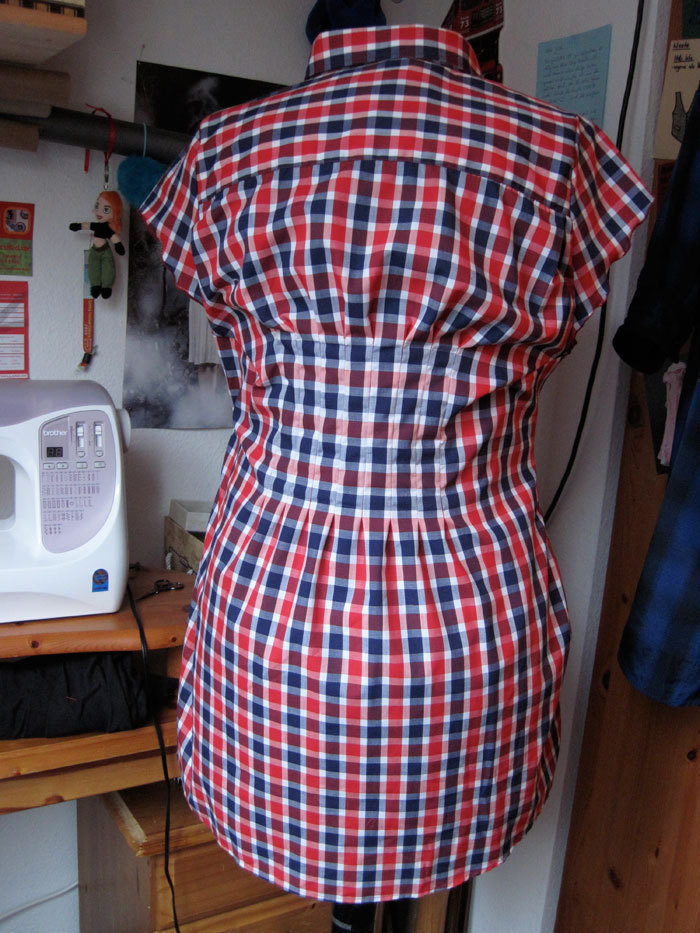
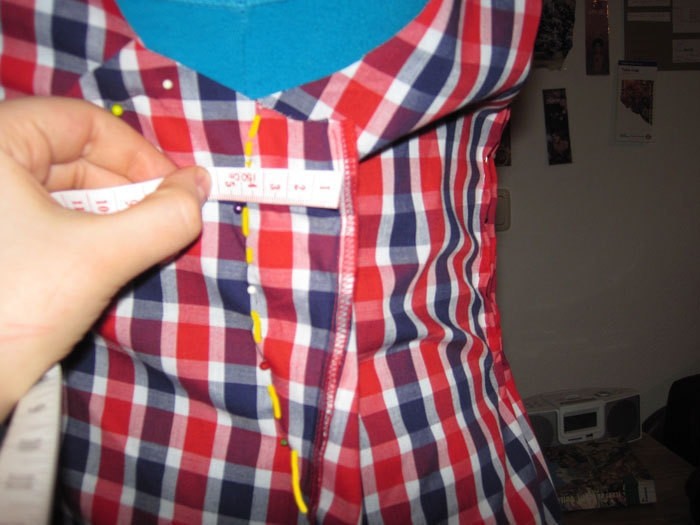
 Step 9
that's what it should look like in the back (the yellow marking is again for the darts for a nicer fit)
-
 Step 10
mark where your shoulders end (by me it is about 10cm (4") from the collar)
-
 Step 11
mark and cut your armhole, don't forget seam allowance
-
 Step 12
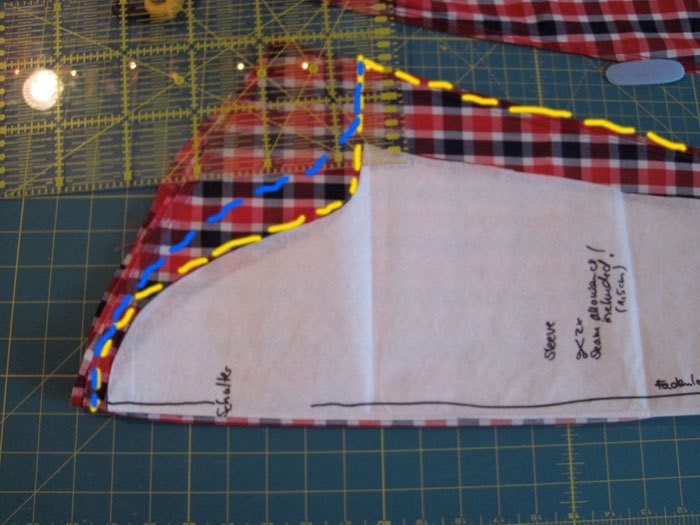
now to the sleeves, I got as pattern (Lydia from Burdastyle), you can either draft one yourself or search for it on burdastyle or other sewing communities or just take a good fitting shirt and take it apart to use it as pattern...but in all cases I recommend to make the sleeves as wide as the original one (yellow line). either you get puffed sleeves with a lost of ease to fit you or you just pin it in the armhole and cut away the leftover fabric in the end...if you cut it too short now, you'll regret it later!
anyway, lay the pattern down on your existing sleeve and cut (don't forget seam allowance)
For the blue button-up dress I just took the old sleeves and put them on my arms, I pulled them up as far as they would get with the cuffs closed, then I marked the point where my shoulder began and cut them large enough to make them puffy (blue line)
-
 Step 13
attach the sleeves to your shirt
-
 Step 14
in the process I decided to alter my design. At first I wanted a more T-Shirt like look with short sleeves, hut I cut mine too tight and made them finally into really short sleeves ^^(left side)
I hemmed them with the role hem of my serger. If you don't have a serger, turn the hem inside (about 1,5cm (5/8") and use a straight stitch)
again check whether you need darts to make the shirt more fitted
-
 Step 15
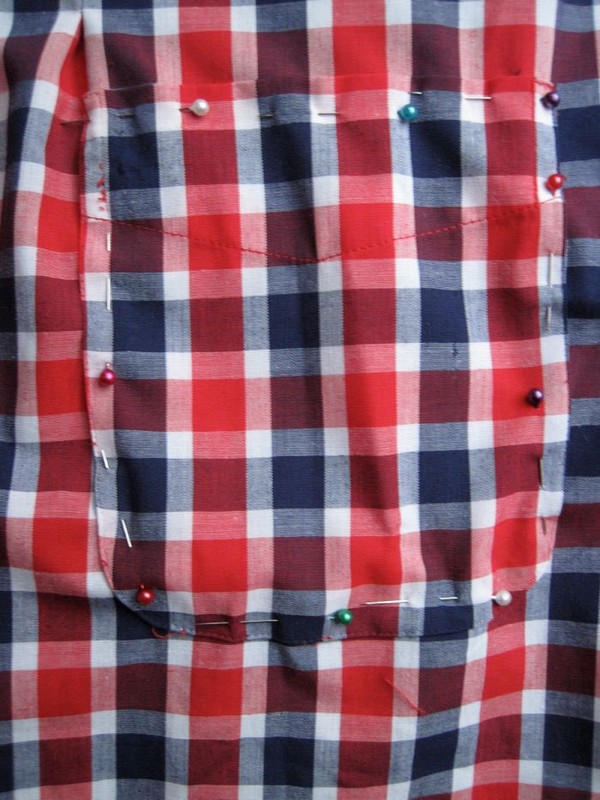
If you're satisfied with how the shirt looks, get the pocket and attach it wherever you want it to go, if you have a checkered shirt like me, be careful to match the stripes or do it deliberately against the pattern to make it look more dynamic
-
 Step 16
That's it, cut off some leftover threads...
-
 Step 17
...and be proud ^^


 1
Watercolor Art »
Watercolor Paints Made From Make Up
1
Watercolor Art »
Watercolor Paints Made From Make Up
 2
Paper Book Covers »
Shoe Inspired Spiral Notebook
2
Paper Book Covers »
Shoe Inspired Spiral Notebook

(Finally something they can be used on, it's killing me to see so many shirts out there and no way to make myself buy something I know I won't use!)