


About
Nigellissima
if There’s a family in iTaly that doesn’t have a recipe for yogurt pot cake, then I’ve yet to meet them. And I love this plain cake with perhaps disproportionate intensity. There is something so quintessentially Italian about its scent – as it bakes, I think I’m in a kitchen in Italy – and its taste – that combination of lemon and vanilla – and even the old-fashioned charm of its method.
This is it: your yogurt pot is your unit of measurement. And even though I saw from the original recipe that I copied down (from some scrawled piece of paper in the kitchen of a house I’d rented one summer), that the specified yogurt pot had a 125ml capacity, I have kept the same number of eggs for my 150ml yogurt pot. I work on the principle that eggs these days are larger than when the cake first came into being. Anyway, it works, and that’s the main thing. And this is the way it works: for 1 cake, you need 1 pot of yogurt, 2 pots of sugar, 1 pot of oil, 1 pot of potato starch or cornflour and 2 pots of flour. In keeping with this style of measuring, you will see that I have even stipulated 2 capfuls of vanilla extract.
Although potato starch is the norm in Italy, it isn’t easily available in Britain, which is why I have substituted cornflour. Bear in mind that potato starch is denser, or rather weighs more per pot than cornflour does. Which is to say, if you’re using potato starch, it will weigh in as 100g, whereas the same volume of cornflour is 75g. I’ve specified actual weights in the ingredients list, not only so that you can make this even if you’re working from a jumbo carton of yogurt, but also because I feel the ingredients list should double as a shopping list, too.
I know this cake best in a ring shape, ciambella (pronounced “chambella”) as it’s known in Italy, and a 22cm savarin or ring mould is a fairly standard baking tin here in the UK, too, but do use a 22 or 23cm springform tin if that’s easier for you: the cake won’t be as high, but don’t use a smaller diameter because, without the hole in the middle, the cake wouldn’t cook properly in the centre if the tin were any deeper.
Finally, I’m aware it may sound a bit of a bore having to whisk the egg whites, but it only sounds it; in the days of electric whisks, it really isn’t any trouble.
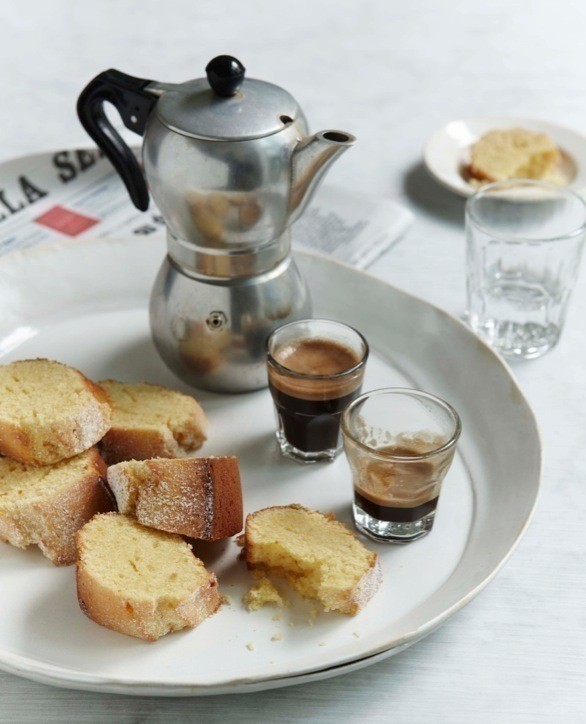
This is my favourite weekend breakfast, or – indeed – anytime treat.
Cuts into 16 slices, but it would be easy to eat 3 or 4 at a sitting
-
 Sandi N. added Yogurt Pot Cake to Desserts
05 Mar 18:56
Sandi N. added Yogurt Pot Cake to Desserts
05 Mar 18:56
-
 Moornook favorited Yogurt Pot Cake
25 Jan 14:43
Moornook favorited Yogurt Pot Cake
25 Jan 14:43
-
 Susan S. favorited Yogurt Pot Cake
26 Oct 10:08
Susan S. favorited Yogurt Pot Cake
26 Oct 10:08
-
Kaiulani W. favorited Yogurt Pot Cake
10 Jul 01:41
-
 e.b favorited Yogurt Pot Cake
09 Jan 20:29
e.b favorited Yogurt Pot Cake
09 Jan 20:29
-
Suzi T. favorited Yogurt Pot Cake
04 Jan 12:14
-
 Sam A. added Yogurt Pot Cake to dessert
02 Jan 22:58
Sam A. added Yogurt Pot Cake to dessert
02 Jan 22:58
-
 sam.apel.9 added Yogurt Pot Cake to Food
24 Dec 16:34
sam.apel.9 added Yogurt Pot Cake to Food
24 Dec 16:34
-
 Elaina B. favorited Yogurt Pot Cake
22 Dec 23:04
Elaina B. favorited Yogurt Pot Cake
22 Dec 23:04
-
 Doodlebert added Yogurt Pot Cake to Bake
21 Dec 06:58
Doodlebert added Yogurt Pot Cake to Bake
21 Dec 06:58
You Will Need
-
Step 1
Preheat the oven to 180°C/gas mark 4, and grease your ring mould (or springform tin); you can use vegetable oil for this or a special baking spray.
-
Step 2
Separate the eggs and put the whites in one bowl and the yolks in another. Whisk the whites until you have firm peaks, then set aside while you get on with the rest of the cake.
-
Step 3
Scrape the yogurt out of its pot and on to the egg yolks, then use the emptied yogurt pot to measure out your other ingredients – so, next, add 2 pots (just) of sugar and whisk with the egg yolks and yogurt until airy and light.
-
Step 4
Now fill your yogurt pot up with vegetable oil and, beating all the while, slowly add this to the egg yolk mixture. Then beat in 2 capfuls of vanilla extract and the zest of half a lemon.
-
Step 5
Still beating, add 2 yogurt potfuls of flour followed by 1 yogurt potful of cornflour or potato starch, then scrape down and fold in with a rubber or silicone spatula. Now, with a large metal spoon, dollop in the whisked egg whites, and fold them in with the spatula.
-
Step 6
Fill the prepared ring mould with the smooth, soft batter – it will come right to the top
– and bake in the oven for 30–35 minutes; when cooked, the sides will be coming away at the edges and a cake tester will come out clean. -
Step 7
Remove it from the oven to a wire rack, letting the cake sit in the tin for 10 minutes before turning it out.
-
 Step 8
Once cooled (although I love this still slightly warm), transfer it to a serving plate or stand and dust with icing sugar. Traditionally, this cake would be placed on the plate with the smooth side uppermost, but I rather like it turned back up the way it was baked, with its rustic cracks and uneven surface visible.

 1
Watercolor Art »
Watercolor Paints Made From Make Up
1
Watercolor Art »
Watercolor Paints Made From Make Up
 2
Paper Book Covers »
Shoe Inspired Spiral Notebook
2
Paper Book Covers »
Shoe Inspired Spiral Notebook
