

About
The tiniest of adjustments that will yield the biggest results!
When doing patchwork, especially when stitching something like a quilt block that has a lot of smaller pieces, the scant quarter inch seam is vital to your block turning out to be the correct size, and will also determine whether the points match or are chopped off, etc. When I first started quilting, I didn't know the difference between the scant quarter inch seam versus the regular quarter inch seam. It's a tiny, easy adjustment to make, and I wish I'd known about it BEFORE I made my husband the quilt that is lovingly named "Triangle Massacre" because none of the blocks came out to the correct size, and none of the triangle points matched. ;) He still uses it and loves it just the same, but it sure left me scratching my head for a long time trying to figure out what I'd done wrong!
-
 Mandy C. favorited Understanding The Scant 1/4 Inch Seam
29 Apr 18:48
Mandy C. favorited Understanding The Scant 1/4 Inch Seam
29 Apr 18:48
-
 Anita H. added Understanding The Scant 1/4 Inch Seam to My likes
22 Apr 14:57
Anita H. added Understanding The Scant 1/4 Inch Seam to My likes
22 Apr 14:57
-
Anita H. favorited Understanding The Scant 1/4 Inch Seam
22 Apr 14:56
-
 Kelli Fannin Quilt Designs published her project Understanding The Scant 1/4 Inch Seam
13 Mar 09:00
Kelli Fannin Quilt Designs published her project Understanding The Scant 1/4 Inch Seam
13 Mar 09:00
You Will Need
-
 Step 1
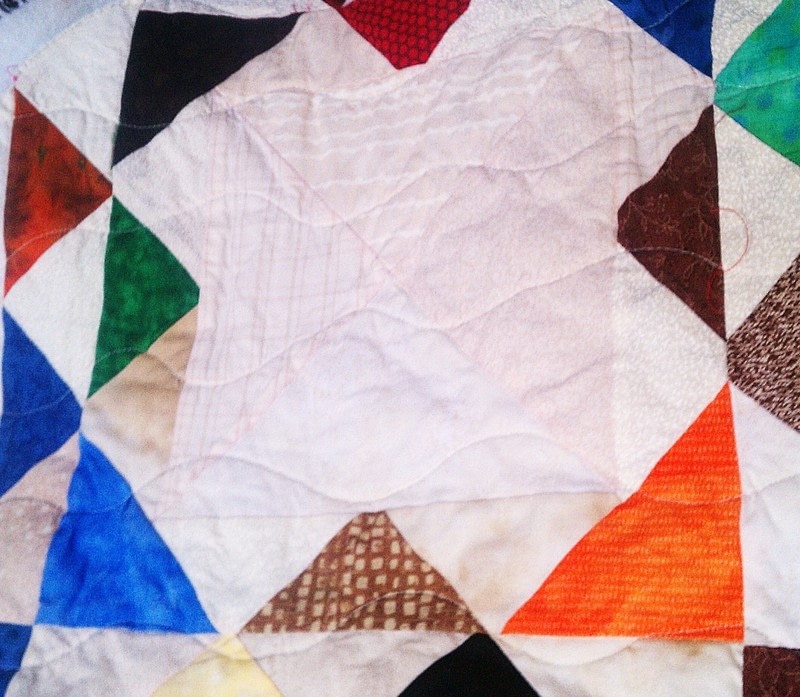
Years ago, I made my hub this scrap quilt from a book called Quilts for Men, which I ended up naming Triangle Massacre because none and I mean NONE of the points worked out. Not that they just didn't match. More like they didn't exist at all. They were all chopped off in the seams, and to top it off, the blocks weren't turning out to size.
-
 Step 2
Here is a close-up of what I'm talking about. These were supposed to be triangles.. with points on them. ;)
-
 Step 3
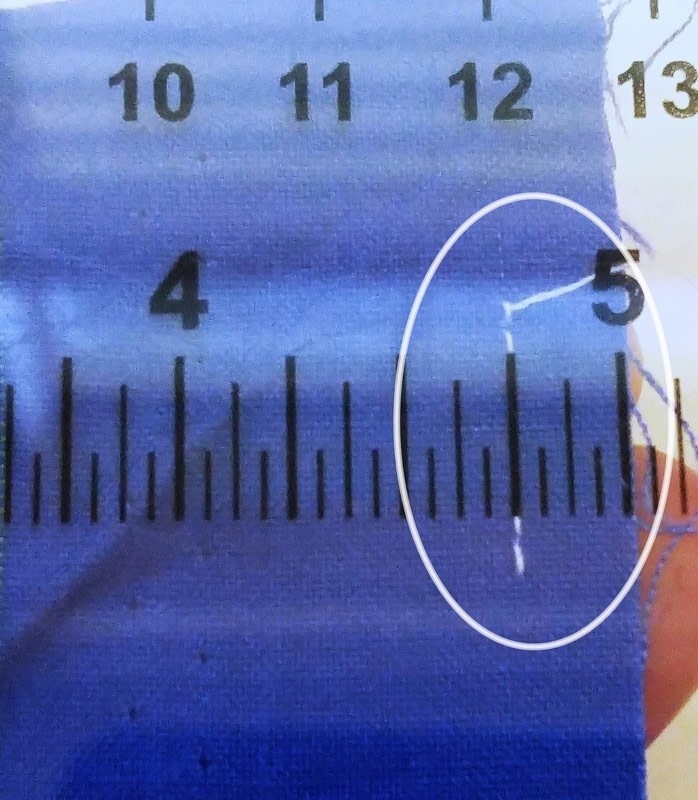
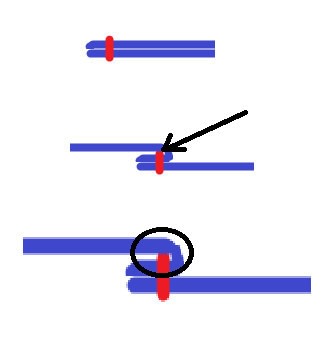
With some googling and some research, I came to learn that "scant quarter inch seam" isn't just another way of saying "precise quarter inch seam". This is a regular quarter inch seam. Your stitching line lines up directly under the quarter inch mark on your ruler.
-
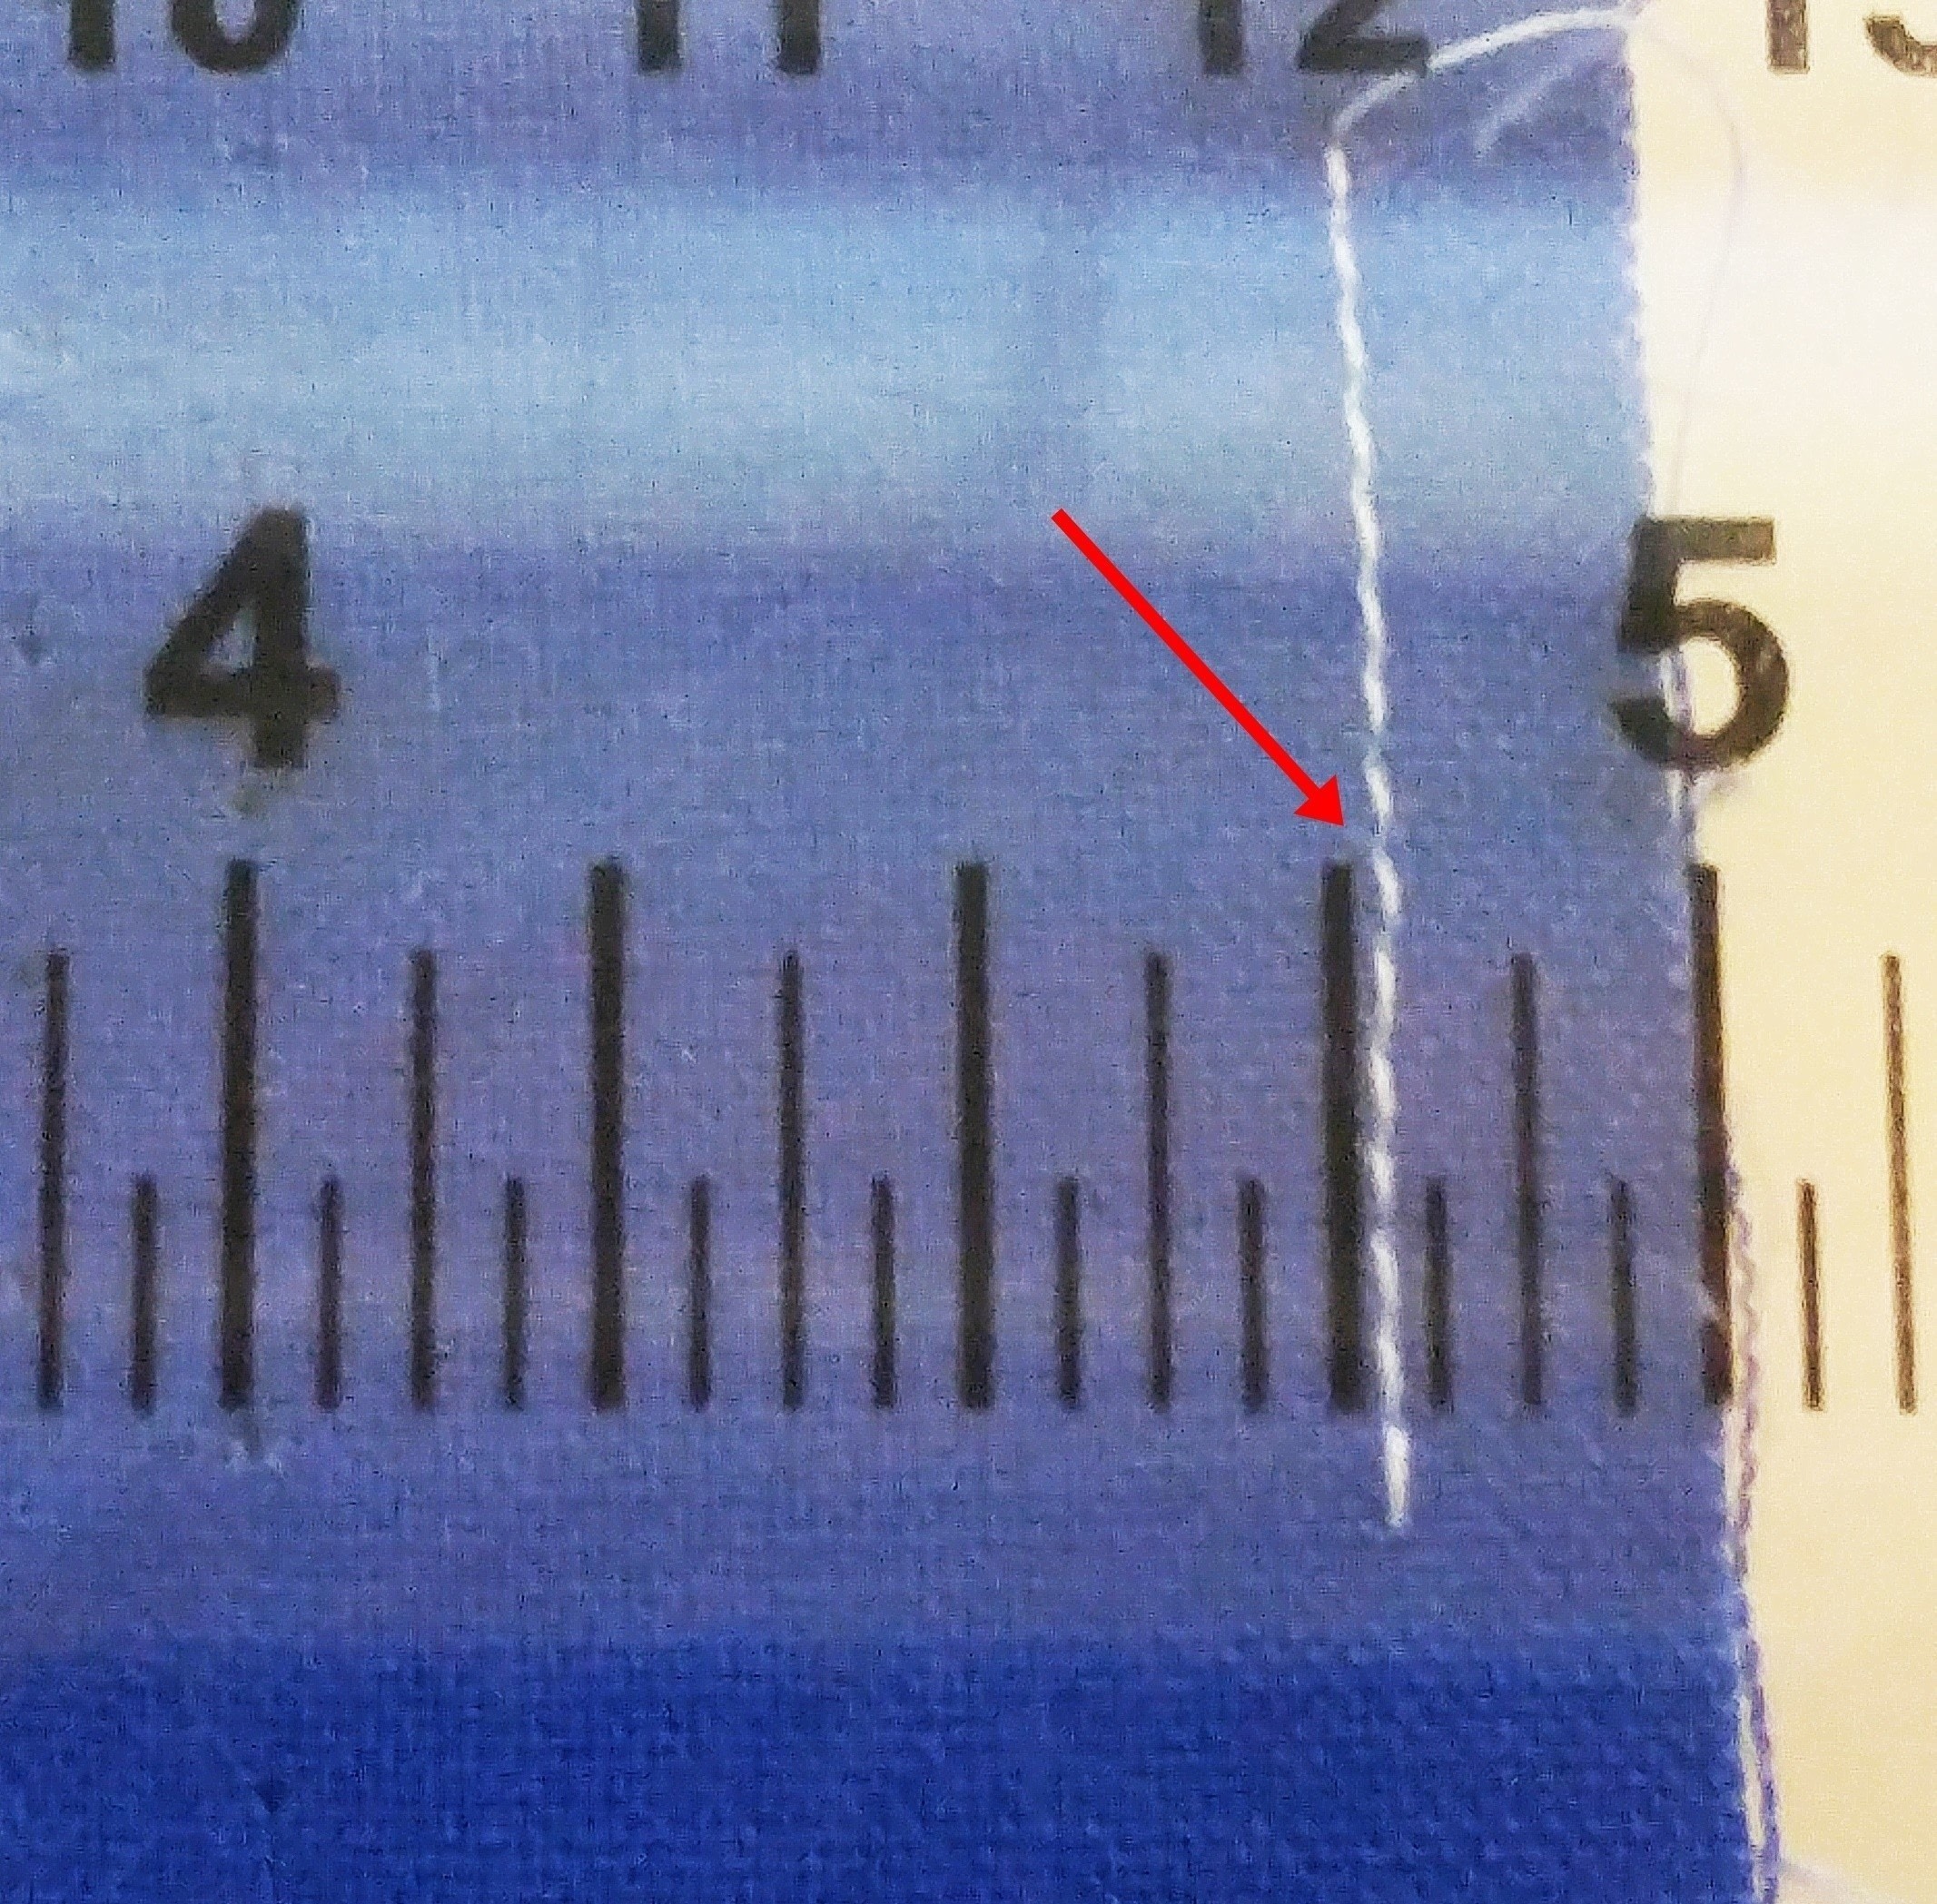
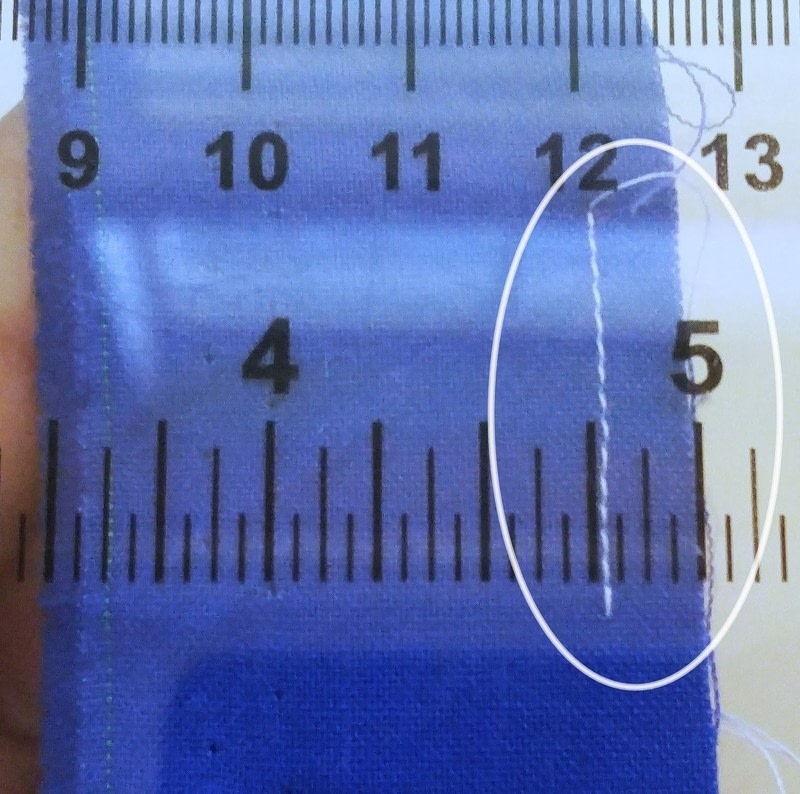
 Step 4
SCANT 1/4" seam actually means a teeny bit LESS THAN 1/4". Like this. Notice that the thread is just inside the 1/4" mark. Tucked right up next to the line. *insert strains of the hallelujah chorus* This makes ALL the difference!!
-
 Step 5
Reason being is that when you fold open the seam, whether pressing to one side or pressing open, the fabric has to lay over the thread which doesn't seem like a lot of thickness, but if your block has lots of pieces, those little slivers add up and it can make enough difference to throw your block size off by 1/4" or 1/2"! Not to mention what it does to the points.
-
 Step 6
So what I do to get my scant 1/4" seam is this. I move my needle position to the right, sewing a short seam and measuring, until I have a scant 1/4" seam like in the pic in step 4 above. Which on my machine means moving the needle to the 3.3 position. This takes a little bit of trial and error and a scrap of fabric but once you figure out your needle setting, then it's quick. Each time I sit down to sew, I just move my needle to the right until it is on the 3.3 setting. That gives me my scant 1/4" seam. Then I can sew along using the edge of my presser foot as the fabric guide. But whatever guide you like to use, you can adjust accordingly. There are lots of different ways people achieve this. I've heard of people putting a strip of tape on their machine as a guide, using special seam guides, etc. but I just find this way easiest for me.
-
 Step 7
May all your quilt blocks be the right size and may all your points match! :) Mine still aren't perfect ALL the time, I'm human after all, but at least they aren't completely absent and chopped off in the seams anymore! :D
Happy Stitching!


 1
Watercolor Art »
Watercolor Paints Made From Make Up
1
Watercolor Art »
Watercolor Paints Made From Make Up
