About
Easy-No Mess-Way To Transfer
This is a sure fire way to turn any design you like and embroider it! I am using a custom order to show you how simple it is!
-
 PineconePrincess favorited Transfer Any Image For Embroidery
31 Jan 23:42
PineconePrincess favorited Transfer Any Image For Embroidery
31 Jan 23:42
-
 Stephanie N. favorited Transfer Any Image For Embroidery
09 Sep 13:43
Stephanie N. favorited Transfer Any Image For Embroidery
09 Sep 13:43
-
 Chudames favorited Transfer Any Image For Embroidery
27 Jul 08:34
Chudames favorited Transfer Any Image For Embroidery
27 Jul 08:34
-
 mmotse03 favorited Transfer Any Image For Embroidery
29 Jun 03:49
mmotse03 favorited Transfer Any Image For Embroidery
29 Jun 03:49
-
 Morgan B. favorited Transfer Any Image For Embroidery
01 Sep 01:11
Morgan B. favorited Transfer Any Image For Embroidery
01 Sep 01:11
You Will Need
-
 Step 1
Collect all your supplies, I always like having my materials in front of me before I start a project! You need a hoop, scissors, thread(whatever brand you prefer), embroidery needle, fabric, Solvy Sulky(my secret weapon), tape and whatever image it is that you are wanting to embroider. This image is for a friend and the logo is for his band.
-
 Step 2
Next you want to cut a good piece of Solvy Sulky, enough to cover the design and enough to fit in the hoop while you are stitching.. So base it on those two things! Then you are going to tape the Solvy Sulky onto the design.
-
 Step 3
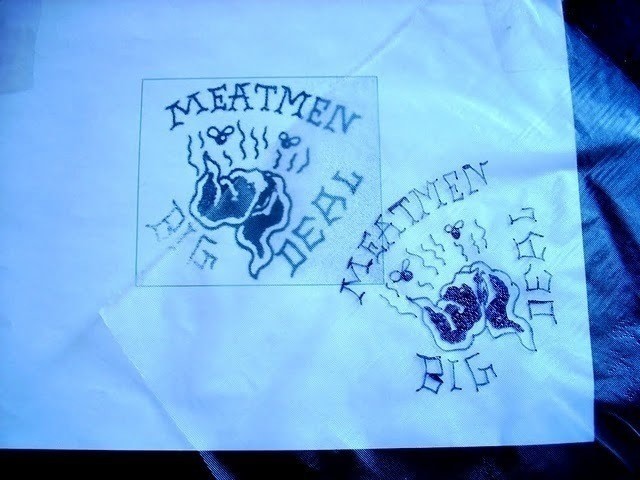
After taping you want to trace over your design and it should look something like this!
-
 Step 4
After you are finished tracing you can remove the Solvy Sulky easily from the tape and you should have a copy of your design
-
 Step 5
Now you hoop your Solvy Sulky design and your fabric and begin to stitch!
-
 Step 6
After you are finished stitching you may see pieces of your stencil showing but no worries that will be washed off later. I like to take a little creative control sometimes and I go outside the lines, the joys of embroidery!
-
 Step 7
Go ahead and remove any excess Solvy Sulky you may have around the design by cutting with scissors.. BE CAREFUL not to cut your stitches!
-
 Step 8
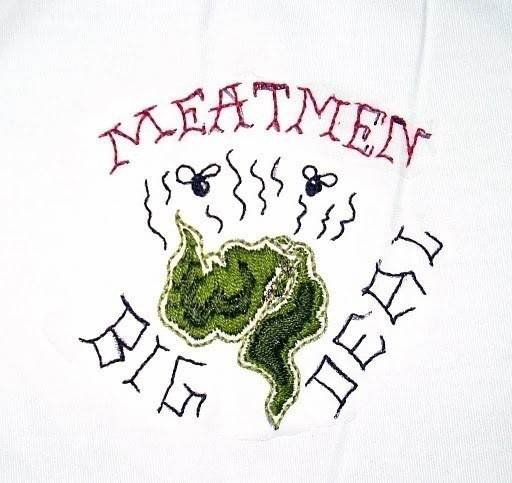
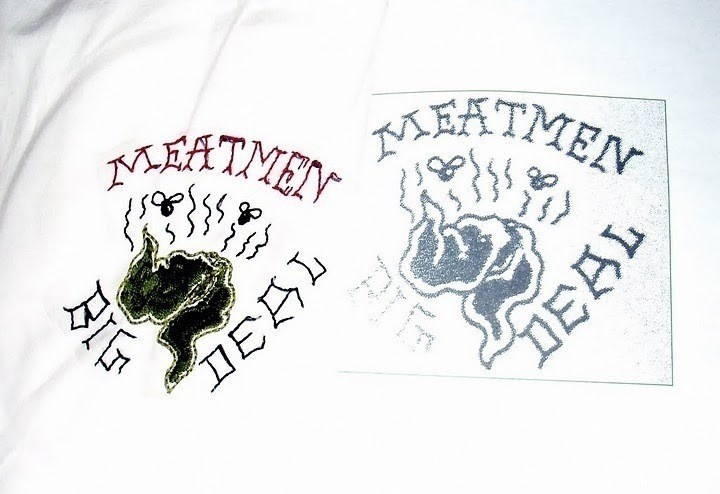
This is just a picture to see how I started with the image and stitched my version of it!
-
 Step 9
Now for removing any lines and Solvy Sulky you have on your item. You want to wash it under warm tap water with any kind of soap.. I work a lather into my palm before adding the piece and wash gently against the fabric, rinse well!
-
 Step 10
Hang or lay flat until dried. You can iron if need just use it on a low seating and be careful not to mess up your stitches!
-
 Step 11
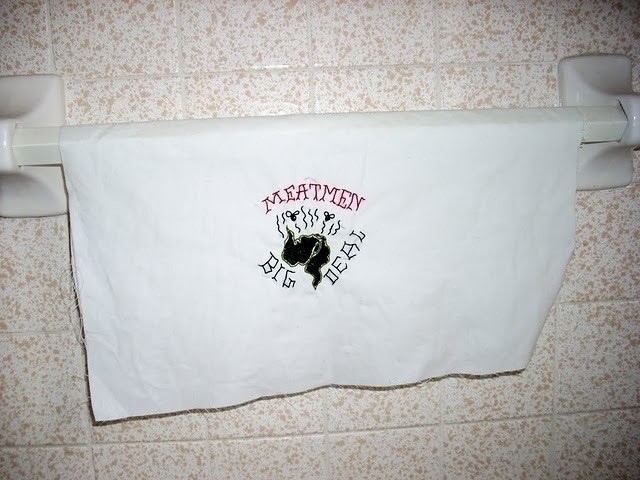
Finished product!