


About
Bored of all that messy pumpkin carving? Try these spooky alternatives
I wanted to try an alternative to pumpkin carving this year and after lots of googing I found a couple of websites which gave me inspiration (buzzfeed and Martha Stewart)
Here is my tutorial on my own take of the mummy and vampire pumpkins!
Tags
-
 Flo Di favorited Spooky Pumpkins Vampire & Mummy
07 Dec 22:30
Flo Di favorited Spooky Pumpkins Vampire & Mummy
07 Dec 22:30
-
 Sarah B. favorited Spooky Pumpkins Vampire & Mummy
30 Oct 08:28
Sarah B. favorited Spooky Pumpkins Vampire & Mummy
30 Oct 08:28
-
 Jill S. added Spooky Pumpkins Vampire & Mummy to Holiday
29 Oct 03:09
Jill S. added Spooky Pumpkins Vampire & Mummy to Holiday
29 Oct 03:09
-
 blurrymind commented on Spooky Pumpkins Vampire & Mummy
28 Oct 21:40
blurrymind commented on Spooky Pumpkins Vampire & Mummy
28 Oct 21:40
-
 Step 1
The night before you want to decorate your pumpkins paint them white and leave them to dry overnight
I'm going to show you how to do two different styles in this tutorial.
Let's start with the vampire pumpkin...
-
 Step 2
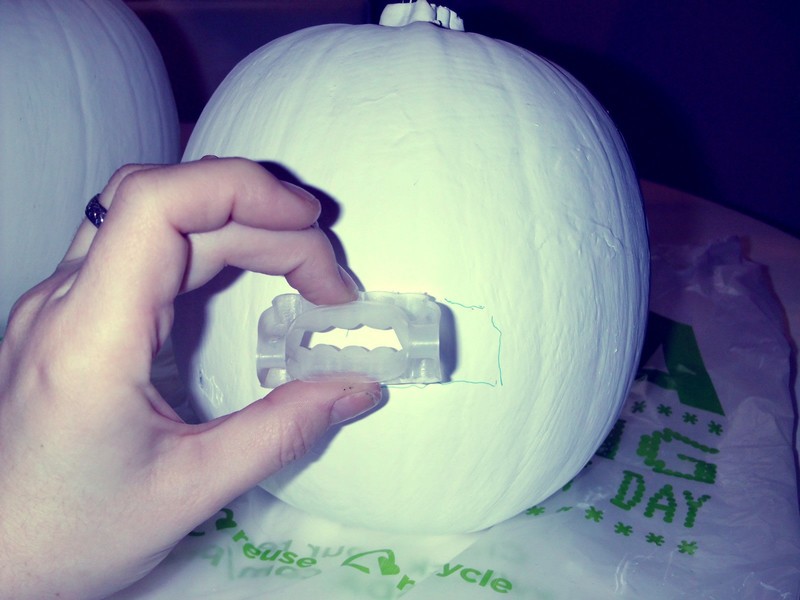
Vampire Pumpkin
Close your vampire teeth together and hold the teeth side up next to the pumpkin and draw round them
-
 Step 3
Cut out the hole you have marked on your pumpkin. I did this by cutting round the shape with a sharp knife and then cutting zigzags inside the rectangle so that it was easier to pull the small chunks out.
Then scoop put as much of the inside as you can
-
 Step 4
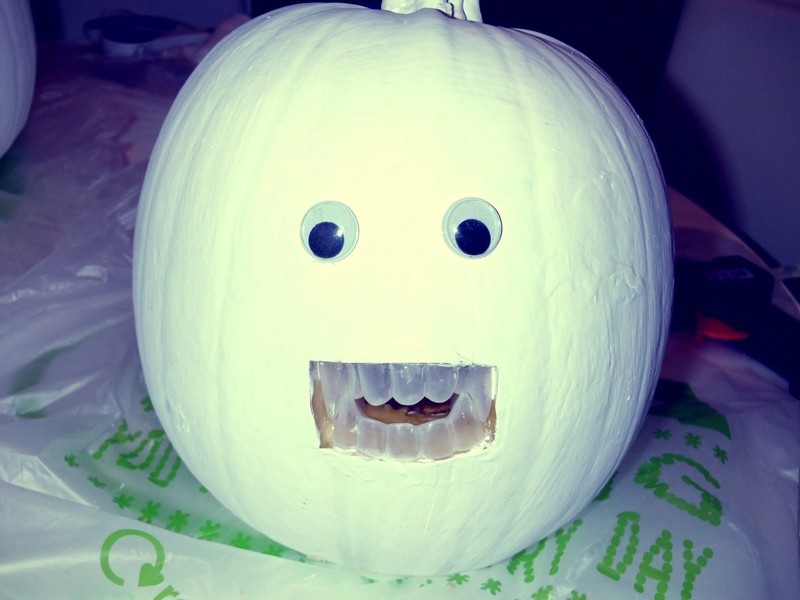
Squeeze the teeth inside the hole
-
 Step 5
Glue the eyes to the pumpkin.
I used a hot glue gun so that the glue dried quickly
-
 Step 6
I then dribbled 2 line of hot glue from the corners of the mouth, down the chin.
This is so when you paint the blood on, it has more of a 3D effect
-
 Step 7
Once the glue has dried, paint it red.
I used red nail varnish for this part as it comes with the small brush and has a shiny finish so it looks pretty realistic.
I also smeared a little of the nail varnish on the teeth to make it look a bit more spooky
-
 Step 8
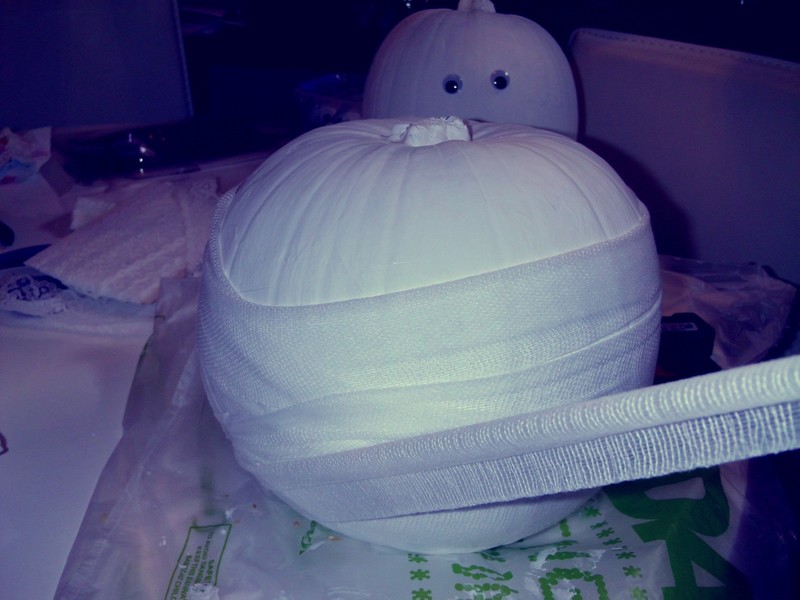
Mummy Pumpkin
Starting with another painted white pumpkin
-
 Step 9
Take your bandage and glue one end of it to the back of your pumpkin
-
 Step 10
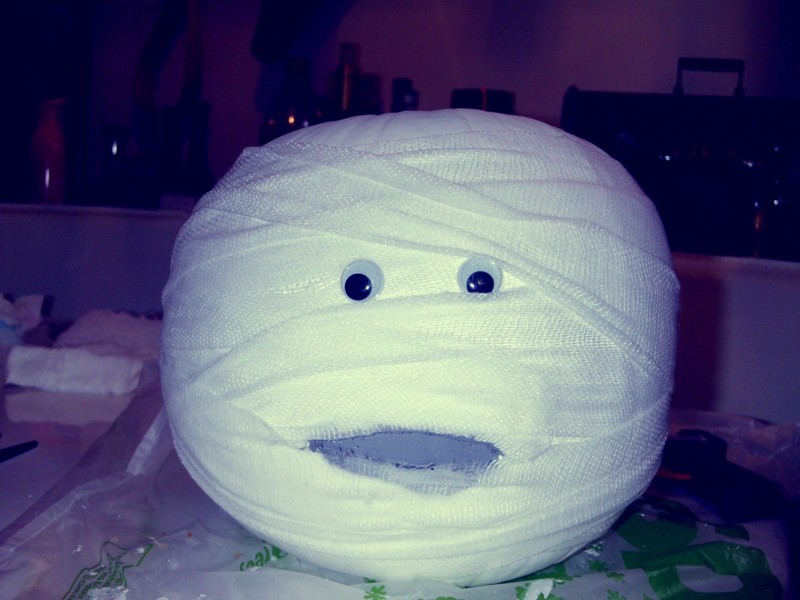
Once you have finished wrapping your pumpkin, glue two eyes on the front of the pumpkin, over the bandage.
I pulled some of the bandage over the edges of the eyes so it looked more like they were peeking out, rather than just placed on top
-
 Step 11
Below the eyes (leaving a gap) cut a hole in the bandages and then paint the pumpkin underneath with a dark black/grey colour
-
 Step 12
Move the bandages around a little to make a mouth shape
-
 Step 13
Place your pumpkins in a spooky corner and you're done!!!!


 1
Watercolor Art »
Watercolor Paints Made From Make Up
1
Watercolor Art »
Watercolor Paints Made From Make Up
 2
Paper Book Covers »
Shoe Inspired Spiral Notebook
2
Paper Book Covers »
Shoe Inspired Spiral Notebook

prettymarshmallow.blogspot.com