Orchid Arrangement
Extract from Paper Folded Flowers • By Elizabeth Moad • Published by Search Press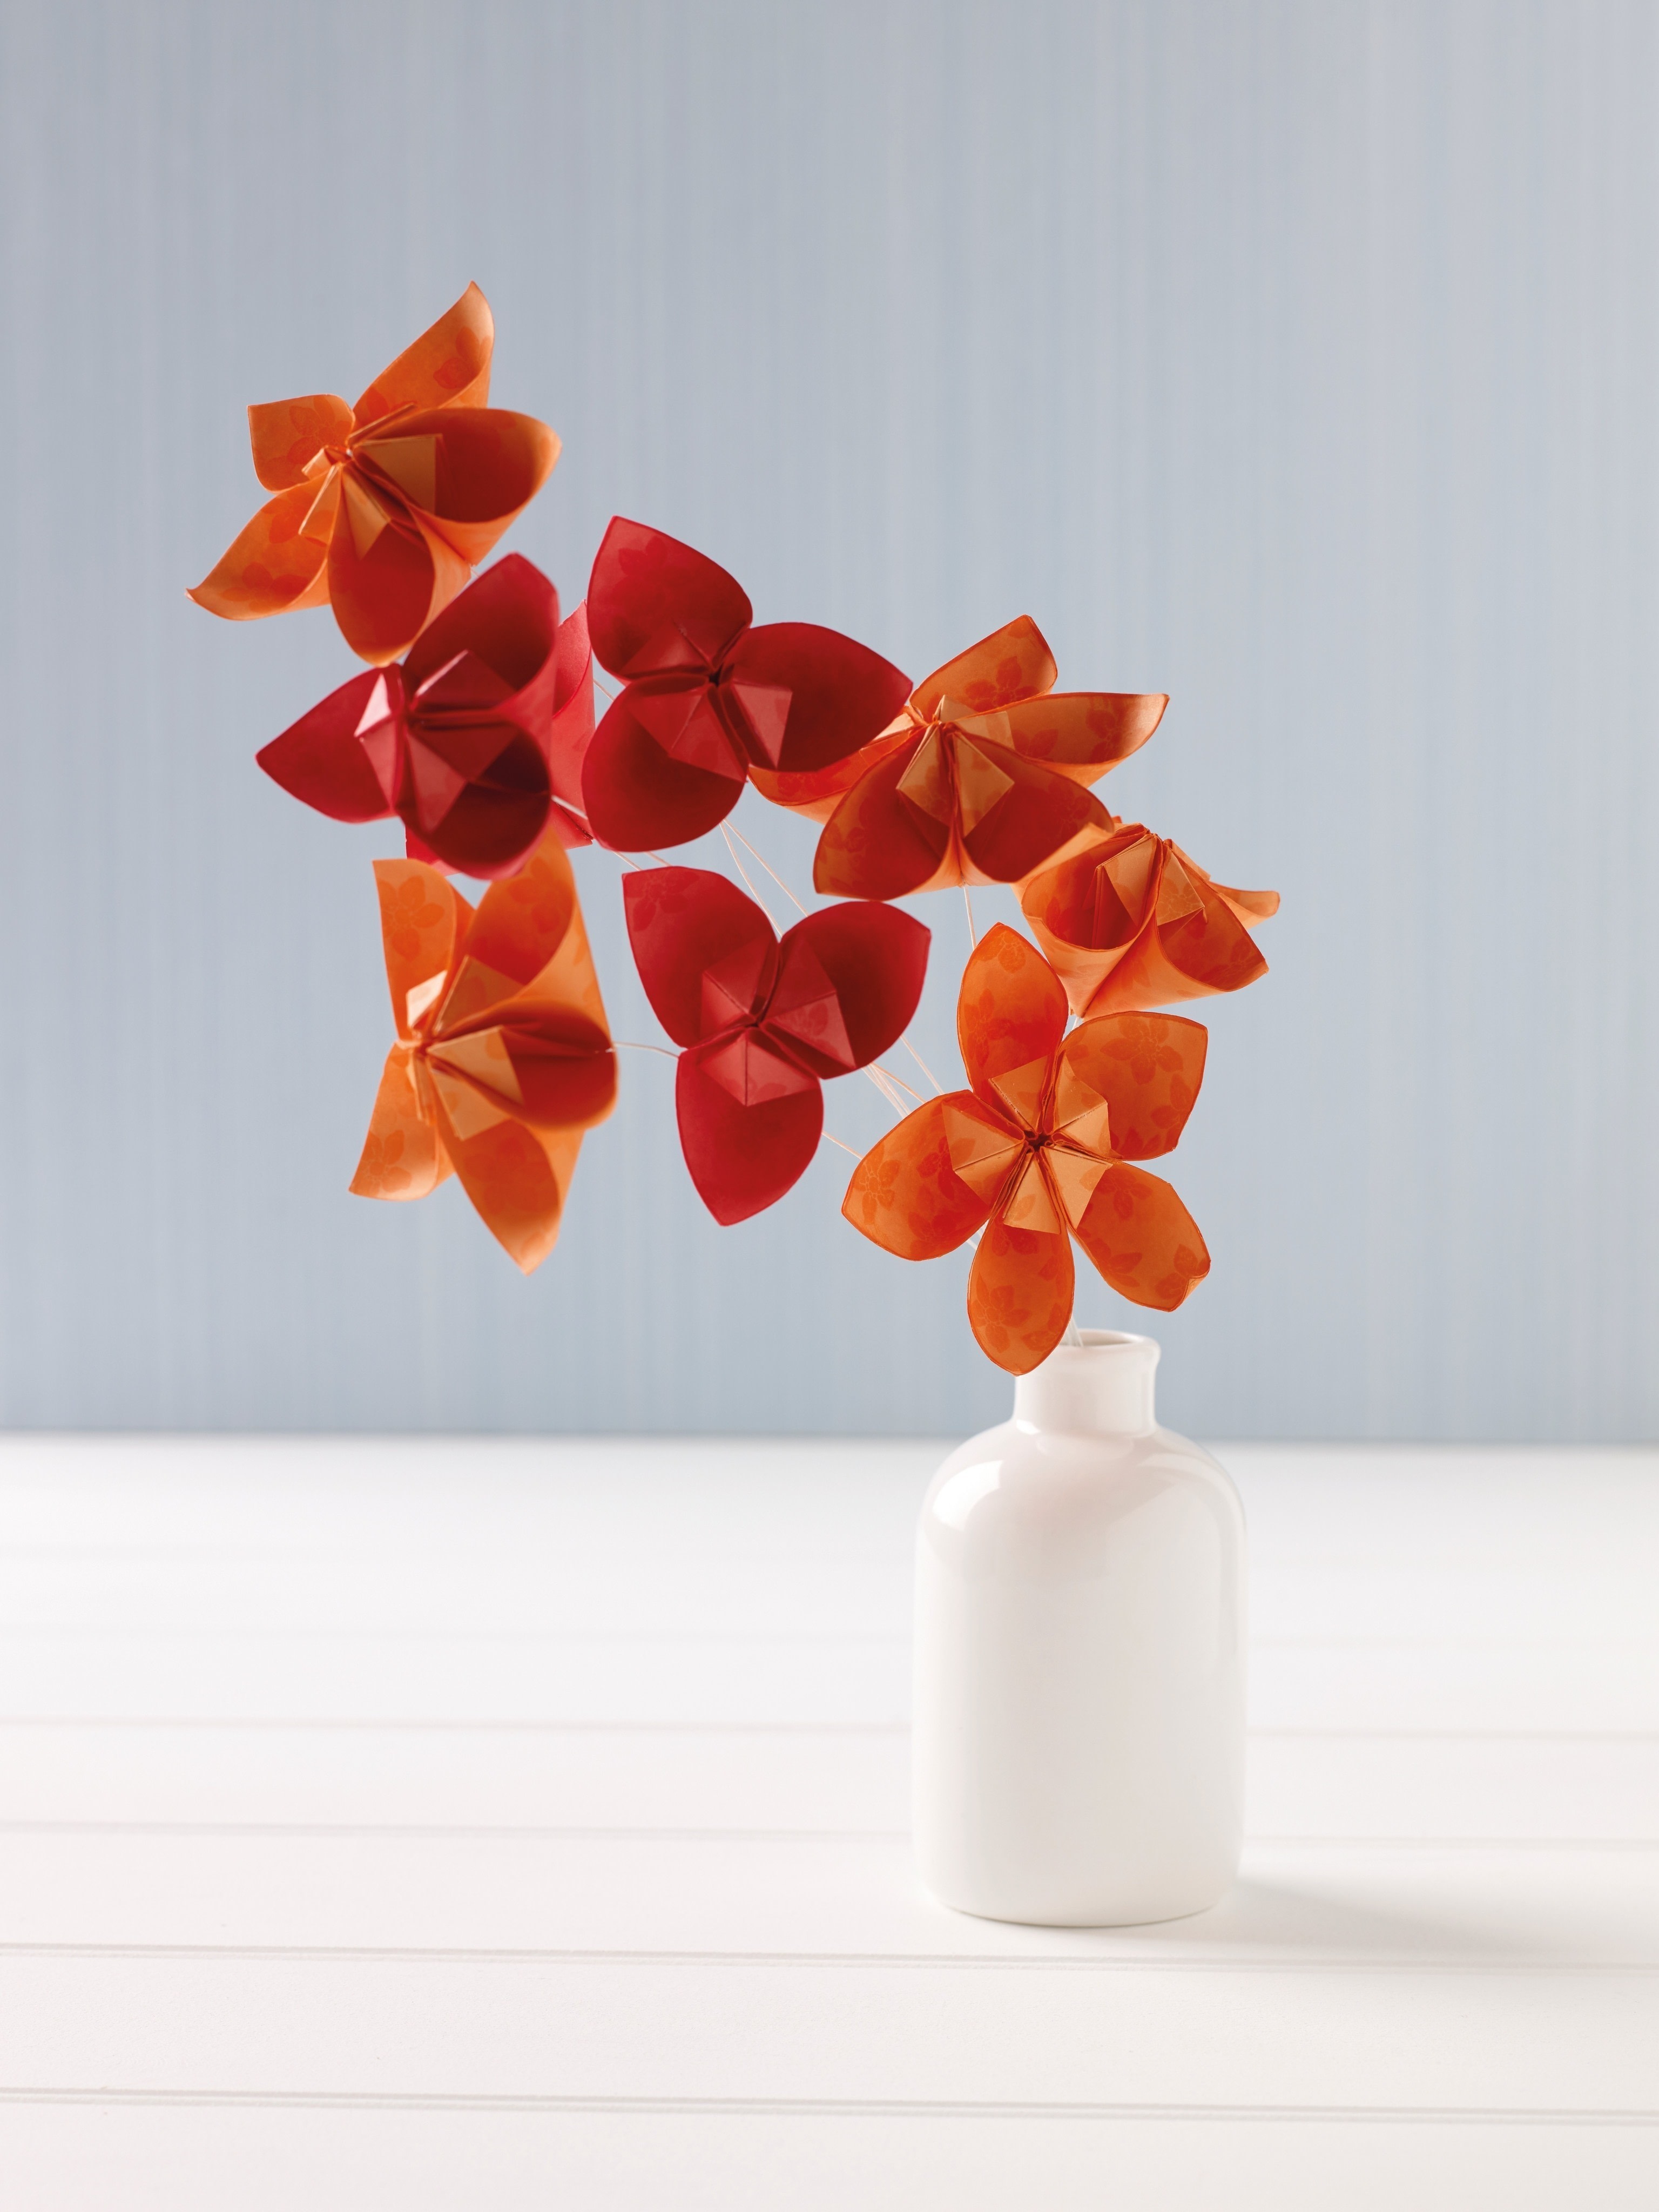


About
Paper Folded Flowers
Create these intricately folded flowers for use as a table centrepiece – they are sure to be admired.
Paper flowers are a wonderful home decoration, and by making your own you can choose colours that will harmonise with your décor. These orchid-like flowers are inspired by kusudama, Japanese origami flowers.
The number of petals can vary from flower to flower: for this project, the red flowers have three folded petals each and the orange blooms have five petals each.
Tags
© 2024 Elizabeth Moad / Search Press · Reproduced with permission.
-
 Alex Z. added Orchid Arrangement to Интересное
12 May 16:13
Alex Z. added Orchid Arrangement to Интересное
12 May 16:13
-
 earl c. favorited Orchid Arrangement
11 Jul 11:14
earl c. favorited Orchid Arrangement
11 Jul 11:14
-
Brenda A. favorited Orchid Arrangement
26 Jun 08:12
-
 Pam favorited Orchid Arrangement
14 May 06:12
Pam favorited Orchid Arrangement
14 May 06:12
-
 Search Press published her project Orchid Arrangement
08 May 09:00
Search Press published her project Orchid Arrangement
08 May 09:00
You Will Need
-
 Step 1
Cut out three squares of red paper 70mm (2¾in) each. Place these onto scrap paper. Using the floral rubber stamp and red ink, print and stamp all over the paper squares in a random pattern.
-
 Step 2
Fold each square in half, point to point, with the stamped pattern outermost.
-
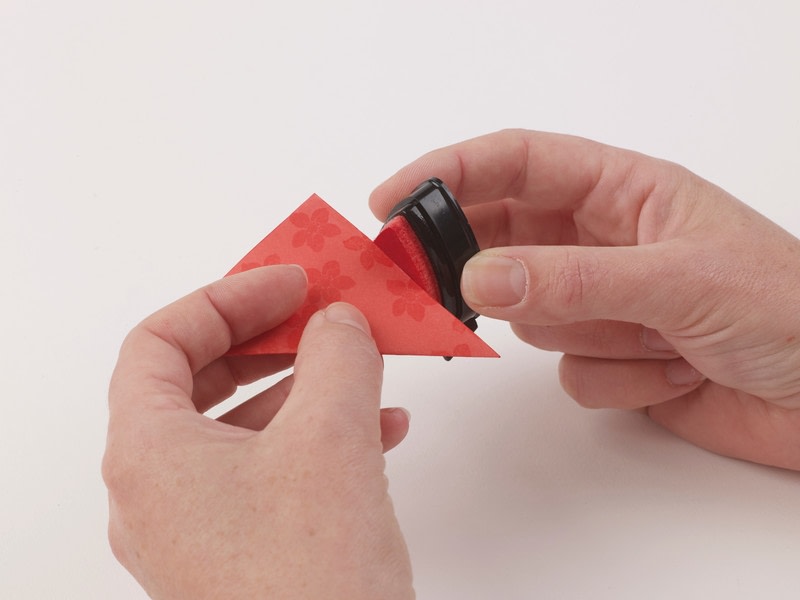
 Step 3
Run the ink pad along the open edges of the shape.
-
 Step 4
With the fold horizontal and the point at the top, fold both bottom corners upwards and in towards the top point.
-
 Step 5
Crease each fold.
-
 Step 6
Open out the two folds.
-
 Step 7
Keeping the long edge horizontal and facing you, fold the right-hand corner up to meet the crease you have just made on the right-hand side.
-
 Step 8
Do the same for the left-hand side. The two points will now extend over the outer edges of the shape.
-
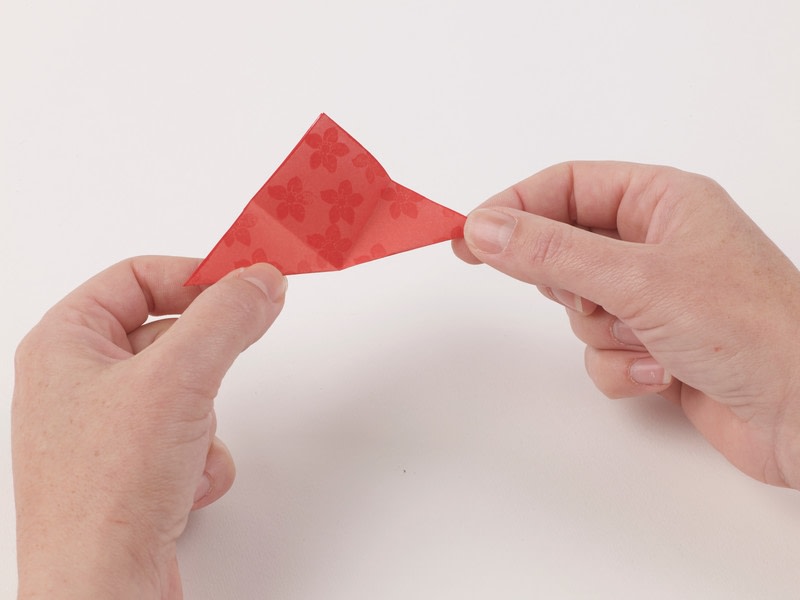
 Step 9
Gently fold the overlapping corners over the edges of the shape.
-
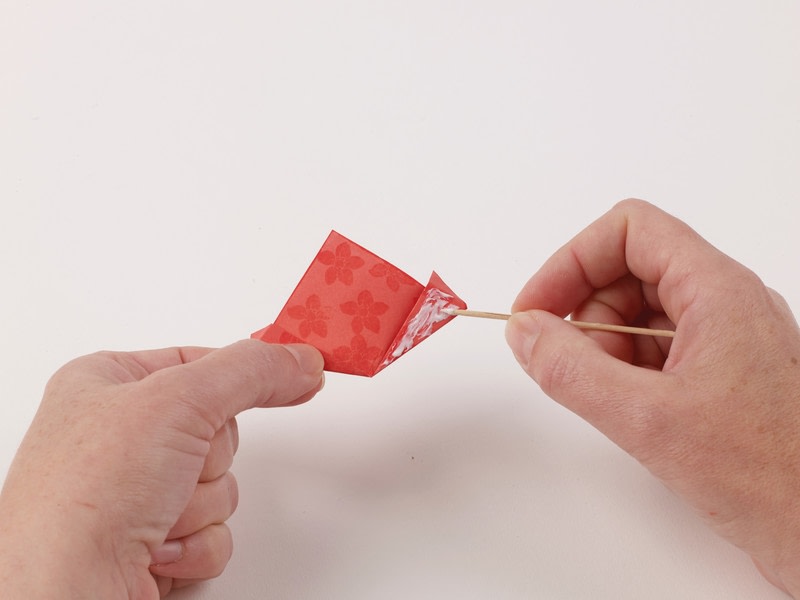
 Step 10
Using a cocktail stick, apply glue to one of the uppermost triangle folds.
-
 Step 11
Bring the other side in to meet the fold, and form a cone. Hold the sides in place whilst the glue dries. Then push down the small inner folds to create a stamen.
-
 Step 12
Repeat steps 2 to 9 to create two more red petals.
-
 Step 13
Glue the petal shapes together by the short, flat areas.
-
 Step 14
Thread a length of floristry wire through the centre of the flower. Apply a dab of strong glue to the tip of the wire, then pull it back down inside the flower so that it attaches to the flower. Be careful not to get glue on your fingers.
-
 Step 15
This completes the first flower. Make as many as you would like, to form a bouquet.
Tip
Flowers with five petals can be made in much the same way following steps 2 to 9. At step 10, five petals are glued together to make a larger flower.