


About
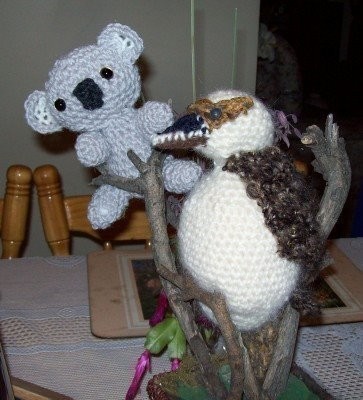
Crochet A Kookaburra
Some basic instructions, with more detailed instructions to come.
I am naming the Kookaburra, Kooka.
Tags
-
 Neko-San K. favorited Kookaburra
31 May 20:32
Neko-San K. favorited Kookaburra
31 May 20:32
-
 WerewolfCas favorited Kookaburra
28 Aug 10:15
WerewolfCas favorited Kookaburra
28 Aug 10:15
You Will Need
-
 Step 1
To begin, find a picture of what you wish to make.
-
 Step 2
Now draw your project. I can't draw for nuts, but it helped me realise what components I will need to make my kookaburra.
-
 Step 3
Knowing what parts I needed to be making, I made a selection of textures and colours from my yarn stash. I've used a 5.00mm hook and changed to a 4.00mm hook for the facial features. The yarns vary from an 8 ply to a 12 ply.
-
 Step 4
I first made the body in simple single crochet rounds with out joining the rounds and increasing, working straight, then decreasing. The body began with 8 sc and increased to 40 sc, then reversed with the decrease to 8 sc.
-
 Step 5
The head was made the same beginning with 6 sc, increasing to 24 sc and ending with 12 sc.
-
 Step 6
Any stuffing will do. If you use snap on eye's this is the best time to do it.
-
 Step 7
Then sew head to body.
-
 Step 8
I made the beak next. The yarns were a different thickness, so I used the thinner one for the top of the beak.
-
 Step 9
I then weaved thin wire into the sides of the beak, so as I could shape them better.
-
 Step 10
I deliberately used a lighter shade of yarn to sew the beak parts together, to define the top and bottom parts of the beak.
-
 Step 11
Now with the embroidery of the face, I sc the sides of the eye's across the beak and across the other eye over the top of the face (not made seperate). I then hand sewed a contrasting yarn into the gaps. I'm not an embroiderer at all, but it just passes. The eye's are small buttons.
-
 Step 12
This is the beginning of the wings.
-
 Step 13
Trying the wings for size as I go.
-
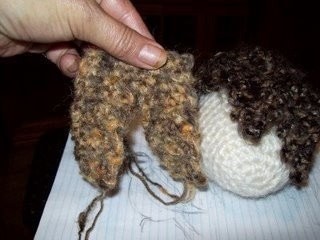
 Step 14
And the finished wings.
-
 Step 15
The Kookaburra also has a feather tail which I made last and also sewed wire into for shaping.


Comments


 1
Watercolor Art »
Watercolor Paints Made From Make Up
1
Watercolor Art »
Watercolor Paints Made From Make Up

