


About
A few projects and a few materials..
Seeing as Nobody else has put one up, I thought I'd do my best at a little knitting lesson, especially for DeLightfulfreak <3
There are tons of Tuts on the net, check out the youtube vids, they might make more sense than pics.
This is the basics, I might do a tut on ribbing and eyelets and buttonholes etc, but i think this is everything you need for my Pullip patterns :P
I'm very sorry this is so long, so here is the index!
5......Cast on
13....Knitting
18....Purling
26....Casting off
28....Decreasing
29....Increasing (knit)
31....Increasing (purl)
I learnt from a kit a few years ago, and then a couple of good techniques from books and from trial and error.
This is Written from a right-handed point of view, so Lefties can either knit like this with difficulty? or find another tut, I know there are others online, and also some good vids on youtube.
-
 Elentine favorited Knitting Tutorial
22 Dec 02:14
Elentine favorited Knitting Tutorial
22 Dec 02:14
-
 Cassandra B. favorited Knitting Tutorial
20 Nov 04:10
Cassandra B. favorited Knitting Tutorial
20 Nov 04:10
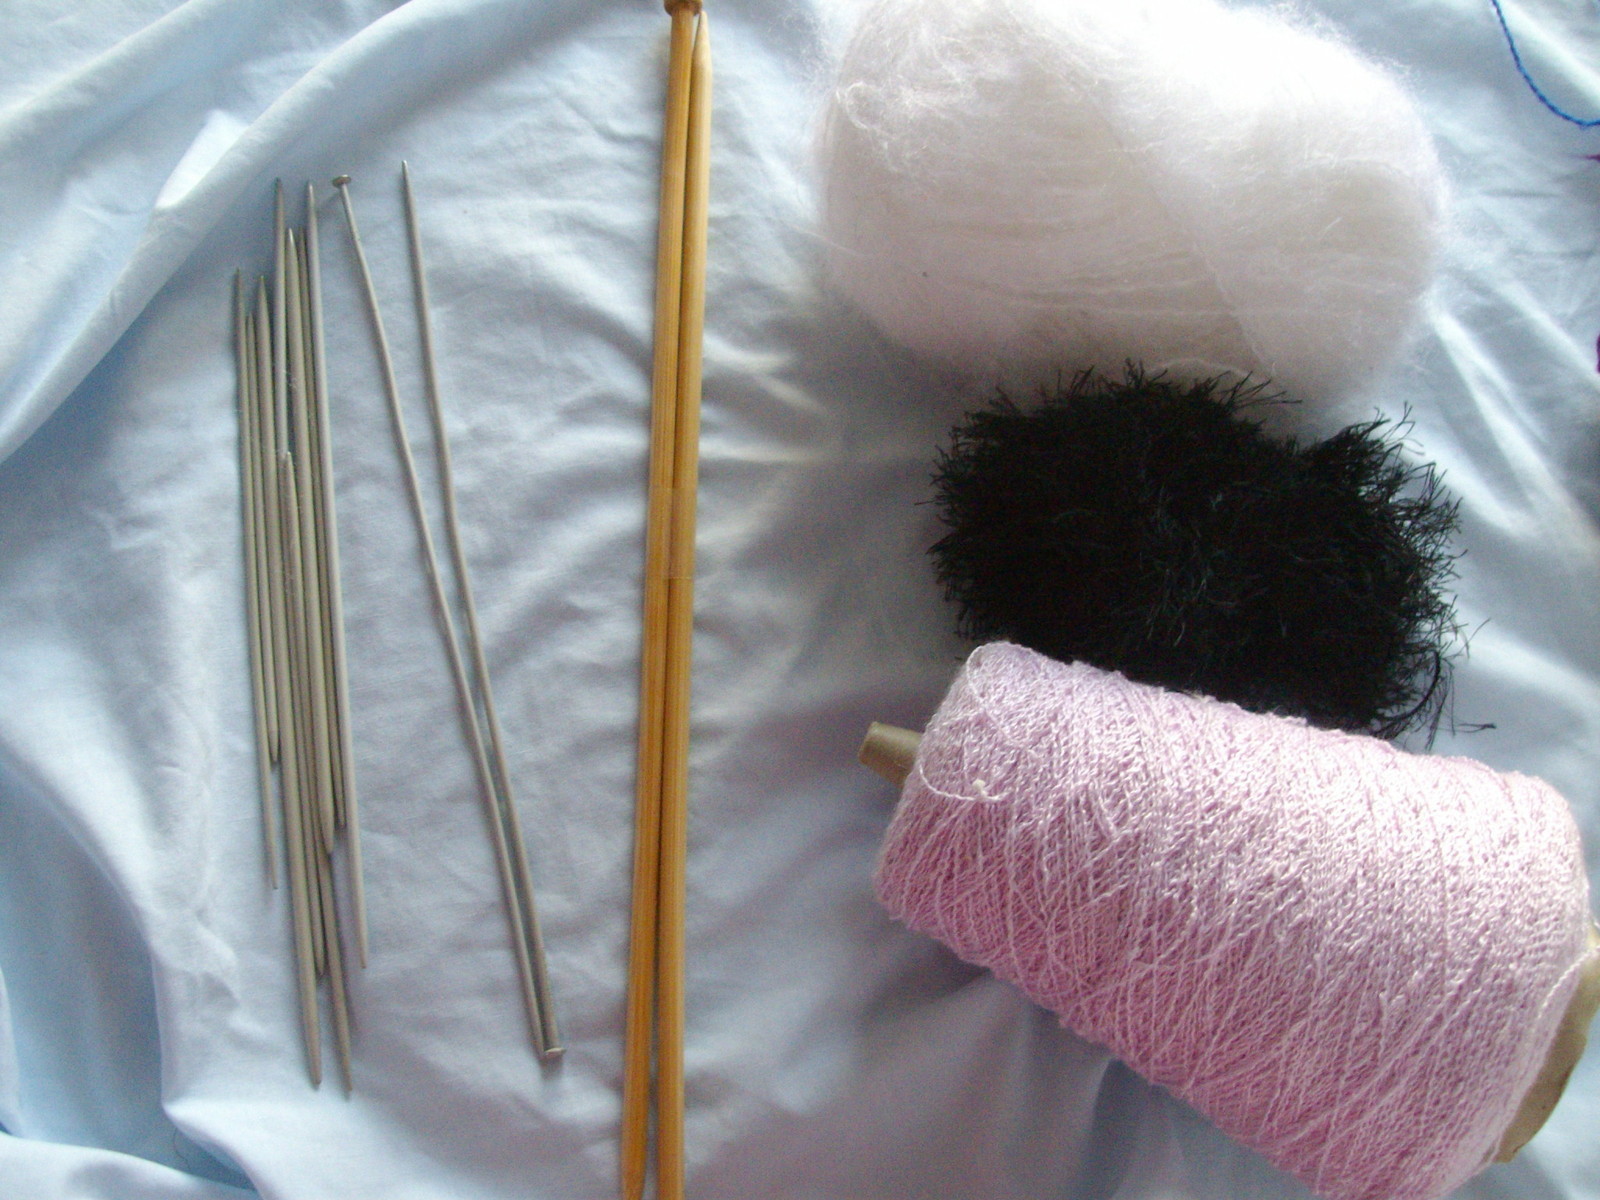
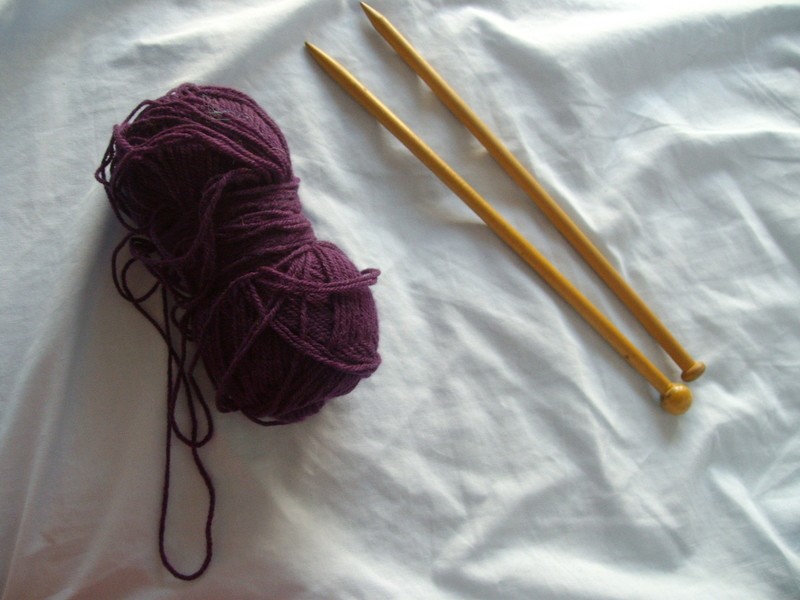
You Will Need
-
 Step 1
You really don't need much to start knitting, just a ball of yarn and a pair of needles. Charity shops often have lots of yarn very cheap, and pots of knitting needles, so don't be afraid to ask as they often keep the majority out the back. Of course, there are also highstreet shops that sell all sort of yarn, and if you know exactly what you want or need lots of matching yarn for a jumper etc they are good for that, but obv a lot more expensive.
Anyway, I recommend a plain wool and smaller needles than I have here, but not the tiniest, 5mm maybe, but whatever you are comfortable with. The plain wool will show up any mistakes so you can see where you went wrong, but as soon as you get the basic idea, and your fabric holds together use some fancy yarn thats quite furry or exotic somehow, then if you make a mistake it wont show at all and it will be pretty even if you are limited to a very basic pattern :)
Gosh, I do go off on one dont I? sorry, I'll try and be briefer :P
-
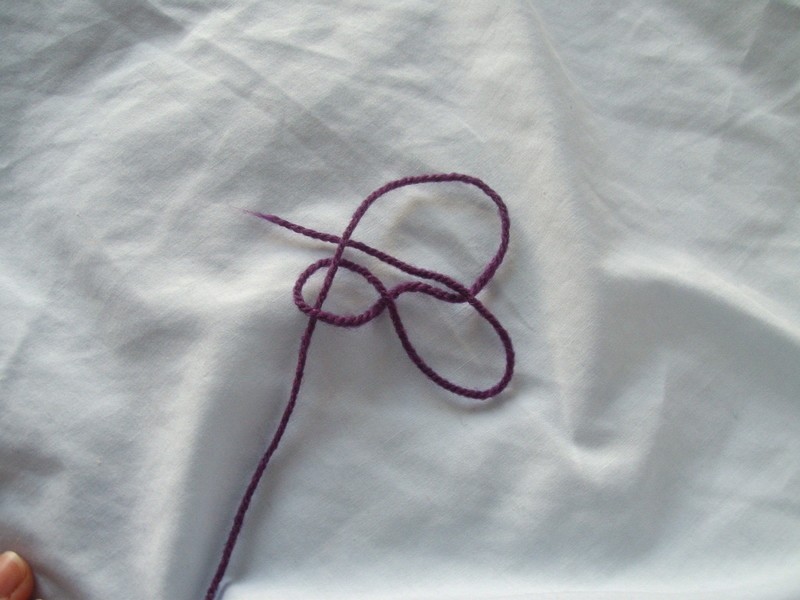
 Step 2
Right, if you can tie this knot then skip to 5, this is a guide to the initial knot: make a loop like that <-
-
 Step 3
Pull a loop through the loop like that <-
It doesn't matter which way you do this, officially I think I've done this backwards, but it really doesnt matter. -
 Step 4
Pull it tight. You should have a loop that you can make tighter and looser.
-
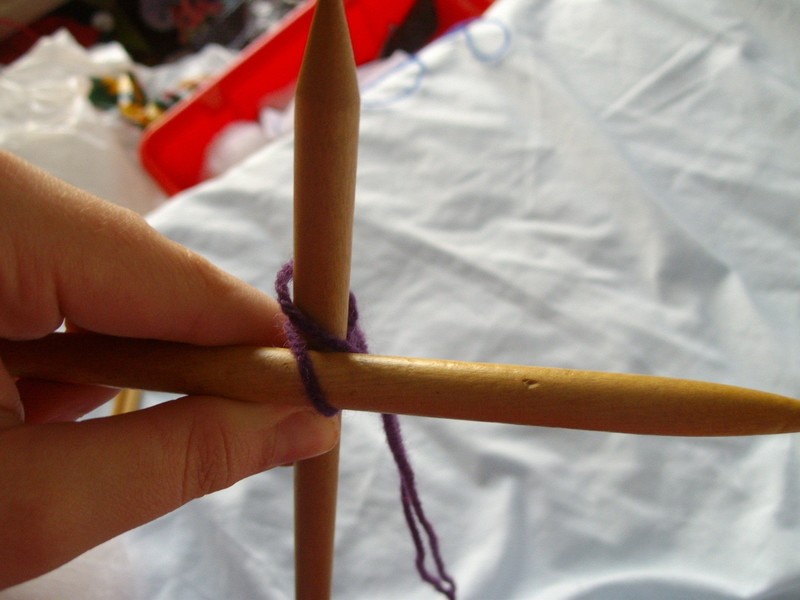
 Step 5
Slip it over a needle and tighten it.
Now you can start to cast on. -
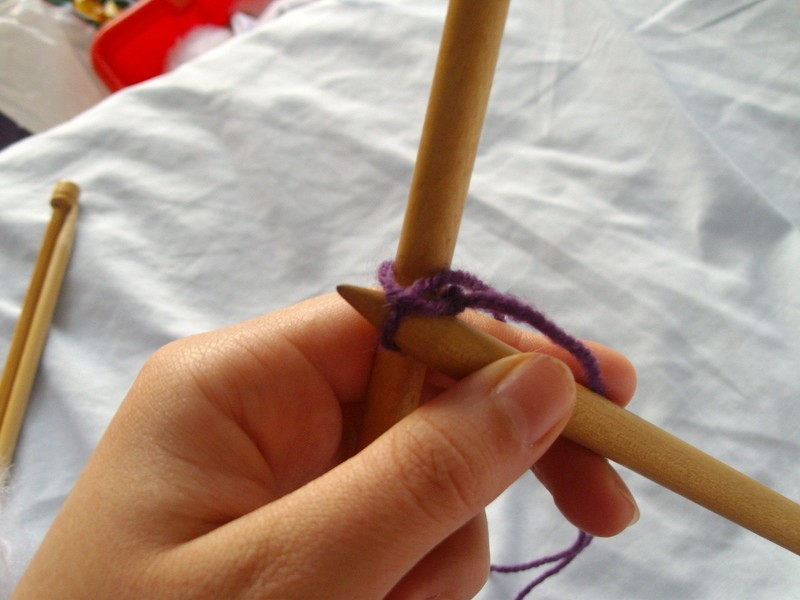
 Step 6
Push the other needle through the loop like that, from the bottom at the back. This will obv loosen the knot again a little.
-
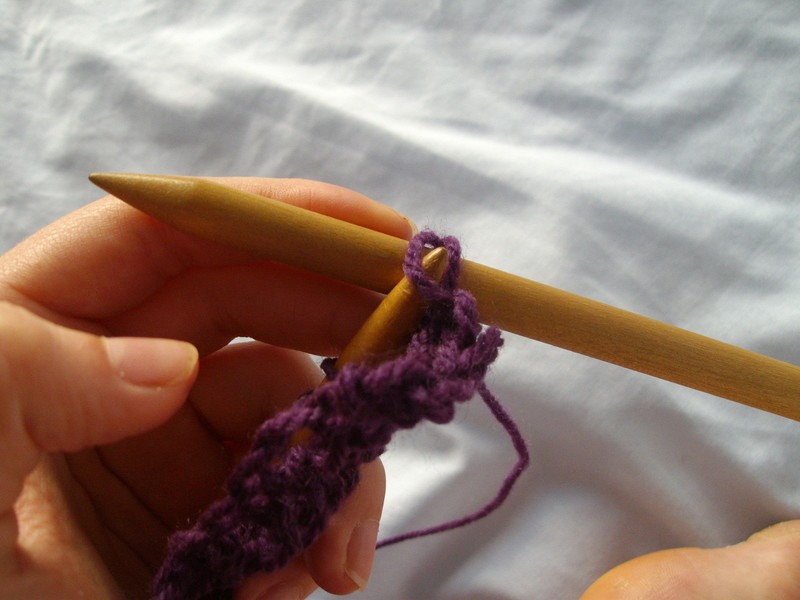
 Step 7
Take the yarn (you can see two tails hanging from the work here, one is from the knot, ignore that from now on, it is excessively long and i would probable cut it or weave it in usually. The yarn refers to the wool that is still connected to the ball) and wrap it around the back of the right hand needle and between the two.
-
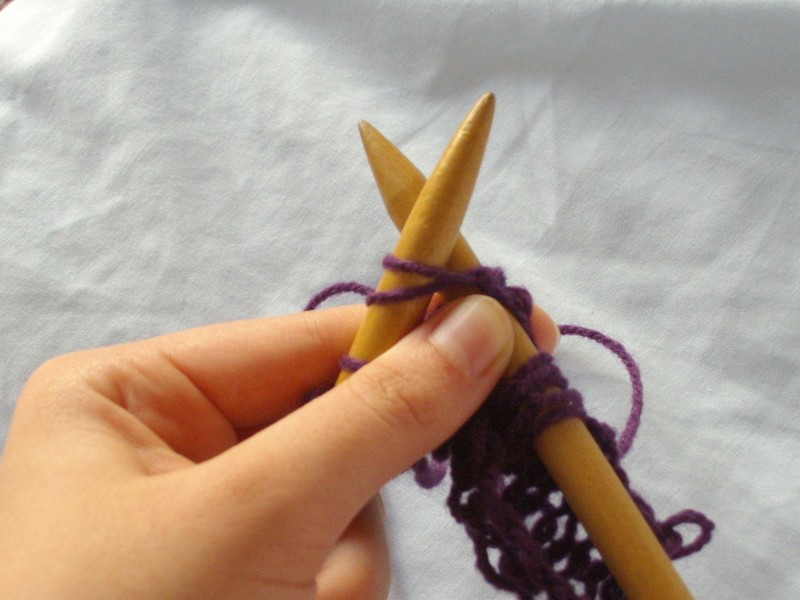
 Step 8
Right, this picture is deceptive. It would be easier with different coloured needles, but trust me, th vertical needle in the picture above is the right hand needle (RHN), here it is the left hand needle (LHN).
You put the point of the RHN against the side of the LHN and slide the yarn that is between them across into a loop. If you lose the connection the yarn can escape between them and you will have to go back to step 6.
-
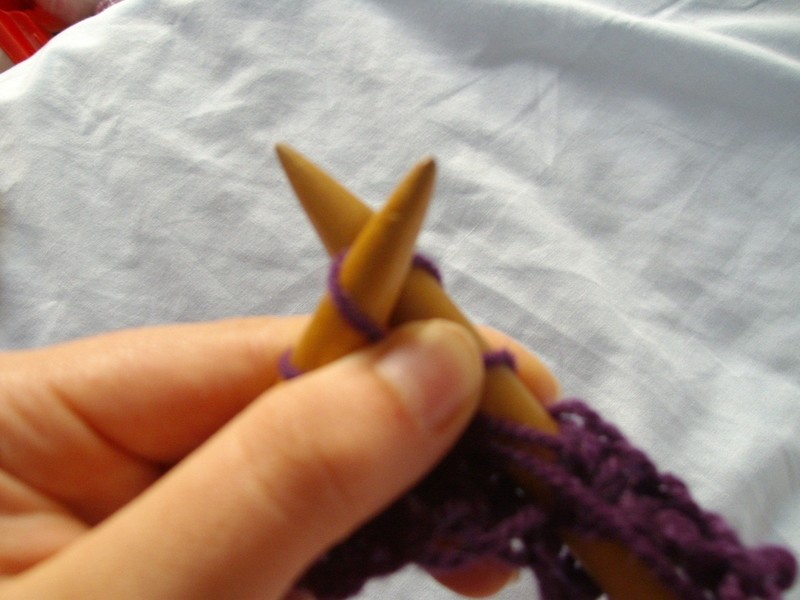
 Step 9
Put the LHN through the new loop on the RHN, from the top at the back, and then remove the RHN.
-
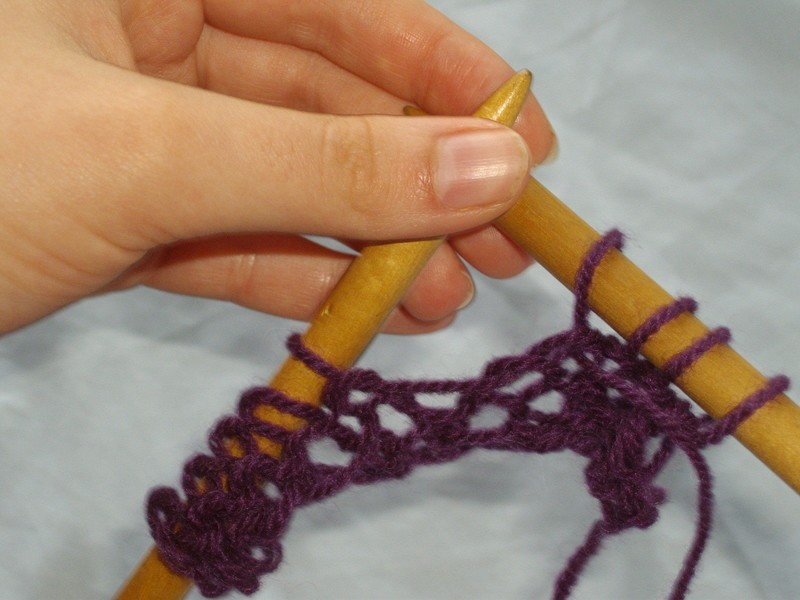
 Step 10
You should now have two loops on the LHN.
-
 Step 11
Repeat from step 6 in the new loop: push the RHN through from the bottom to the back, yarn around the back and down between, bring the RHN to the front with the yarn on it, move the new loop across and start again..
-
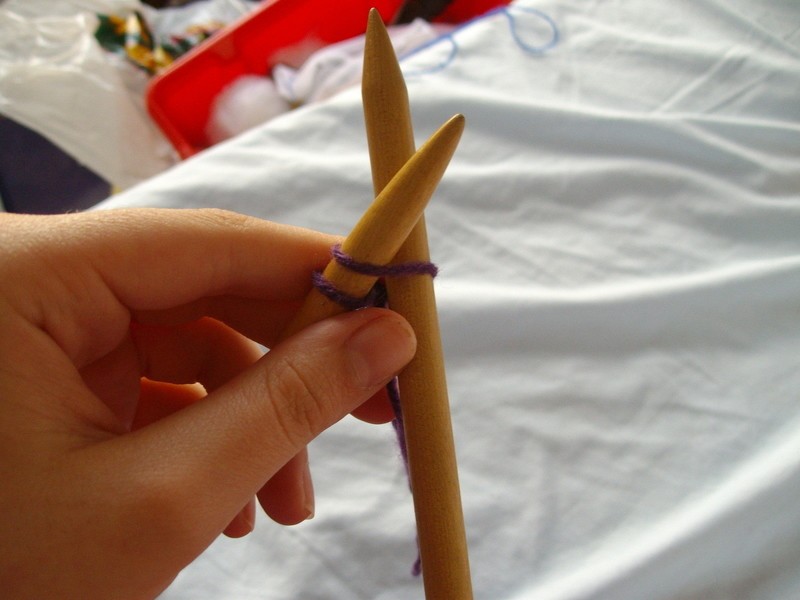
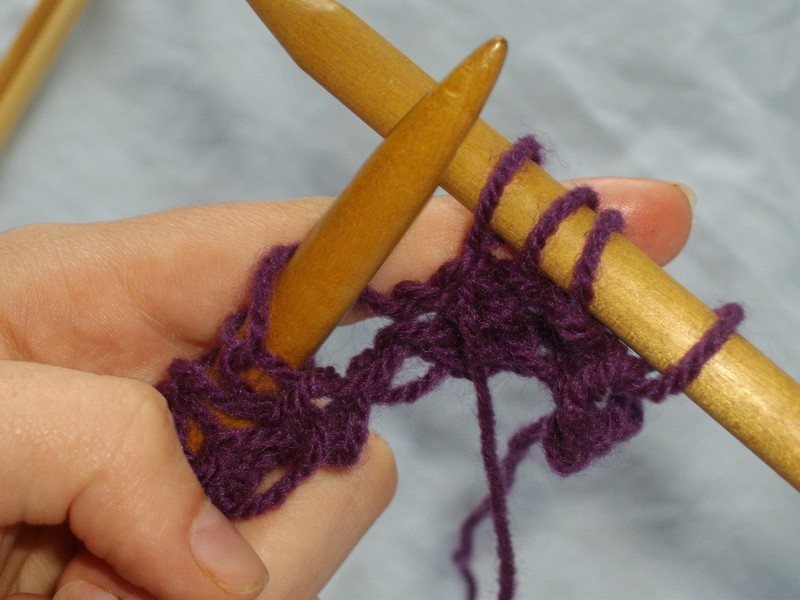
 Step 12
once you have cast on however many stiches, here there are 9, you cant start knitting.
-
 Step 13
Start as if you were starting another cast on stitch, from the bottom to the back..
-
 Step 14
..take the yarn around the back and down between..
-
 Step 15
a clearer view of step 14
-
 Step 16
.. bring it through..
-
 Step 17
BUT DON'T SLIP IT ACROSS!!
instead of moving the new stitch to the LHN, leave it on the RHN and slip the stitch you started with, the one you pushed the RHN through, off the LHN (be careful not to pull any other stiches off with it), then start a new stitch, going from the bottom to the back.. -
 Step 18
After a row of knitting you can start to purl. You don't have to, and if you are using a fancy yarn that obsures the stitches you can knit every row. This is called garter stitch.
A purl stitch starts by pushing the needle from the _top_ in front.
-
 Step 19
The yarn comes from the front, and goes between the needles towards the back and around the RHN
-
 Step 20
Slip the RHN to the back, taking the loop with it that way
-
 Step 21
Slip the starting stitch off the needles.
-
 Step 22
this is the 'wrong side' of the work after a few rows of knitting and purling alternate rows (stockinette stitch)
-
 Step 23
Right side of the stockinette stitch.
the needles are too big for the yarn for a traditional fabric.. -
 Step 24
this is the right side of a more traditional balance of needle and yarn, with distinctive V shapes
-
 Step 25
..And the wrong side
These two pics are what your firat attempt should look like, roughly.
although i say 'wrong side', you can use this.
Garter stitch looks like this but a little looser. -
 Step 26
when you have finished knitting you need to cast off
to cast off: knit two stitches, then slip the first stitch over the second stitch and off the needle. Knit another stitch so the second stitch becomes the first stitch which you slip over the new stitch. -
 Step 27
you don't have to cast off the entire row, but if you do, when you have only one stitch left on the RHN cut the yarn and hold the work and pull the end through by pulling the RHN away, so it makes a knot.
-
 Step 28
I know this is getting crazy long, but just a couple more, increasing and decreasing.
Decreasing is easy: knit (or purl) two stitched together, as if they were one stitch. -
 Step 29
Increasing (knit)
This is quite complicated, so don't be discouraged if it takes you a few goes.
Make a stitch, but dont slip the starting stitch off the LHN, instead put the RHN through from the top at the back. -
 Step 30
Wrap the yarn around the back and down the middle, and bring the RHN to the front, through the hole..
<- here, the big one
-
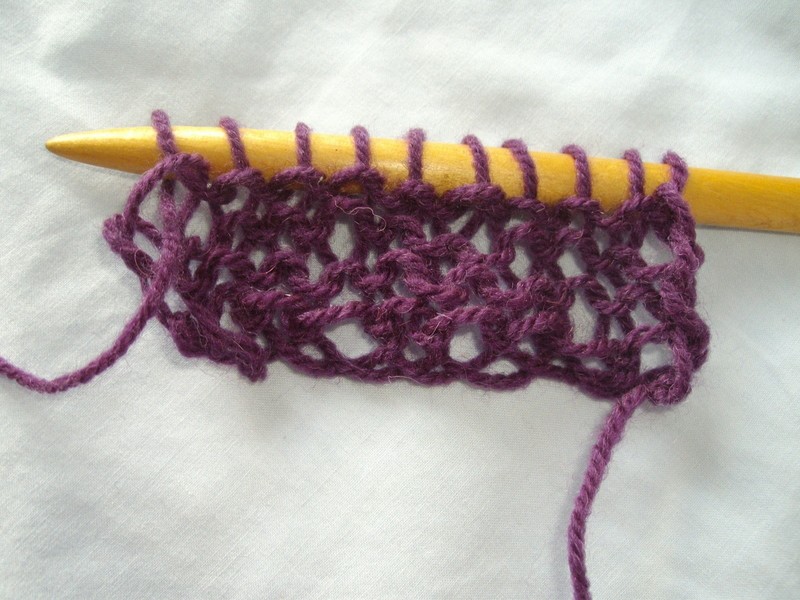
 Step 31
Increaseing (purl)
there is a little hole that looks like a soup bowl in the middle here....____
<- \__/ -
 Step 32
Stich the LHN through this hole from the back.
-
 Step 33
..and then treat it like a normal purl stitch with the RHN, coming from the top infront and bringing the yarn around. it may feel a little tight, but thats normal.
-
 Step 34
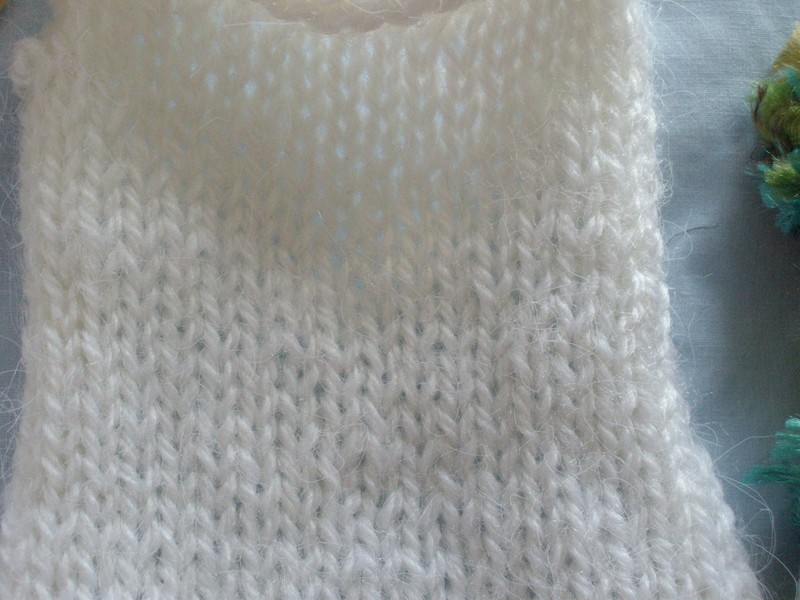
The scarf on the right is a good project for a begginer, as the furry yarn disgiuses any mistakes, and you dont need to increase/decrease at all.
The hat is to the pullip hat design, with knitted flowers. the thin long scarf is 6 stitches wide stockinette, with a fancy yarn wraped around and sewn in. the white was the start of a mitten, but shows the contrast between the wrond side and the right side of the stockinette stitch. -
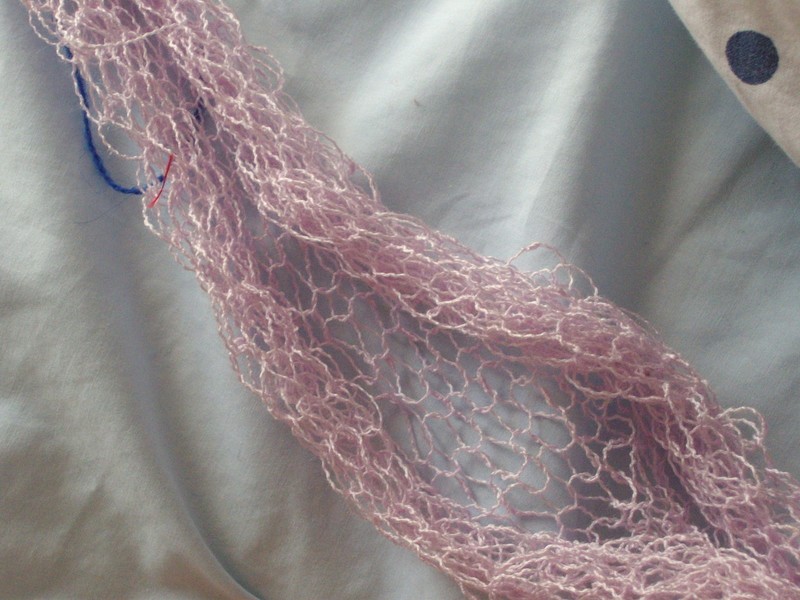
 Step 35
this is a quite thin yarn on my biggest needle, which makes a pretty scarf
-
 Step 36
this is a beautiful fabric, which is made with a very thin yarn with normal sized needles. its beautiful, but takes forever to make..


 1
Watercolor Art »
Watercolor Paints Made From Make Up
1
Watercolor Art »
Watercolor Paints Made From Make Up

It'll take some and practice for me to learn but I'll keep trying ^^
Knitting is easy, once you know how.
Trust me