


About
I always LOVE food!!
This is the first tutorial cake box I have make..
Basically,, it's always the same ways if you want to make another type or shape of cake box..
This tutorial are the basic things you have learn to make your own cake box..
Have fun!!!
Tags
Downloads
-
 Kinhime Dragon favorited Kawaii Mini Cake Box
30 May 12:36
Kinhime Dragon favorited Kawaii Mini Cake Box
30 May 12:36
-
 Liza W. added Kawaii Mini Cake Box to Plushie Ideas
14 Dec 14:51
Liza W. added Kawaii Mini Cake Box to Plushie Ideas
14 Dec 14:51
-
 olivoyle favorited Kawaii Mini Cake Box
29 May 11:10
olivoyle favorited Kawaii Mini Cake Box
29 May 11:10
-
 Xfluffy_unitatoX favorited Kawaii Mini Cake Box
17 Nov 23:23
Xfluffy_unitatoX favorited Kawaii Mini Cake Box
17 Nov 23:23
-
Barbara M. favorited Kawaii Mini Cake Box
16 Sep 04:29
-
Roxy R. favorited Kawaii Mini Cake Box
12 Sep 11:13
-
 PunkyFunk added Kawaii Mini Cake Box to DIY the Room
22 Jun 21:08
PunkyFunk added Kawaii Mini Cake Box to DIY the Room
22 Jun 21:08
-
 lilxpanda added Kawaii Mini Cake Box to To-make list
19 Apr 01:18
lilxpanda added Kawaii Mini Cake Box to To-make list
19 Apr 01:18
-
 Karen C. favorited Kawaii Mini Cake Box
04 Jan 11:01
Karen C. favorited Kawaii Mini Cake Box
04 Jan 11:01
-
 Jennifer J. added Kawaii Mini Cake Box to What I want to make
10 Dec 20:01
Jennifer J. added Kawaii Mini Cake Box to What I want to make
10 Dec 20:01
You Will Need
-
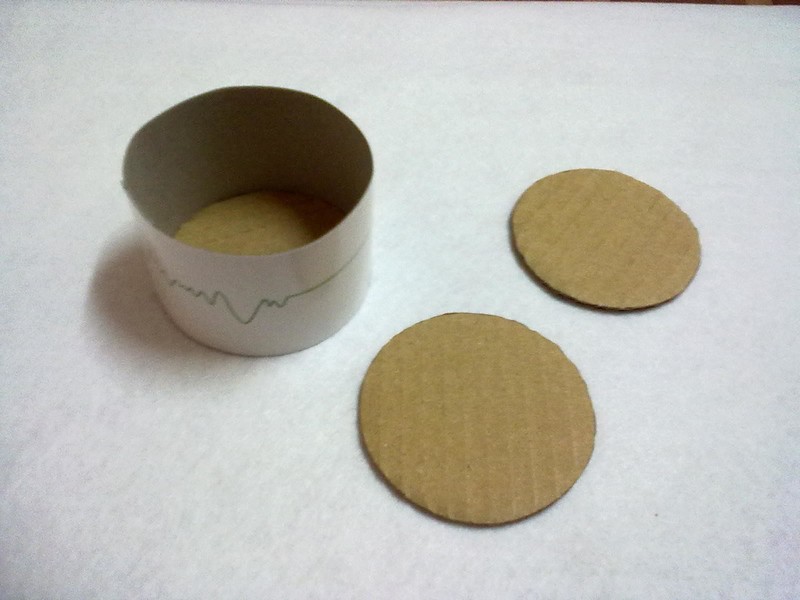
 Step 1
You will need a box.. It's depend what shape do you want to use..
If you see, the round shape has 2 size,, that for the lid.
-
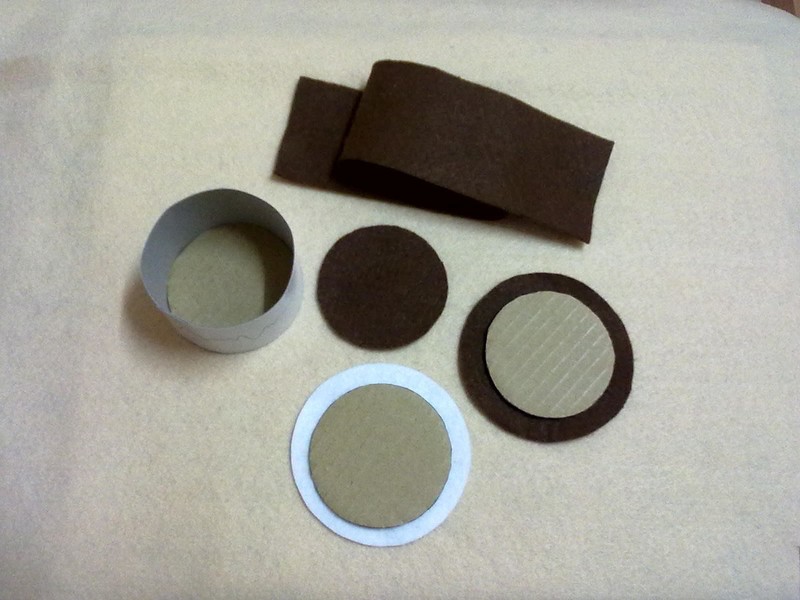
 Step 2
Cut the felt into the size of your box..
I use a dark brown felt for the box, and a white felt for the lid (for the bigger one, for a small lid, I also use a dark brown felt.)For the lid, you have to cut it a bit large than their size.
-
 Step 3
Glue the felt onto the lid.. You have to cut it a little bit so that you can flip it.
Same with the other lid.
-
 Step 4
The lid from the back view.
-
 Step 5
The lid from the front view.
-
 Step 6
Put a glue around the back lid. Just for a one side of lid only.
-
 Step 7
Glue it together. Make sure the small lid are place center to the big lid.
Press it a while to make it stick together.
-
 Step 8
Now, for the box..
Take the felt, sew together the bottom and the side part.
You can use blanket stitch.
Don't forget to use a same colour string with the felt. -
 Step 9
Sew the end together.
-
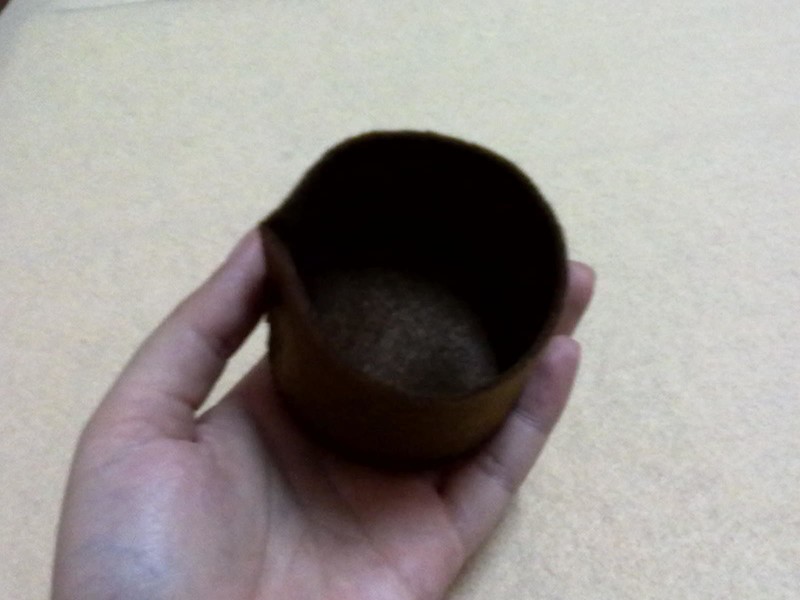
 Step 10
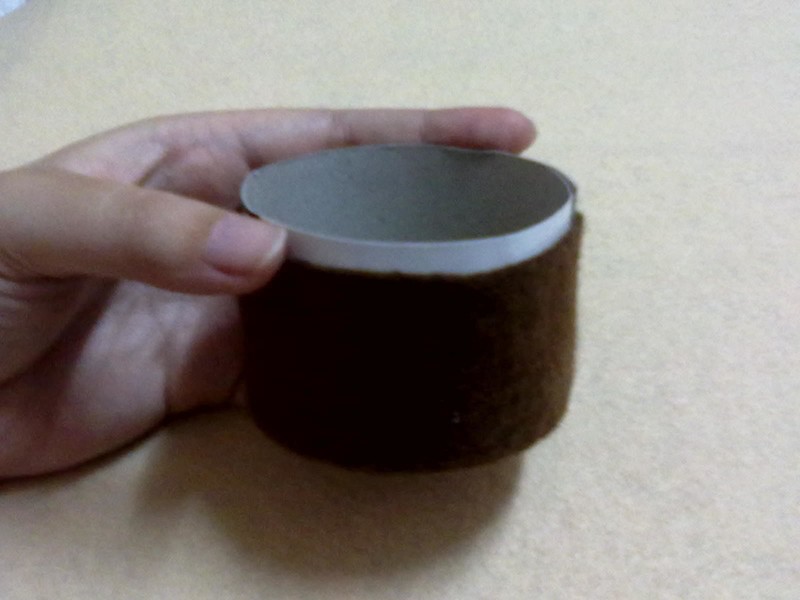
You will get this shape.
-
 Step 11
Fit in the box into that felt.
Don't worry if the felt not cover the whole box. -
 Step 12
Cut a white felt into a curly shape.
This will be a melting cream for this cake box. -
 Step 13
Glue it around the box.
You have to glue that white felt a bit higher than the box, so that you can flip the balance part of felt into the box. -
 Step 14
Take the lid, and try to put it together with the box. The dark brown lid are place inside the box.
-
 Step 15
Take a small white ribbon and glue it around at the bottom part of box.
-
 Step 16
Make a cute little eyes, blusher and a smiley shape.
You can choose your own expressions. -
 Step 17
Glue all of that into the box.
-
 Step 18
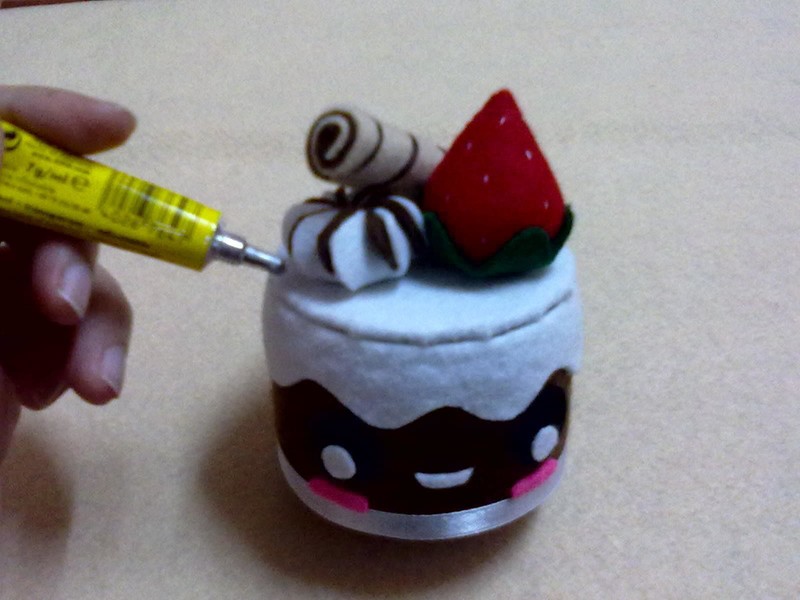
For decoration,, I put a strawberry, Swirl Biscuit, and a Swirl Cream.
Glue it together.You can find the tutorial here:
http://songahin.deviantart.com/gallery/30665168#/d3ixk2b -
 Step 19
You can put a small things in that box.
Or you can make it bigger..
It's all depend on your own creativities..(^,^)v -
 Step 20
Good Luck!!!
* Sorry for my bad English, hope you guys understand..


Versions


Comments


 1
Watercolor Art »
Watercolor Paints Made From Make Up
1
Watercolor Art »
Watercolor Paints Made From Make Up
 2
Paper Book Covers »
Shoe Inspired Spiral Notebook
2
Paper Book Covers »
Shoe Inspired Spiral Notebook
