

About
With this tutorial, you will learn to create a DIY greetings card with a twist
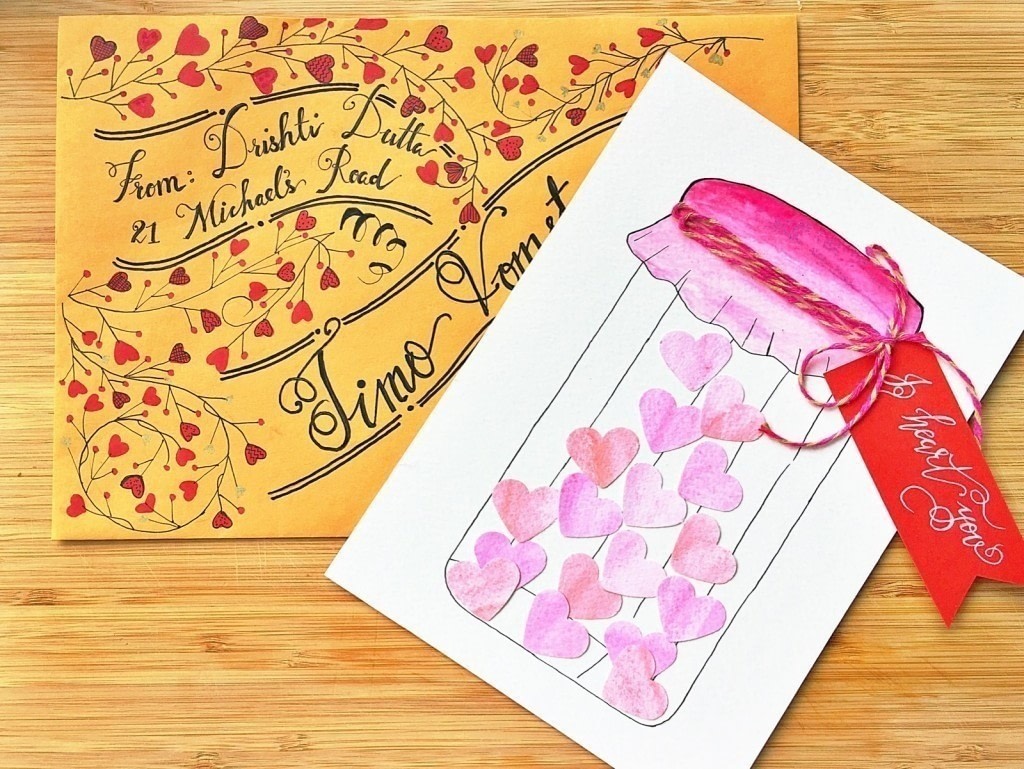
If your handmade card endeavours are dying out of ideas , this is just the post to revive them! In it, you will learn to create this appealing DIY greetings card for your beloved. Whether your preference is simple lettering, watercolor illustration or craft, this post has it all for you.
Tags
Downloads
- 114243_2F2016-05-12-192452-square2.jpg 259 KB [ Download ]
-
 Kimya J. favorited Jar Of Hearts Handmade Card Tutorial
14 Mar 00:20
Kimya J. favorited Jar Of Hearts Handmade Card Tutorial
14 Mar 00:20
-
 RareJewel favorited Jar Of Hearts Handmade Card Tutorial
10 Feb 10:04
RareJewel favorited Jar Of Hearts Handmade Card Tutorial
10 Feb 10:04
-
 Annelie S. favorited Jar Of Hearts Handmade Card Tutorial
22 Jan 16:31
Annelie S. favorited Jar Of Hearts Handmade Card Tutorial
22 Jan 16:31
-
 Emma H. favorited Jar Of Hearts Handmade Card Tutorial
04 Jun 20:26
Emma H. favorited Jar Of Hearts Handmade Card Tutorial
04 Jun 20:26
-
 PineconePrincess favorited Jar Of Hearts Handmade Card Tutorial
28 May 22:53
PineconePrincess favorited Jar Of Hearts Handmade Card Tutorial
28 May 22:53
-
 Drishti D. published her project Jar Of Hearts Handmade Card Tutorial
28 May 09:00
Drishti D. published her project Jar Of Hearts Handmade Card Tutorial
28 May 09:00
-
 Step 1
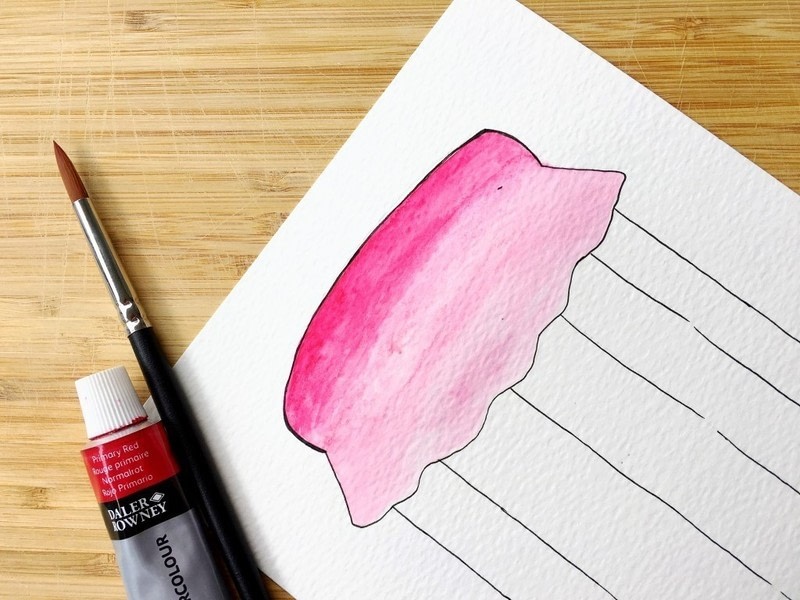
Draw the outline of the jar as shown with a pencil.Next trace the outline with a pen. You can feel free to use dip pens or regular micron pens.
-
 Step 2
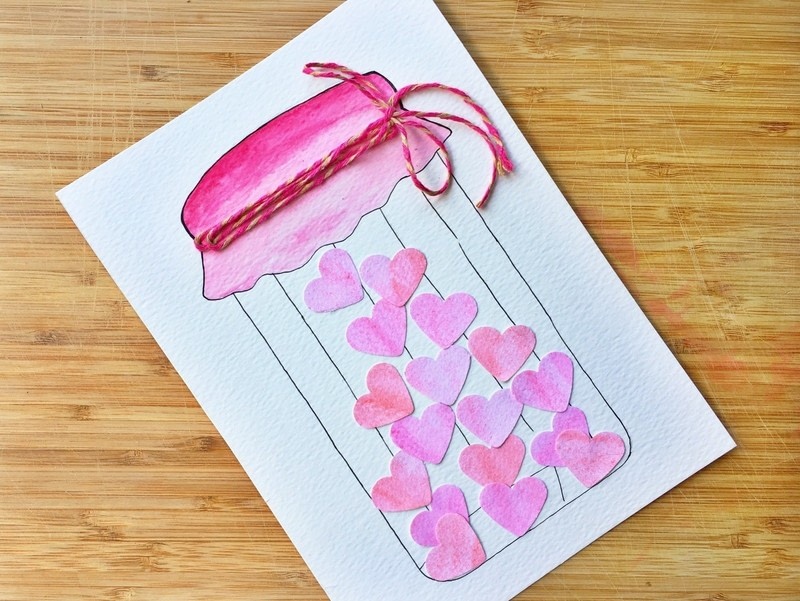
To fill color onto the fabric cover of the jar go over with a wet flat brush with lots of color on the topmost section of your object. This is where you want the color to appear the darkest. The idea is to thin out the paint as you go downwards. You can add a little more water with each horizontal stroke as you go downwards until you get the lightest shade. The finished ombre effect will look like this.
-
 Step 3
Use a new watercolor cardstock paper create the same ombre effect this time with two colors. Start using both the colors from opposite direction and spread it towards each other until you reach the center and can see both the colors blend in at their lightest shades creating a lovely ombre effect.
-
 Step 4
Use a heart puncher to punch out ombre colored hearts for your jar and paste them using a glue stick on the body of the jar.
-
 Step 5
Create a realistic touch your card further by adding a baker’s twine around the fabric cover section and tie a tiny knot. Glue it to paper by folding it once as shown.
-
 Step 6
Cut out a section from red cardstock of dimensions 8X3 cm to write your personalised note using White ink pen with faux calligraphy. Glue the tag onto the jar.
-
 Step 7
And voila! An easy DIY handmade card is ready that is sure to delight.


 1
Watercolor Art »
Watercolor Paints Made From Make Up
1
Watercolor Art »
Watercolor Paints Made From Make Up
 2
Paper Book Covers »
Shoe Inspired Spiral Notebook
2
Paper Book Covers »
Shoe Inspired Spiral Notebook

