


About
Drawing the Details: Hair
The difficulty people often face when sketching
hair is that there is simply too much information.
It is impossible to draw every hair, and yet, how
else do you convey the texture and flow? How
do you get across the delicate, formless quality
and not end up with something that looks more
like a helmet?
There are so many different hair types – and different
ways of styling it – that every case has to be dealt with on
an individual basis. However, there are ways to simplify
what’s happening and various techniques for depicting
texture and body.
Things to Remember
Sketch the overall shape of the hairstyle rather than
individual strands of hair.
Let your mark-making follow the direction of flow and
describe the texture of the hair.
Less is more: there will be areas of light and shade.
Sometimes, it’s enough to pick these out.
Don’t forget the head shape beneath the hair. However
‘big’ the style, keeping the head in mind gives you form
and symmetry.
-
 Amanda P. added How To Draw Hair to Drawing Tutorials
17 Jun 21:58
Amanda P. added How To Draw Hair to Drawing Tutorials
17 Jun 21:58
-
 Miss Captain Cosplay favorited How To Draw Hair
20 Apr 00:19
Miss Captain Cosplay favorited How To Draw Hair
20 Apr 00:19
-
 Carla B. favorited How To Draw Hair
02 Apr 01:01
Carla B. favorited How To Draw Hair
02 Apr 01:01
-
 Crafterella featured How To Draw Hair
29 Mar 23:00
Crafterella featured How To Draw Hair
29 Mar 23:00
-
 Emma H. favorited How To Draw Hair
28 Mar 21:48
Emma H. favorited How To Draw Hair
28 Mar 21:48
-
 Chudames favorited How To Draw Hair
27 Mar 22:20
Chudames favorited How To Draw Hair
27 Mar 22:20
-
Alissa B. favorited How To Draw Hair
24 Mar 21:25
-
Lex R. favorited How To Draw Hair
23 Mar 18:35
-
 Search Press published her project How To Draw Hair
23 Mar 09:00
Search Press published her project How To Draw Hair
23 Mar 09:00
You Will Need
-
Step 1
SKETCHER’s corner seeing it
1 Look for the overall shape of
straight hair, which flows out and
down from a central point on the
parting line. 2 ‘Choppy’ hair is a
mass of curves, but it is not totally
random: sections of hair will flow in
the same direction. 3 Natural
African-American hair has a curly texture that does not flow; it is far
more sculptural. 4 The ‘flow lines’
in the linked sections of a plait
travel in alternate directions. -
 Step 2
First marks to tonal sketch
1 When drawing hair that goes in lots of directions, you
need to build up a sketch, picking out the various shapes
and flow lines. -
 Step 3
2 Hair is made up of lots of subtly
different shades. It’s better to create the impression of
brown: I have used tan and olive pencils alongside one
another, with navy for areas where there is more shadow. -
 Step 4
3 Blend the watercolour pencils with a waterbrush. This
will begin to give the sketch body.4 Make sure that the
brush marks also follow the flow lines of the hair. It’s
good to leave some white paper highlights where the
hair is lightest, even if, in truth, it is a paler brown rather
than white. -
 Step 5
Shading to Give Form
A bob needs to be viewed as an overall shape,
but the watercolour marks still follow the
direction of hair flow. The build-up of shadow
along the bottom lifts and rounds the bob. Note
the touches of green and purple to gently
dampen the yellows and oranges.
Watercolour, rainbow pencil -
 Step 6
Hair Direction
This long hair was curly and wayward despite
the ponytail. Too many lines would have quickly
become a mess, so I drew only those that
described a change of hair direction. The dark
shadows against her back, at the nape of her
neck and at the hair tie act as a contrast, pinning
the hair in place and preventing confusion.
Sailor fountain pen, black ink
When hair is very black, navy blue can be
a more attractive colour for the shadows
than black or grey, and it is less likely to
obscure your mark-making -
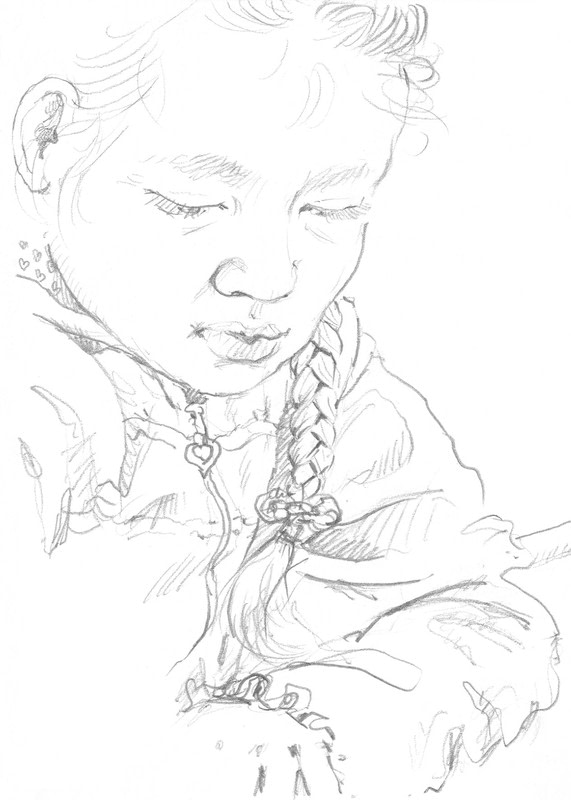
 Step 7
Plaits
The important thing to get right when drawing a
plait is the angling of the sections up (or down)
towards the middle. Note how the two sides are
offset, with dark shadows where they meet,
creating a zigzag shadow up the centre. The
occasional pencil line for texture tells us it is hair.
3B pencil -
 Step 8
Short Hair
The top edge of the hair is indicated by a series
of soft, grey marks, but what really tells us the
shape is the deep shadow in front and into the
parting. The unpainted areas between the two
keep the hair soft and prevent it from becoming
a solid object.
Watercolour -
 Step 9
The Head Beneath
The tangled dreadlocks and the springy texture
of the hair is suggested by the frenetically
scribbled marks. Despite this anarchy, the shape
of the head is followed through, remaining
strong and clear.
Sailor fountain pen, black ink, watercolour pencil,
Waterbrush -
 Step 10
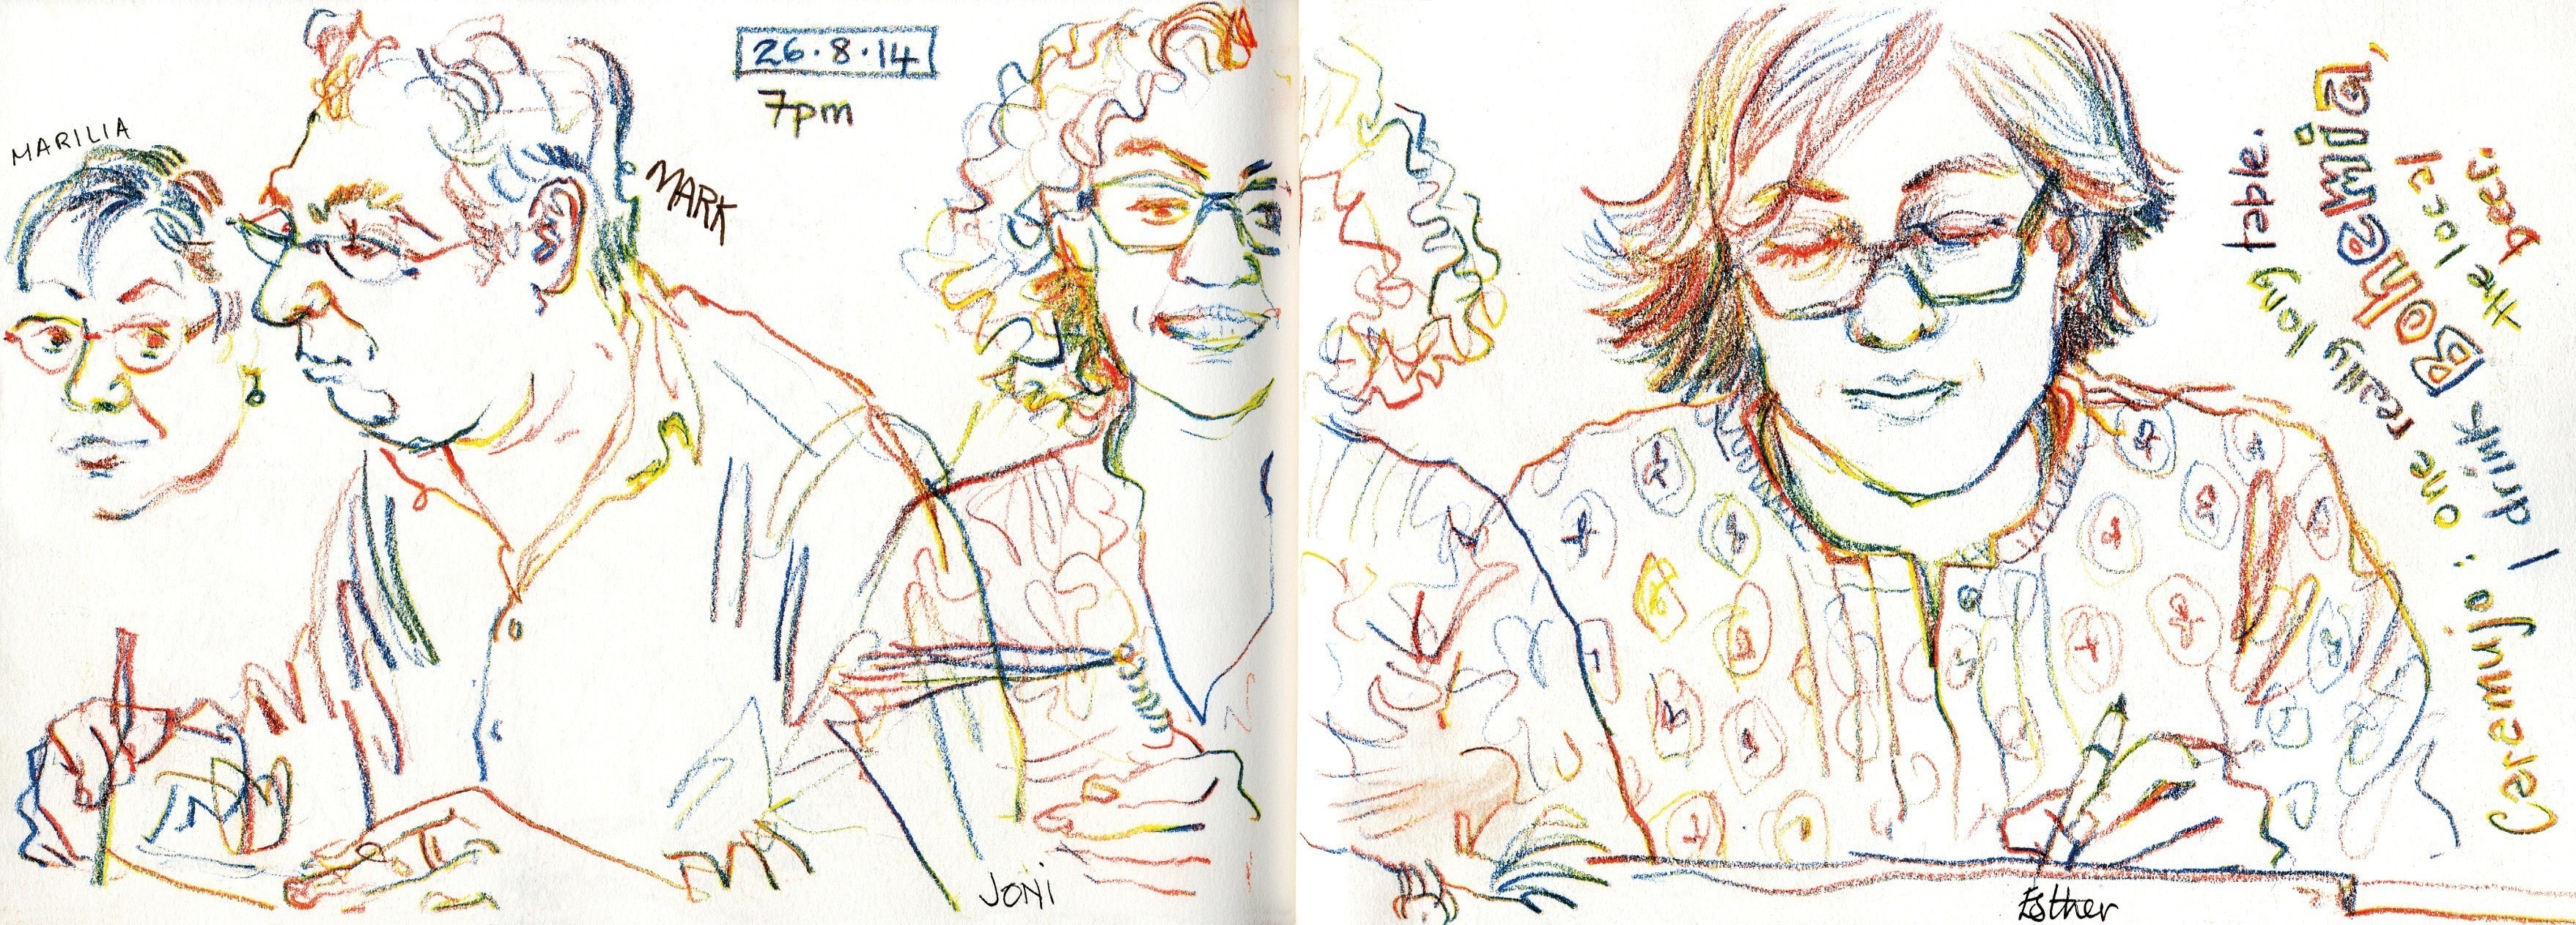
Mark-Making to
Show Texture
These four people had very
different hair types. Though I
have used the same pencil, the
marks I have created are very
different, so the four textures are
clearly communicated.
Rainbow pencilNote the greater intensity of marks
at the neck, where the underside of
the hair is in shadow


 1
Paper Book Covers »
Shoe Inspired Spiral Notebook
1
Paper Book Covers »
Shoe Inspired Spiral Notebook
