


About
Step by step of how to do the chic Bow ;)
Ok Girls, here they are step by step how to do the Chic bow!
Tags
-
 Jess H. favorited How To Do: Chic Bow {Roze Meisje}
15 Feb 20:48
Jess H. favorited How To Do: Chic Bow {Roze Meisje}
15 Feb 20:48
-
 DizzyPrincessX favorited How To Do: Chic Bow {Roze Meisje}
22 Nov 18:49
DizzyPrincessX favorited How To Do: Chic Bow {Roze Meisje}
22 Nov 18:49
-
 Samantha C. favorited How To Do: Chic Bow {Roze Meisje}
22 Jan 19:34
Samantha C. favorited How To Do: Chic Bow {Roze Meisje}
22 Jan 19:34
-
 Joana A. added How To Do: Chic Bow {Roze Meisje} to g
07 Jan 19:55
Joana A. added How To Do: Chic Bow {Roze Meisje} to g
07 Jan 19:55
-
 Bonnie B. added How To Do: Chic Bow {Roze Meisje} to Hair Accessories
11 Dec 14:03
Bonnie B. added How To Do: Chic Bow {Roze Meisje} to Hair Accessories
11 Dec 14:03
-
 Danielle R. favorited How To Do: Chic Bow {Roze Meisje}
27 Jul 19:59
Danielle R. favorited How To Do: Chic Bow {Roze Meisje}
27 Jul 19:59
-
 angellynx favorited How To Do: Chic Bow {Roze Meisje}
29 Apr 17:16
angellynx favorited How To Do: Chic Bow {Roze Meisje}
29 Apr 17:16
-
 Tabitha H. favorited How To Do: Chic Bow {Roze Meisje}
10 Apr 22:26
Tabitha H. favorited How To Do: Chic Bow {Roze Meisje}
10 Apr 22:26
-
 Miss_Fit added How To Do: Chic Bow {Roze Meisje} to Necklace Like Things
29 Mar 04:08
Miss_Fit added How To Do: Chic Bow {Roze Meisje} to Necklace Like Things
29 Mar 04:08
-
 cristinakilljoyway favorited How To Do: Chic Bow {Roze Meisje}
15 Jan 16:04
cristinakilljoyway favorited How To Do: Chic Bow {Roze Meisje}
15 Jan 16:04
-
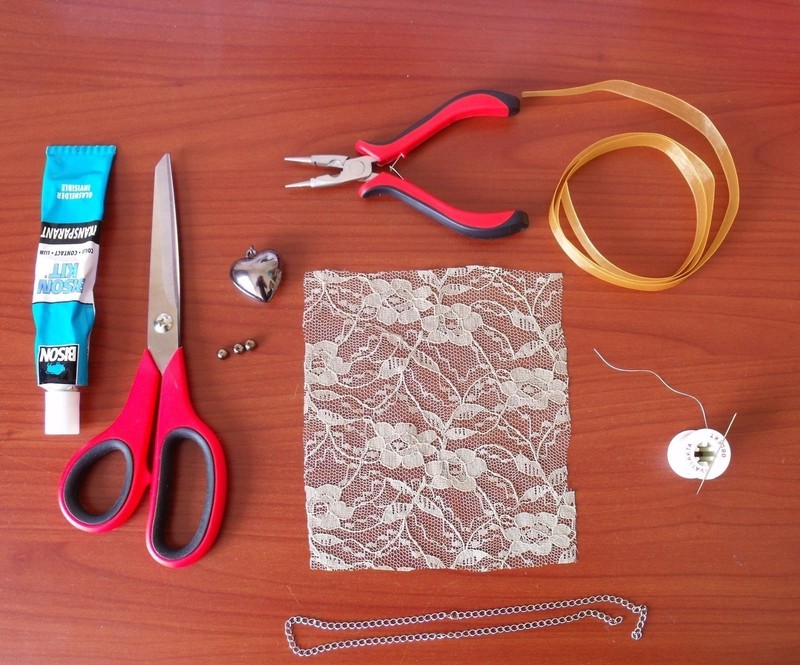
 Step 1
You will need what you see at the picture..
-
 Step 2
We are going to fold the piece of lace to the half and we are are going to sew the tips together.
-
 Step 3
as you can see they are now together, do not forguet that the union will be the back side of our Bow.
-
 Step 4
Now we have to fold in the half to measure the center of the bow.
-
 Step 5
Now sew down the middle with the thread and we form a line so we can see the shape of the bow.
-
 Step 6
Now this is the final result, and it is your desicion if you want the sides close or not, I really like don't close it, it looks like very chic ;)
-
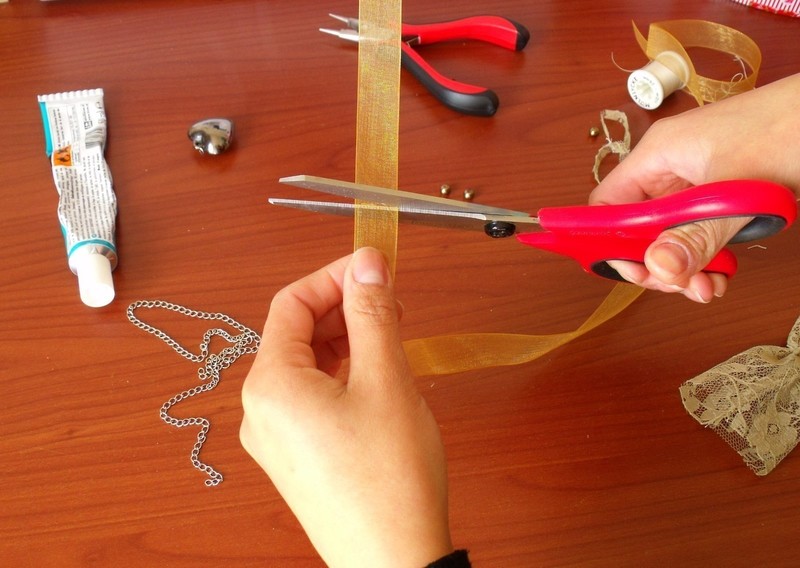
 Step 7
Now we cut a little piece of the ribbon, you can use the best combination for your bow, in my case a Haven't enough time to buy a new color of ribbon :s
-
 Step 8
We put glue all around the center of our bow.
-
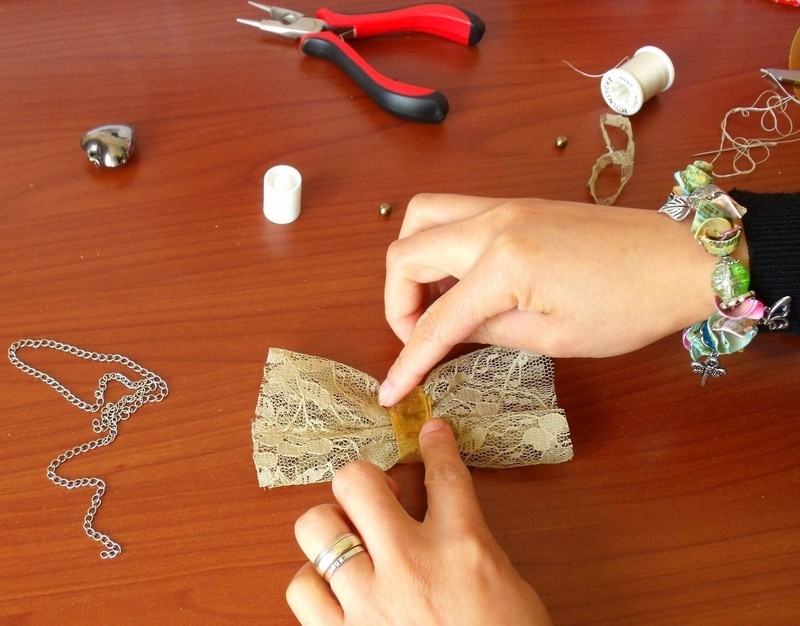
 Step 9
And we put the little piece of ribbond all around of the half bow like you see.
-
 Step 10
Don't forget to press for a while till the glue dry is.
-
 Step 11
it is time to paste the beads in my bow I used only 3 beads, but you can use another type or more then 3.
-
 Step 12
There you have the beads..
-
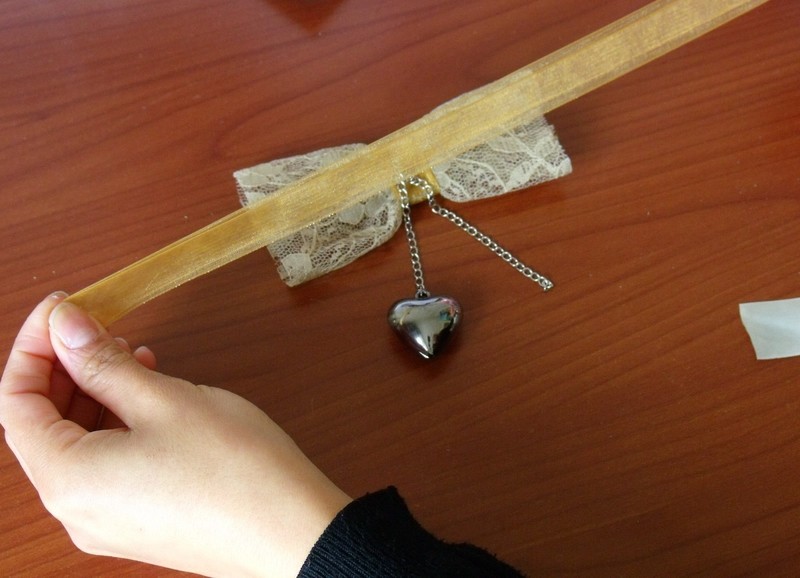
 Step 13
On the back side you can put enough glue to paste de chains, in this case I used only two chains
-
 Step 14
And I used just one heart and you can decided how long the chains will be, the colours, the form, etc..
-
 Step 15
We have enough ribbon, now we are going to put glue on the bow and we are going to put the center of the ribbon on the bow.
-
 Step 16
And do not forget to press and leave it dry..
-
 Step 17
To reinforce the back side with the chains you can use a strong little piece of material, but be careful, remember that the bow we will use it in the neck ;)
-
 Step 18
Voilá!
I hope you like it! I wish you good luck with it, for sure you will be the center of the party ;)


Versions


Comments


 1
Watercolor Art »
Watercolor Paints Made From Make Up
1
Watercolor Art »
Watercolor Paints Made From Make Up
 2
Paper Book Covers »
Shoe Inspired Spiral Notebook
2
Paper Book Covers »
Shoe Inspired Spiral Notebook
