


About
Folk Art Needlecraft
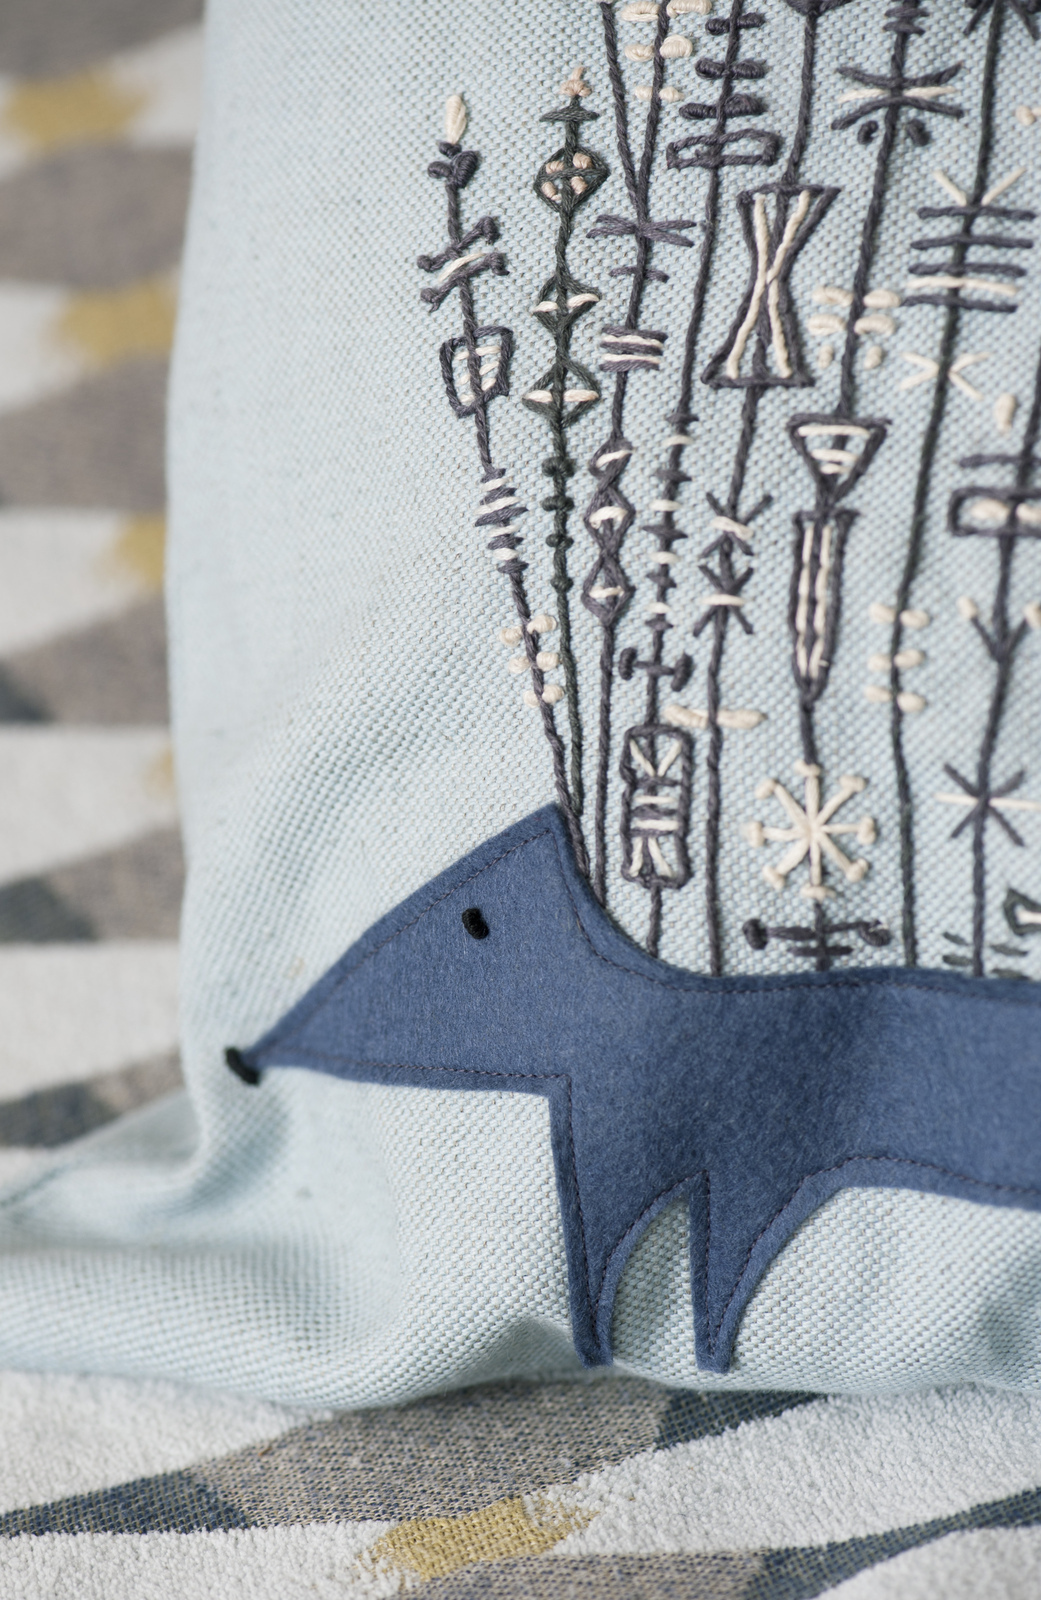
The embroidery on this bag is a bit like stitch doodling! It is a great way to practice some basic stitches and do some designing. Follow the template to stitch in the spines and then work along each spine filling the length with triangles, knots, circles, and stars. You can draw out a plan but I think it is much more fun to make it up as you go along.
-
 ellie j. added Hedgehog Craft Bag to cool stuff i can do
07 Jan 21:40
ellie j. added Hedgehog Craft Bag to cool stuff i can do
07 Jan 21:40
-
sarah g. favorited Hedgehog Craft Bag
13 Apr 04:25
-
 Aishwarya Purohit favorited Hedgehog Craft Bag
22 Nov 05:04
Aishwarya Purohit favorited Hedgehog Craft Bag
22 Nov 05:04
-
 MamaMindy added Hedgehog Craft Bag to Embroidery Tutorials
11 Nov 22:46
MamaMindy added Hedgehog Craft Bag to Embroidery Tutorials
11 Nov 22:46
-
 Juli T. favorited Hedgehog Craft Bag
19 Sep 22:31
Juli T. favorited Hedgehog Craft Bag
19 Sep 22:31
-
 erin f. favorited Hedgehog Craft Bag
24 Aug 07:32
erin f. favorited Hedgehog Craft Bag
24 Aug 07:32
-
 sarah.jones.756412 favorited Hedgehog Craft Bag
04 Jul 16:45
sarah.jones.756412 favorited Hedgehog Craft Bag
04 Jul 16:45
-
Jane Z. favorited Hedgehog Craft Bag
14 Jan 16:40
-
arina m. favorited Hedgehog Craft Bag
08 Jan 23:05
-
 Susanna P. favorited Hedgehog Craft Bag
22 Dec 21:58
Susanna P. favorited Hedgehog Craft Bag
22 Dec 21:58
-
 Step 1
Cut the linen or cotton in half to make two rectangles measuring 15¾ × 15 in. (40 × 38 cm) each. Take one of the pieces of fabric and place with the widest measurement at the base. Mark a point 1½ in. (4 cm) in from each side edge, along the top. On the left side, draw a line from the lower corner to meet the mark at the top. Repeat on the right side so that you have a shape that is wider at the bottom and slants in at the top. Cut the shape out and repeat for the other piece of fabric.
-
 Step 2
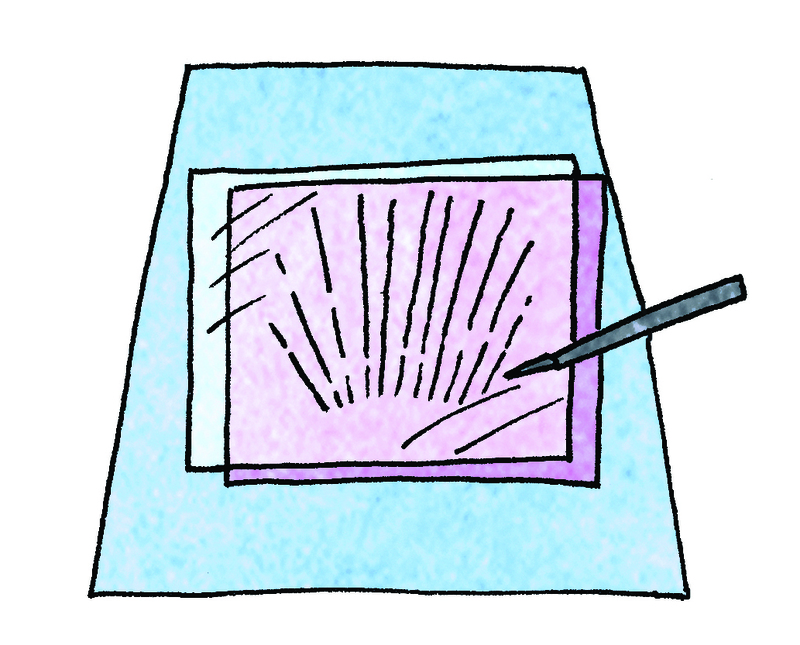
Trace the spines of the hedgehog and, using dressmaker’s carbon paper, transfer the design onto the fabric, centering it between the side edges and starting 4½ in. (11 cm) up from the bottom edge.
-
 Step 3
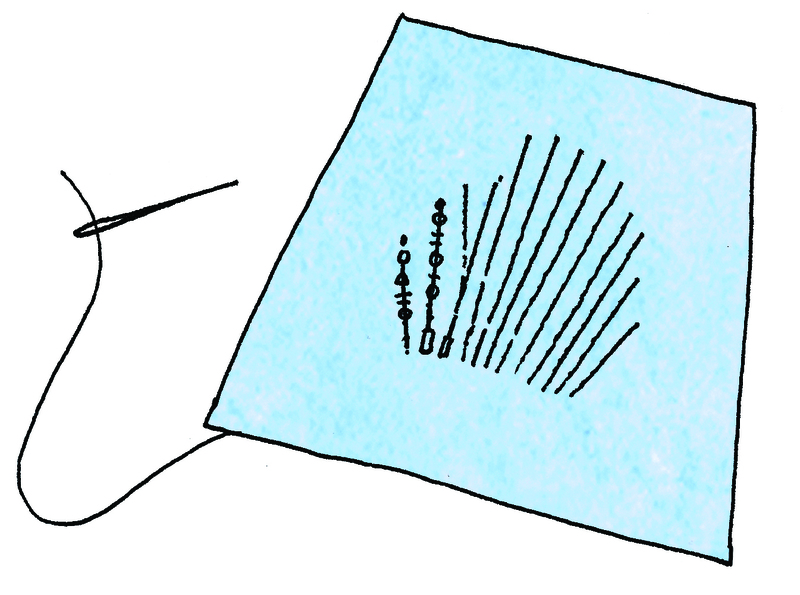
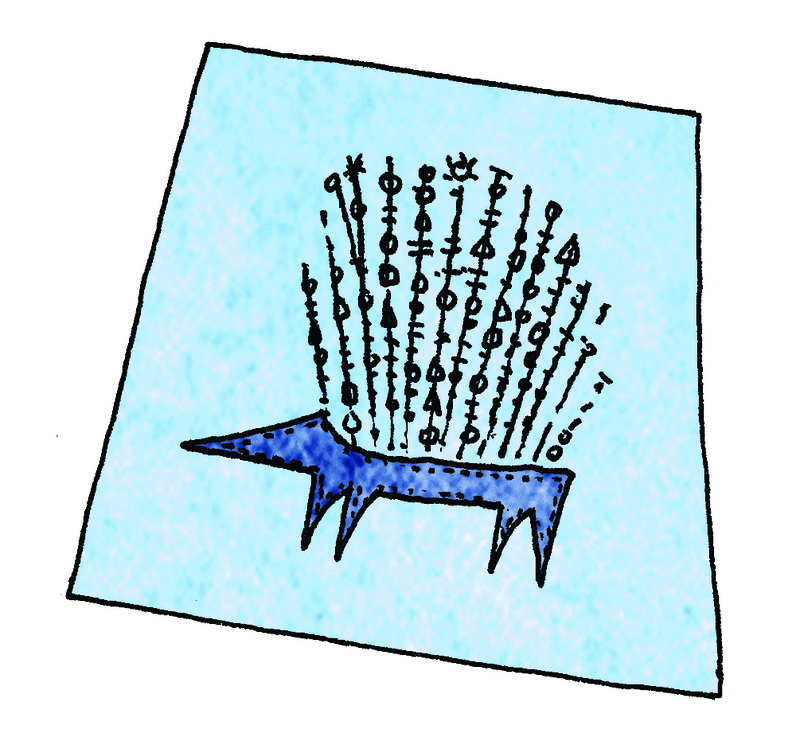
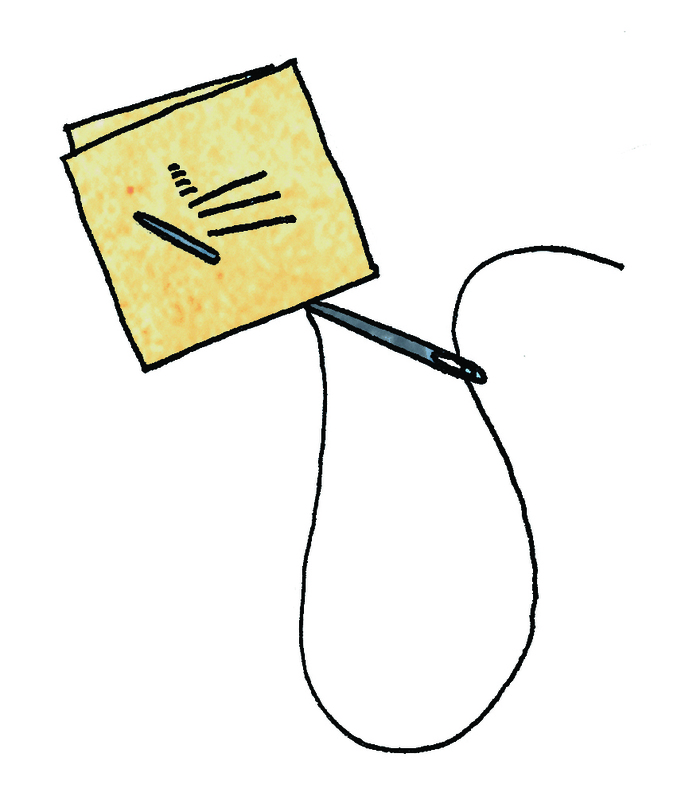
Stitch the spines using whipped backstitch, then you can start stitch doodling, working your way up each spine. To help plan your design, transfer the basic hedgehog shape with the spines onto paper and draw in shapes like triangles, dots, or squares along the spines, looking at the photograph of the finished bag for inspiration. Then simply start stitching—you can make a variety of shapes with just three different stitches.
-
 Step 4
Trace the body and cut out the shape from felt. Pin it in position so that the ends of the spines meet the body. Machine topstitch all around the felt body, close to the edge. Make a bullion knot for the eye and nose.
-
 Step 5
To make the label, cut a piece of felt 3¼ × 1½ in. (8 × 3.5 cm). Fold it in half, making a crease with your finger to mark the middle. Embroider the small hedgehog motif, centering it between the top and bottom and ½ in. (1 cm) in from the crease. Sew the top and bottom seams, close to the edge.
-
 Step 6
With right sides facing, pin the front and back sections of the bag together. With the wrong side of the embroidered piece facing you, place the label in the seam sandwiched between the front and back with the embroidered side facing up, 2¾ in. (7 cm) down from the top edge, with the raw edges aligned. Machine stitch down each side and across the bottom, taking a ½-in. (1-cm) seam. Trim the seam allowance and cut across the corners. For a neat finish, you could zigzag all the raw edges.
-
 Step 7
Cut three pieces of webbing: one piece 26½ in. (67 cm) and two pieces for the handles, each 19 in. (48 cm) in length. Fold over the top edge of the bag by ½ in. (1 cm) and press.
-
 Step 8
Starting at the side seam, pin the longer length of webbing along the top edge of the bag, lining up the top of the webbing to the top of the folded edge. At the same time, position the ends of the handles sandwiched between the webbing and the bag. Place the two ends 3½ in. (9 cm) in from each side and aligning the ends of the straps with the bottom edge of the webbing lining the top of the bag. Take care that the straps aren’t twisted. When you have come full circle, fold over the extra bit of webbing and pin it down over the raw end on the side seam.
-
Step 9
Machine stitch all around the top edge, catching the straps in the stitching. Machine stitch the webbing at the side seam where it overlaps. Turn the bag right side out and press.


 1
Watercolor Art »
Watercolor Paints Made From Make Up
1
Watercolor Art »
Watercolor Paints Made From Make Up
 2
Paper Book Covers »
Shoe Inspired Spiral Notebook
2
Paper Book Covers »
Shoe Inspired Spiral Notebook
