

Floral Bib Style Necklace
Extract from DIY T-Shirt Crafts • By Adrianne Surian • Published by Adams Media


About
DIY T-Shirt Crafts
This necklace is like a spring bouquet that never fades. Can’t bear to part with team shirts, concert tees, or old shirts that belonged to someone special?
Try making this bib-style necklace to keep those memories close to your heart! It’s an instant update that takes an outdated, worn-out, or outgrown shirt and makes it current again.
Tags
© 2024 Adrianne Surian / Adams Media · Reproduced with permission. · Excerpted from DIY T-Shirt Crafts by Adrianne Surian. Copyright © 2015 F+W Media, Inc. Used by permission of the publisher. All rights reserved. Photographs by Adrianne Surian.
-
 veronica f. favorited Floral Bib Style Necklace
10 Feb 17:06
veronica f. favorited Floral Bib Style Necklace
10 Feb 17:06
-
 Jessica S. favorited Floral Bib Style Necklace
22 Feb 06:03
Jessica S. favorited Floral Bib Style Necklace
22 Feb 06:03
-
 ALadyLotus favorited Floral Bib Style Necklace
03 Nov 10:55
ALadyLotus favorited Floral Bib Style Necklace
03 Nov 10:55
-
 Carla B. favorited Floral Bib Style Necklace
21 Sep 17:36
Carla B. favorited Floral Bib Style Necklace
21 Sep 17:36
-
 FW Media published his project Floral Bib Style Necklace
14 Sep 10:06
FW Media published his project Floral Bib Style Necklace
14 Sep 10:06
You Will Need
-
 Step 1
To prepare the chain and bib base: Find the center point of your necklace chain, opposite the clasp. Cut the link with your wire cutters, creating 2 8"-long chains connected by the clasp. Then, twist open the jump rings with your pliers, and attach each cut end of the chain to the holes in your bib base, twisting them closed again with your pliers.
-
 Step 2
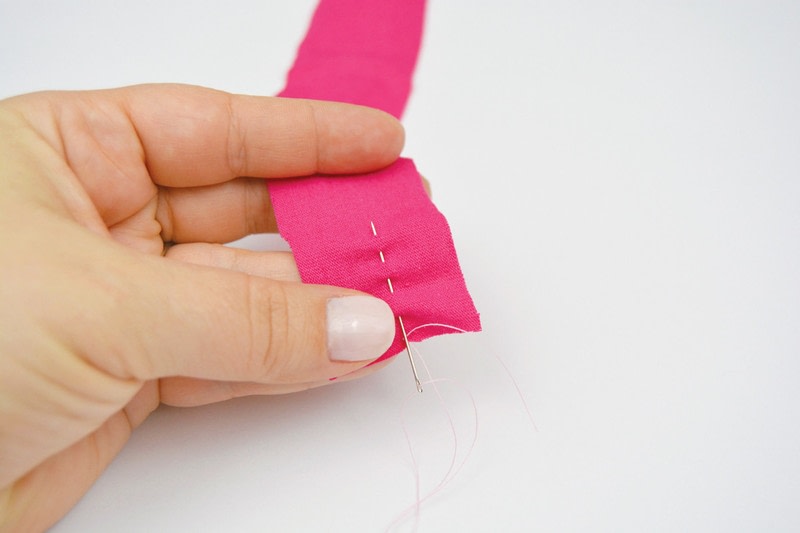
To create the roses: Thread your needle with 12–18" of thread, and tie a knot at the bottom of
one of your fabric strips in the center with your thread, securing one end directly to the fabric. Using a simple basting stitch (an over-under stitch), stitch vertically along the center of your fabric strip with ¼" stitches. It’s not essential to keep these stitches uniform, so don’t worry if they’re a little messy—just try to keep them as close to the center of the strip as possible. You may have a shorter length of thread than your strip is long, but that’s okay. When you get to the end of the fabric strip, pull the thread tight, and gather the fabric into small ruffles until your fabric strip has been reduced to about half its original length. (For example, if you started with an 18" strip, make the final length a ruffled piece 9" long.) Tie off the thread securely at the end of the gathered fabric strip, and arrange the spacing of the ruffles as necessary. -
 Step 3
Fold the ruffled strip in half along the line of stitching.
-
 Step 4
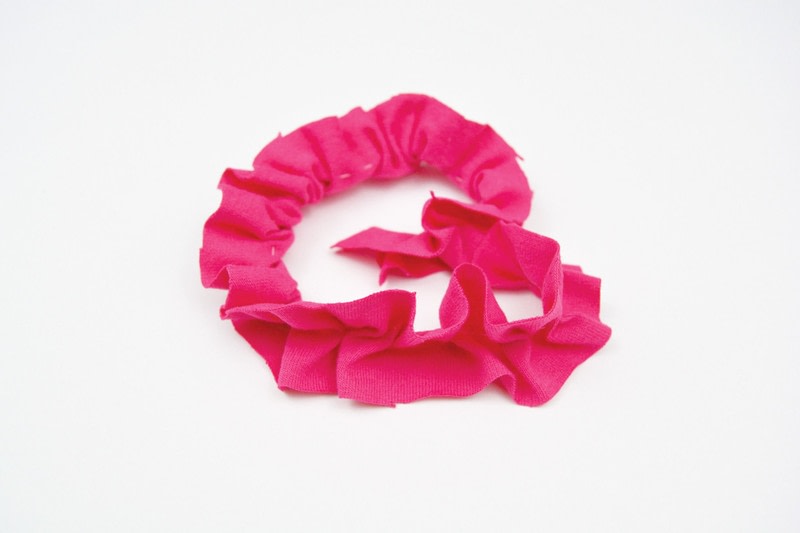
Roll the fabric into a spiral along the stitched edge, creating one flat side and one ruffled side.
-
 Step 5
Cover the flat side of your ruffled rose with fabric glue, and secure it with a fabric circle. Repeat the steps to make all six roses, or as many as you need to cover your bib base (but don’t glue them to the base yet). Try varying the sizes and colors of the roses.
-
 Step 6
To complete: Decide on your arrangement, then glue the roses onto the bib base. If you’re using a fiber base like chipboard or cardboard, or if your base is fabric-covered, you can complete this step using fabric glue. If you’re using metal or plastic, use jewelry glue to attach the roses to the base.


 1
Watercolor Art »
Watercolor Paints Made From Make Up
1
Watercolor Art »
Watercolor Paints Made From Make Up
 2
Paper Book Covers »
Shoe Inspired Spiral Notebook
2
Paper Book Covers »
Shoe Inspired Spiral Notebook
