

About
What's on your mind? Read the time on this clock and find out!
Here’s a variation on the face template I used on the “Mindful Messenger Bag”. I’ve made numerous clocks with kids and teens but here is a basic tutorial for making clocks in general. Cardboard and foam core are easy materials to find and use for basic clocks. If you are handy with wood, and have access to power tools you could take this project up to another level.
-
 Crafterella added Face Time Clock to Katie's Office
13 Jun 16:11
Crafterella added Face Time Clock to Katie's Office
13 Jun 16:11
You Will Need
-
 Step 1
Materials List:
Shirt Cardboard (2 or more sheets)
Pencil
Ruler
Double sided foam tape
Awl or small nail
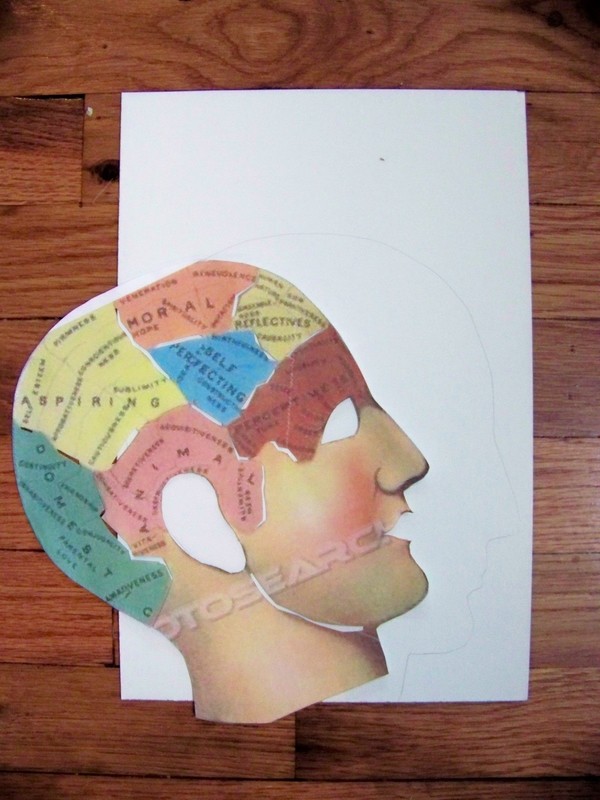
Mind domains image. I found mine here: www.photosearch.com
Scissors
Utility knife (optional for cutting out paper features on face)
Standard clock mechanism kit (Michael’s has them but the clock hands are pretty limited)
Another resource for clock mechanisms: www.klockit.com
Permanent markers
1 AA battery(Clock kit pictured came from www.klockit.com)
-
 Step 2
1) Google the following: “Vintage Brain illustrations”. A bounty of images will appear under the images search area. I got mine from: www.photosearch.com. I increased the size of the human head to fill a standard 8 ½” x 11” sheet of printer paper. I also printed the image out in color. Cut the head out in order to use it as a tracing template. Now, lay the paper image on top of a sheet of shirt cardboard or any thin cardboard that you may have lying around. Trace and cut the image out in cardboard. If you need help with the placement of the facial features: eyes, mouth, ears, use the exacto knife to carefully cut out these areas. You will use the cut outs for tracing in the next step.
-
 Step 3
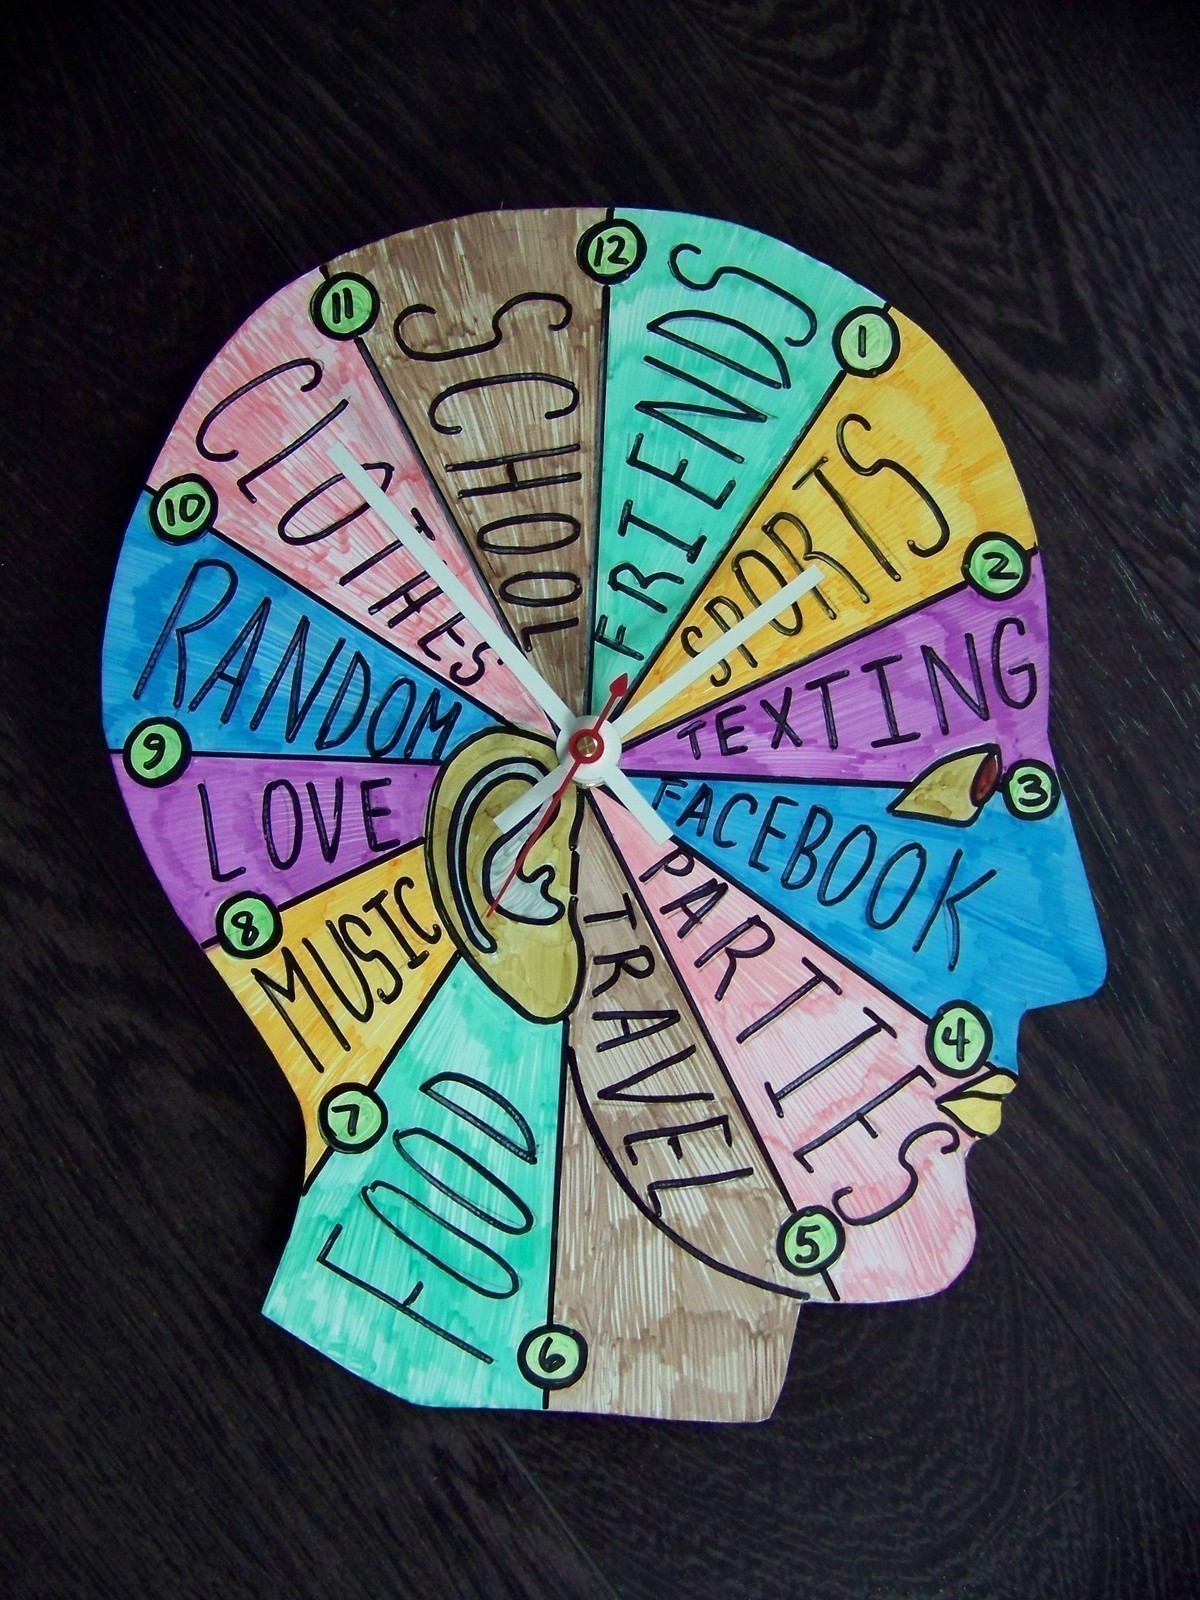
2) I used a pencil and ruler to divide up the face into pie shapes. One pie wedge for each hour, 12 total. I overlapped a circle shape over each line that divided the clock into hours and wrote in the numbers. Color in each wedge. I chose 6 colors and repeated them in a pattern. Have fun with the hourly mind set, I kept them pretty broad, but teens will have more of their own ideas.
-
 Step 4
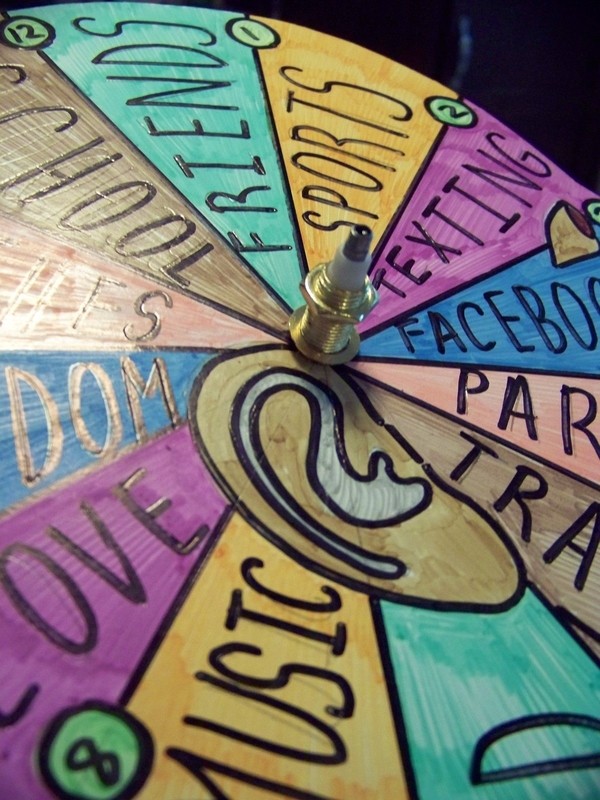
3)The clock mechanism is pushed through the back of the face clock (centered) with the battery in place. Note, that a piece of foam tape holds the mechanism in place on the cardboard.
-
 Step 5
4)The front of face clock, all colored in. The clock mechanism will poke through the black dot near the ear.
-
 Step 6
5)Attaching the washer and bolt to the front mechanism stem.
-
 Step 7
6) The hour hand is snapped on first, below the minute hand. The minute hand floats on top, held in place by a tiny bolt. The minute hand will be able to move aound the clock face once everything is in place.
-
 Step 8
7)I purchased a red second hand.The second hand snaps on like a cap over the minute and second hands. Most kids/teens won't believe that the clock is even working until the second hand is attached. This is the first indication that the clock is working, because you see the second hand moving around the clock face.
-
 Step 9
8)Here is the finished clock. If you want it to be a table top clock, use a hot glue gun to attach a smll chunk of wood to the back of the clock at the bottom neck area. This should keep it stable so that you can put it on top of a table or night stand. If you'd prefer to hang it on a wall, there is a cut out notch on the back of the plastic clock mechanism that allows for a picture hanging hook or nail. Enjoy!


 1
Watercolor Art »
Watercolor Paints Made From Make Up
1
Watercolor Art »
Watercolor Paints Made From Make Up
 2
Paper Book Covers »
Shoe Inspired Spiral Notebook
2
Paper Book Covers »
Shoe Inspired Spiral Notebook

