


About
Some quality time with empty cereal boxes.
Another TapeSwell project! I am embarrassed to show the mess on the shelves on the bookshelf, that's designated for my youngest. ×__× I wanted to make something to keep many of her things together. I decided to reuse cereal boxes.
-
 Caden Kaslik favorited DIY Cereal Box Organizer
14 Dec 18:03
Caden Kaslik favorited DIY Cereal Box Organizer
14 Dec 18:03
-
 jenny y. favorited DIY Cereal Box Organizer
26 Nov 00:17
jenny y. favorited DIY Cereal Box Organizer
26 Nov 00:17
-
 Sarah Sylvia S. favorited DIY Cereal Box Organizer
18 Jul 21:03
Sarah Sylvia S. favorited DIY Cereal Box Organizer
18 Jul 21:03
-
 Jen S. added DIY Cereal Box Organizer to Cate's room ideas
03 Mar 01:32
Jen S. added DIY Cereal Box Organizer to Cate's room ideas
03 Mar 01:32
-
Jen S. favorited DIY Cereal Box Organizer
02 Mar 20:36
-
 Dragana N. favorited DIY Cereal Box Organizer
14 Jul 09:47
Dragana N. favorited DIY Cereal Box Organizer
14 Jul 09:47
-
Melody K. commented on DIY Cereal Box Organizer
26 Apr 12:55
-
 jdk added DIY Cereal Box Organizer to my new work room
15 Nov 11:03
jdk added DIY Cereal Box Organizer to my new work room
15 Nov 11:03
-
Asadora S. favorited DIY Cereal Box Organizer
30 Oct 19:13
-
 Tahleena S. added DIY Cereal Box Organizer to crafting tips
16 Oct 08:51
Tahleena S. added DIY Cereal Box Organizer to crafting tips
16 Oct 08:51
-
 Step 1
Gather your supplies.
FYI, the TapeSwell printed tape has a design on it. You can see the Charleston and Attic Floral prints via the TapeSwell site.
http://www.tapeswell.com/decorative_tape/decorative-tape-c-1.html?zenid=8be0332abae4bd44509478d0d46c9e1a -
 Step 2
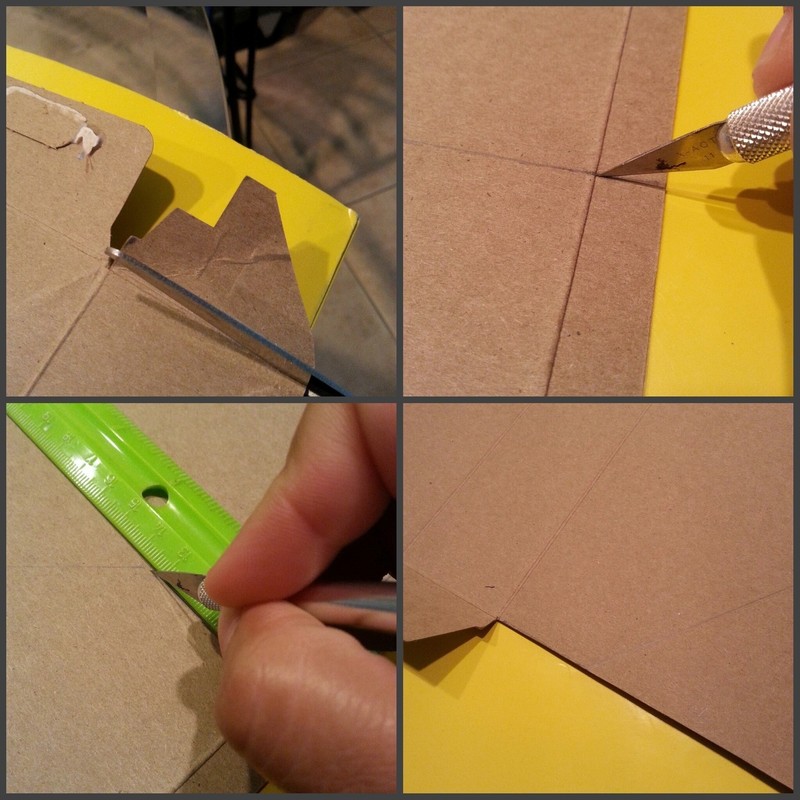
1) Grab your empty cereal boxes and gently disassemble them. The inside of the box will be seen on the outside.
2) Use the ruler and measure 1 1/2"- 2" (depending on width of the box) from the spine of the box. From there, measure 7"-8" down, on a diagonal. Then from there, measure out again 1 1/2"-2" across to the edge of the box.
3)Repeat on the other side. -
 Step 3
Make sure to label the bottom with a "B"! It would be bad to have to start all over again. LOL
Cut the tabs off at top of box with scissors. Cut the shape you just made with an xacto knife (or box cutter). -
 Step 4
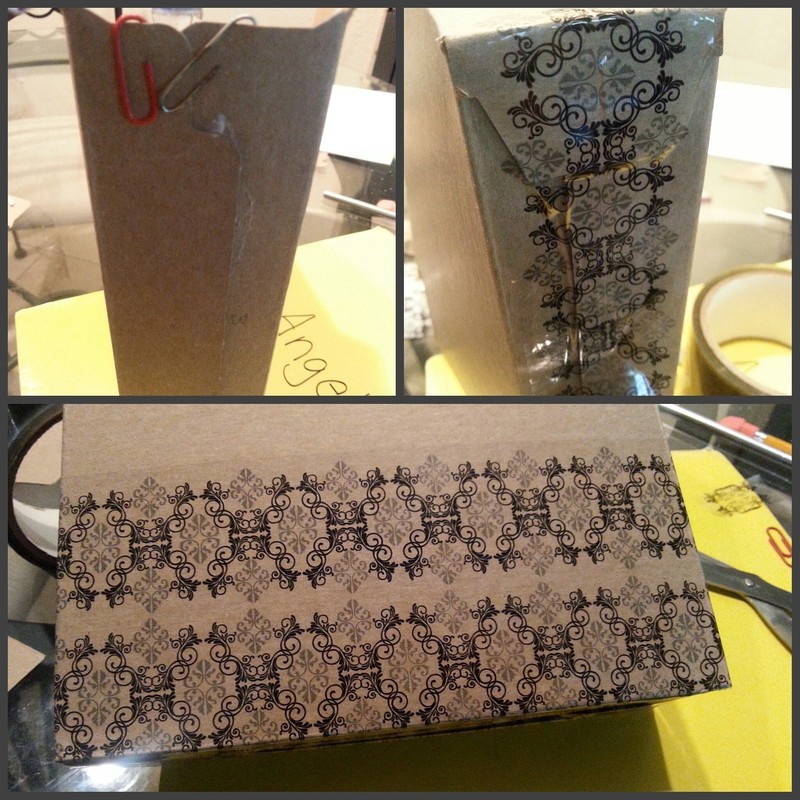
The reason for the paper clips, to hold the bottom flaps in place while it gets taped down. You can use the hot glue or E-6000 to glue it down first, then tape it.
After taping the bottom down, start wrapping the tape around the box. Make sure the ends of the tape get folded into the box (around the edges). -
 Step 5
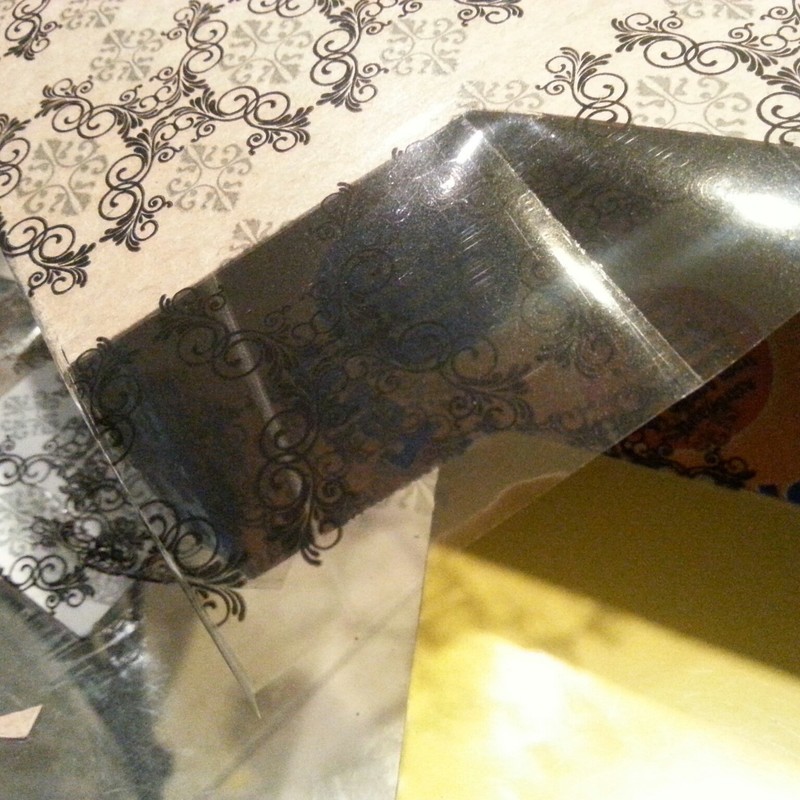
This photo shows the cuts I made to fold the excess tape inside the box.
-
 Step 6
Tou don't have to cover the inside of the organizer. If you choose not to, HOORAY, you are done!
But if you are like me, the cereal logo was driving you nuts, and you felt it needed to be prettified, cover it up! You can cover it after decorating the outside (on the left), or decorate the inside first after cutting out the shape (on the right). Cut all edges off with the xacto knife.
The version on the right: you need work from the middle FIRST, decorate the outside of the box; fold all the edges of tape in; then continue to cover the logo.
**P.S.: The Doily Label Tape is SUPER STICKY & TOUGH!! Once it sticks to itself or on something else, THAT'S IT! You have been warned. LOL**Voil -
 Step 7
Voila! Chic organizers for the bookshelf. My daughter loves them. Let's see how long it lasts. LOL
Enjoy! ~__~


Comments

 1
Watercolor Art »
Watercolor Paints Made From Make Up
1
Watercolor Art »
Watercolor Paints Made From Make Up
 2
Paper Book Covers »
Shoe Inspired Spiral Notebook
2
Paper Book Covers »
Shoe Inspired Spiral Notebook
