

About
Floral plate charger that can be used throughout the year
Living in a rental, storage space is very limited so I DIYed a plate charger can be used throughout the various seasons.
Tags
-
 Key West Witch favorited Diy Floral Plate Chargers
12 May 15:19
Key West Witch favorited Diy Floral Plate Chargers
12 May 15:19
-
 Zornitsa A. favorited Diy Floral Plate Chargers
03 Nov 05:02
Zornitsa A. favorited Diy Floral Plate Chargers
03 Nov 05:02
-
 Sahana A. added Diy Floral Plate Chargers to Home decor
15 Mar 15:51
Sahana A. added Diy Floral Plate Chargers to Home decor
15 Mar 15:51
-
 Alissa B. favorited Diy Floral Plate Chargers
24 Oct 22:00
Alissa B. favorited Diy Floral Plate Chargers
24 Oct 22:00
-
Suzi T. favorited Diy Floral Plate Chargers
16 Oct 20:03
-
 Domicile 37 published her project Diy Floral Plate Chargers
14 Oct 06:00
Domicile 37 published her project Diy Floral Plate Chargers
14 Oct 06:00
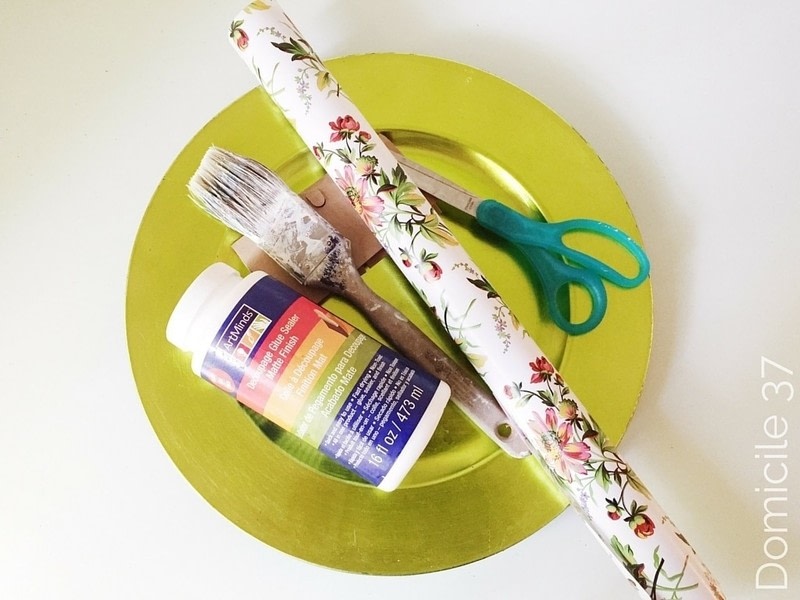
You Will Need
-
 Step 1
First clean off your plates of any glitter, dust, residue or any sort. Then cut paper to size leaving a a few inches around the rim of the plate. Remember this project will wrinkle your paper and you will need some wiggle room to work with.
-
 Step 2
Apply modge podge to charger and place paper on it smoothing it out as you are adhering it to the charger. Note: You can use the *piece of cardboard or your hand to smooth it out.
-
 Step 3
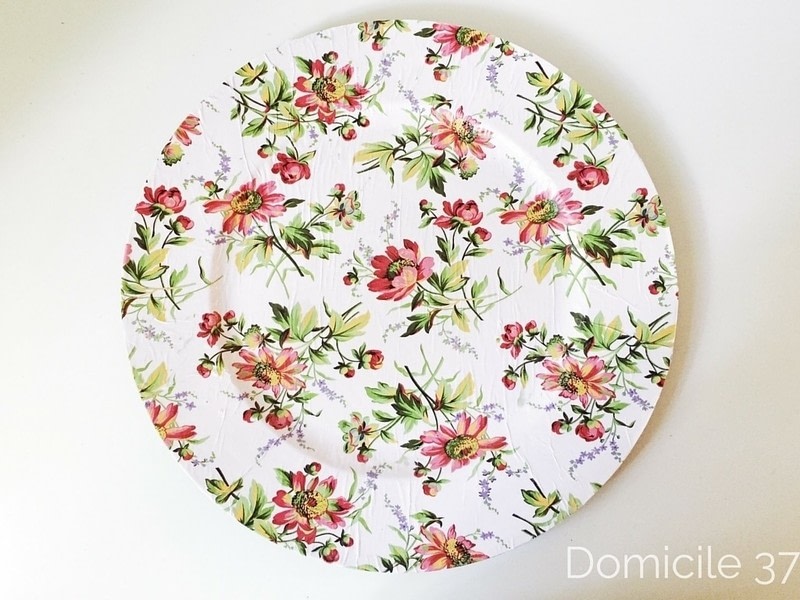
When smoothing out the paper start in the center and work your way out. Remember to smooth out the inner crevice of the plate. I could NOT find a way to eliminate all the wrinkles so. However if you have air bubbles you can pop them with a needle and smooth the paper out. . This technique worked on some of the wrinkles. I would wait a couple of minutes and let the paper settle before popping and flattening out the air bubbles or else you risk the chances of tearing your paper.
-
 Step 4
Once the bottom layer of modge podge dried, I used my exacto knife and cut off the remaining paper. To finish off the plate I applied modge podge on the top of the floral paper and on the rim of the plate to make sure the edges were secured and glued down all the way.
-
 Step 5
It is not perfect, but she surely is stunning! I am so happy my vision for my fall tablescape came together.
-
 Step 6
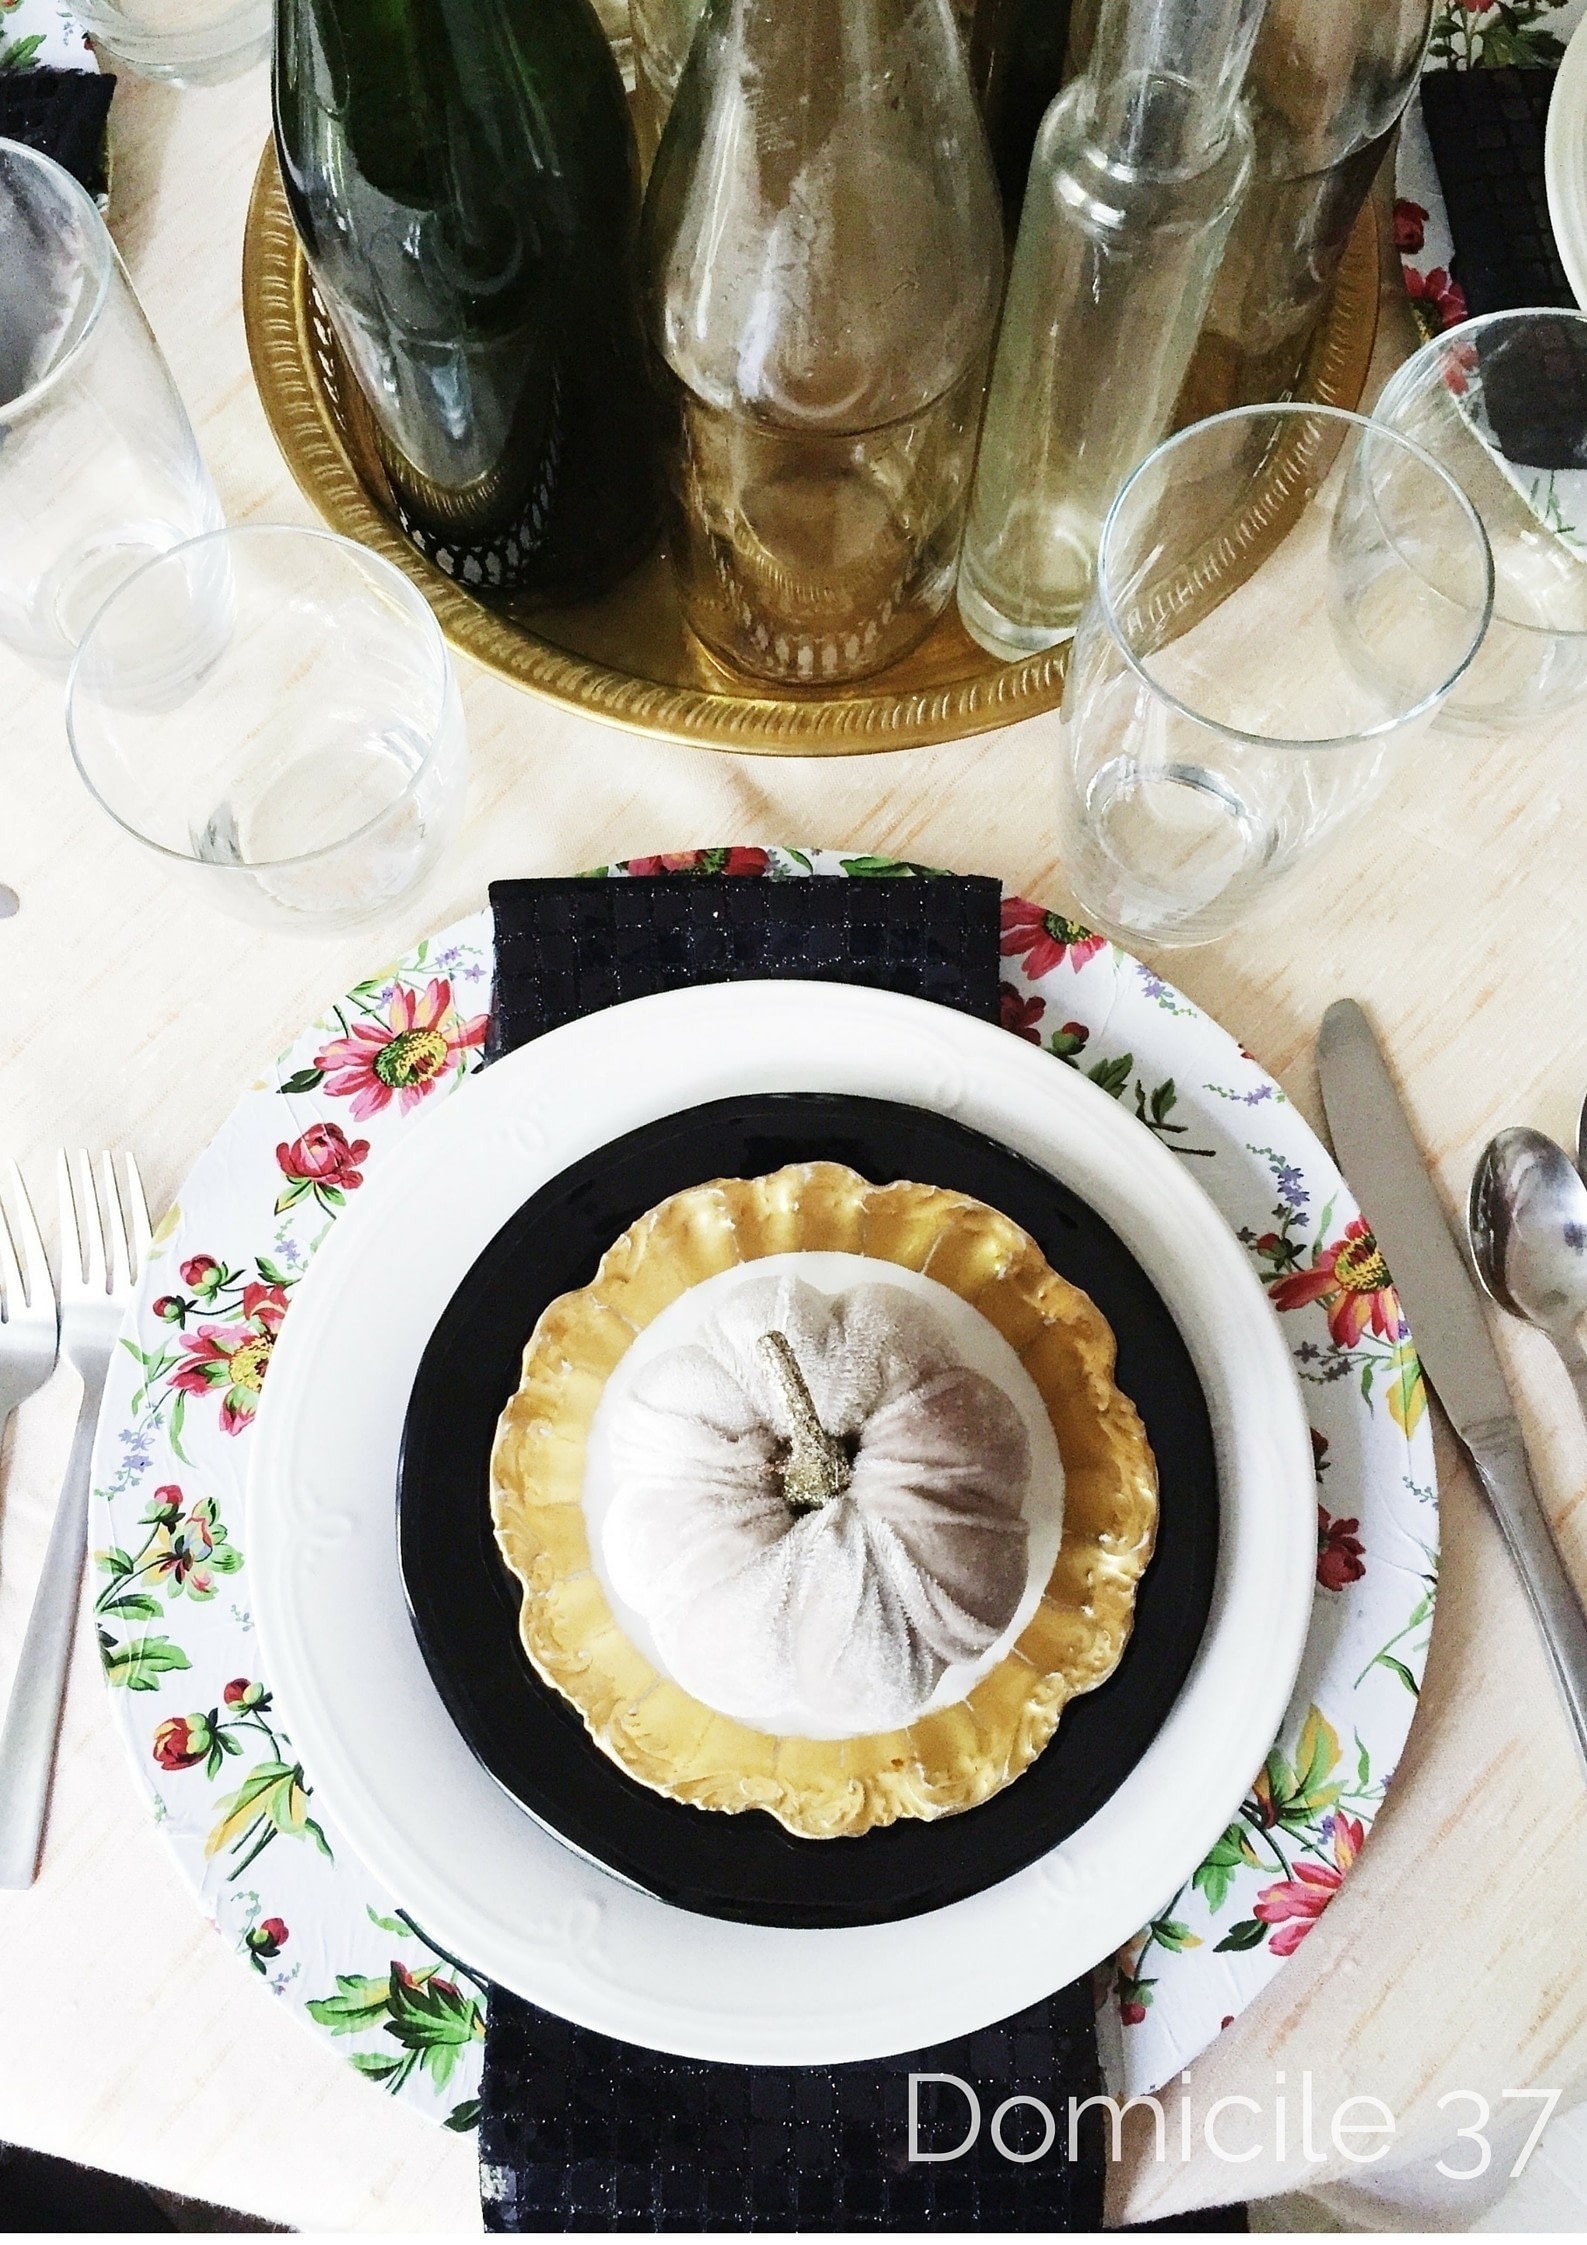
This is the final look of the my fall tablescape with the plate chargers. SO Pretty!


 1
Watercolor Art »
Watercolor Paints Made From Make Up
1
Watercolor Art »
Watercolor Paints Made From Make Up
 2
Paper Book Covers »
Shoe Inspired Spiral Notebook
2
Paper Book Covers »
Shoe Inspired Spiral Notebook
