


About
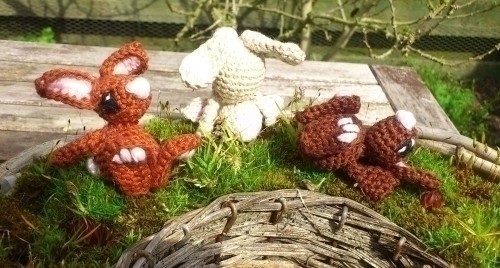
Don't miss these adorable spring bunnies! - My 2nd amigurumi, my 1st self created pattern :)
Hi there!
How great of you to check out my sweet project (and read this text ;) ), I hope you like it as much as I do!
Why?
I wanted to have something to replace my Christmas Candles (read about that here: http://www.cutoutandkeep.net/projects/cute-christmas-candles-with-snow-snowflake-and-a-little-bow).
A bunny was my solution, it isn't too Easter-y, so I can enjoy them till Summer is here. I just had to find a nice pattern.
I saw bunnies with big heads, big ears, weird bodies, and so on.. But non of them really made me happy.. Till I saw the sweet (literally) Sugar Bunnies by Carolyne on The Party Artisan (http://www.thepartyartisan.co.uk/article.asp?article=53&pID=5&title=Sugar+Bunnies). I just had to crochet them!
How?
Because they originally are made with fondant, obviously there wasn't a crochet pattern.. So with a lot of trial-and-error I've made my own.
I'd like to share my pattern here to spread the sweet love of these sweet little spring bunnies!
Do keep in mind that I'm kind of new to amigurumi.. This is the second project I've ever amigurumi-ed (See my Flying Bollies for my first 'project': http://www.cutoutandkeep.net/projects/flying-bollies). This is my first time creating a pattern. So if something is unclear, wrong or could have been done better, please, do not hesitate to let me know!
Have fun creating and treasuring these sweet little creatures, all Spring long ;)
There will be more pictures to illustrate the how-to, but I have to buy some new yarn first. So keep track of this post if you like to make a bunny of your own.
Greetings,
Cindy
Tags
-
 Debora N. favorited Cute Little Spring Bunny
17 Sep 18:47
Debora N. favorited Cute Little Spring Bunny
17 Sep 18:47
-
mizmunchkin1982 .. added Cute Little Spring Bunny to Amigurumi Projects
18 Apr 23:11
-
 Neko-San K. favorited Cute Little Spring Bunny
31 May 20:10
Neko-San K. favorited Cute Little Spring Bunny
31 May 20:10
-
 elysha.jardine added Cute Little Spring Bunny to Things to do
23 Sep 12:57
elysha.jardine added Cute Little Spring Bunny to Things to do
23 Sep 12:57
-
 Sheri P. favorited Cute Little Spring Bunny
30 Mar 07:19
Sheri P. favorited Cute Little Spring Bunny
30 Mar 07:19
-
 Mnemosyn favorited Cute Little Spring Bunny
12 Nov 19:34
Mnemosyn favorited Cute Little Spring Bunny
12 Nov 19:34
-
Belle W. favorited Cute Little Spring Bunny
02 Jul 13:28
-
 Kylie F. favorited Cute Little Spring Bunny
17 Jun 04:48
Kylie F. favorited Cute Little Spring Bunny
17 Jun 04:48
-
Christine B. favorited Cute Little Spring Bunny
29 Apr 09:08
-
 drevanhoussen added Cute Little Spring Bunny to Amigurumis crochet
19 Apr 02:40
drevanhoussen added Cute Little Spring Bunny to Amigurumis crochet
19 Apr 02:40
-
Step 1
Instructions:
Row nr: [total amound of stitches when finished] Instructions
\/ = increase (two stitches in the stitch)
\|/ = increase two times in the stitch.
/\ = Invisible decrease (see instructions by Nerdigurumi on http://www.youtube.com/watch?v=tZ575_ZklWk) -
 Step 2
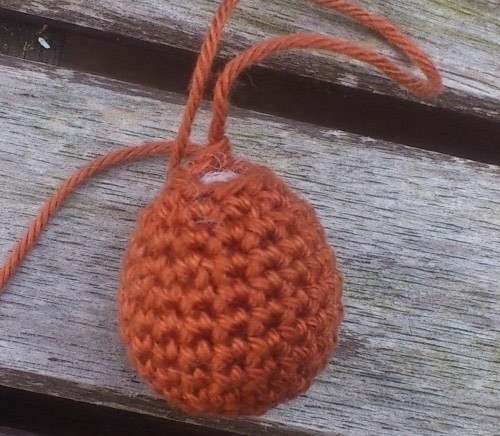
The head:
Row 1: [5] make a magic circle with 5 stitches
Row 2: [11] \/ \/ \/ \/ \|/
Row 3: [15] \/ 2st \/ 2st \/ 2st \/ 1st
Row 4: [17] 4st \/ 7st \/ 2st
Row 5: [17] 17st
Row 6: [17] 17st
Row 7: [15] 1st /\ 6st /\ 6st
Row 8: [10] 1st /\ 1st /\ 1st /\ 1st /\ 1st /\Fill head with stuffing.
Row 9: [7] 1st /\ 1st /\ 1st /\ 1st
Row 10: fasten the head with the thread.Don't add the eyes just yet if you are going to embroider them on.. Do this when you know where her ears are going to be.
If you have safety eyes, you should put them on while making the head. -
 Step 3
The body:
Row 1 [5] Make a magic circle with 5 stitches
Row 2 [11] \/ \/ \/ \/ \|/
Row 3 [15] \/ 2st \/ 2st \/ 2st \/ 1st
Row 4 [18] 3st \/ 4st \/ 4st \/ 1st
Row 5 [20] 7st \/ 8st \/ 1st
Row 6 [20] 20st
Row 7 [20] 20st
Row 8 [18] 3st /\ 8st /\ 5st
Row 9 [18] 18 st
Row 10 [12] 1st /\ 1st /\ 1st /\ 1st /\ 1st /\ 1st /\Fill body with stuffing.
Row 11 [7] 1st /\ 1st /\ 1st /\ 2st
Now you're done, you don't have to close up the body. When you'll sew everything together, this will make a nicer neck. -
 Step 4
The ears (x2):
Pink part:
1. chain 6.
2. skip the last stitch and make 5 stitches in the back loop of the chain.
3. finish with a slip stitch on the bottom. Knot the beginning and the end together and cut them (not too far) off. This makes a nice and horizontal finish for the bottom of the pink part.Back part of the ear:
1. chain 7 with the colour of your bunny.
2. skip the last stitch and make 6 stitches in the back loop of the chain.
3. increase in the first stitch of your chain and continue making stitches till you reach the end.
4. Don't cut your yarn (yet!)Combining pink and backside:
Place the pink part on top of the ear part.
Make normal stitches through the front loop of the pink part and the normal way through the back part Do this all the way around and finish at the top part of the ear.Don´t worry if something is a bit too tight, just try to wiggle your way through. And don´t mind to cheat sometimes, this way you´ll be able to make all stitches.
Now you can cut your yarn, make sure you have a long tail left, you can use this to connect the ears to the head.
-
 Step 5
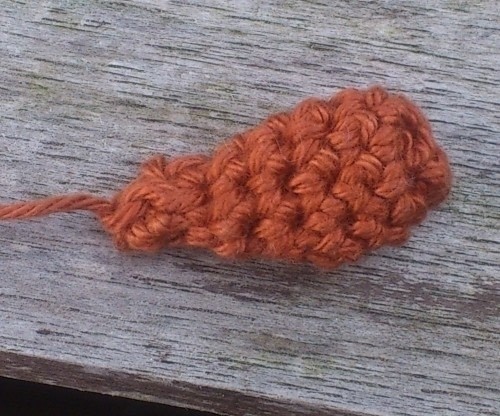
The hands (x2):
1. Chain 3.
2. skip the last stitch and increase through the back loop of the chain. Do this with every stitch of the chain till you finish where you started increasing. Eventually you'll end up with 7 stitches.
3. 7st
4. 7st
5. skip one stitch and stitch in the other one. Do this till you reach 4 stitches.
6. make 4 stitches till you reach the desired length. I try to make 6 stitches in the remaining stitches. This will take some effort, because you are working in the length. -
 Step 6
The feet (2x 2):
Part 1:
1. make a magic circle with 5 stitches (fasten the first and last stitch with a slipstitch, don't know if you already do that).
2. chain 6
3. skip the last stitch and make 5 stitches through the back loop on the chain.
4a. skip the first stitch on your magic circle and 1 normal stitch through the magic circle,
4b. increase the next two stitches
4c. make 2 more normal stitches.
5. make stitches around the other end of the chain using the front loops only.
6. close it using a slip stitch.
(you'll see gaps between the stitches you've made in the back/front loops.. I'm not an expert, so I haven't found a way to make my stitches without them. If you really don't want them showing, you can use the beginning thread to weave through the gaps).Cut off tail if you made part 1.
Part 2:
Make part 1, but don't cut off the tail (you'll thank me later, it is a real pain to have too many tails and to have to add an other just to combine the two parts..)To make a foot:
combine the two parts using normal stitches through both halves.
This will make a clear border made of stitches on one halve.
This halve will make the bottom part of the foot.
You can fold the foot a bit inwards to make it more foot-like.To make the sweet toes you'll have to sew some on using the pink yarn you used for the ears.
I try to make the top part of the toes just below the border you've made connecting the two parts of the foot. -
 Step 7
Use white acrylic yarn for the fluffy tail.
The fluffy tail:
Row 1 [5] make a magic circle with 5 stitches
Row 2 [9] 1st \/ 1st \/ 1st \/
Row 3 [9] 9stFill tail with stuffing.
Row 4 [5] 1st /\ 1st /\ 1st /\
Fasten the tail.
Use some sort of small brush or cleaning thing to rub the tail with. This will loosen the yarn to make it fluffy.
-
 Step 8
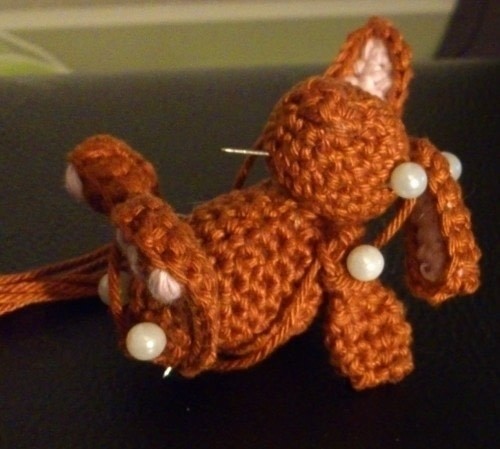
Sewing everything together:
You can place them in any position you'd like! To do this, you can pin the parts, so you can see what they will look like when you sew them on (see the images above for some examples).
In this picture you can see a bunny relaxing in the sun ;)
You can use wire if you really want to have something staying in a certain way, but most of the time folding and moulding the parts works just fine.
To sew them on, use small stitches around the parts.
-
 Step 9
Adding details:
Now you can sew on the details.Nose:
I like to make some sort of a triangle nose, which is wider on the top and small on the bottom.Eyes:
You can make any kind of eye you like.
I like to make triangle eyes, where I make the bottom horizontal, the end to the nose vertical and connect the two with a diagonal line. Fill in the rest and maybe leave/add some white for an extra cute eye. -
 Step 10
I hope you like this how-to.
If you have any questions or remarks, just let me know!


Comments

 1
Watercolor Art »
Watercolor Paints Made From Make Up
1
Watercolor Art »
Watercolor Paints Made From Make Up


