
About
Polymer Clay for Beginners
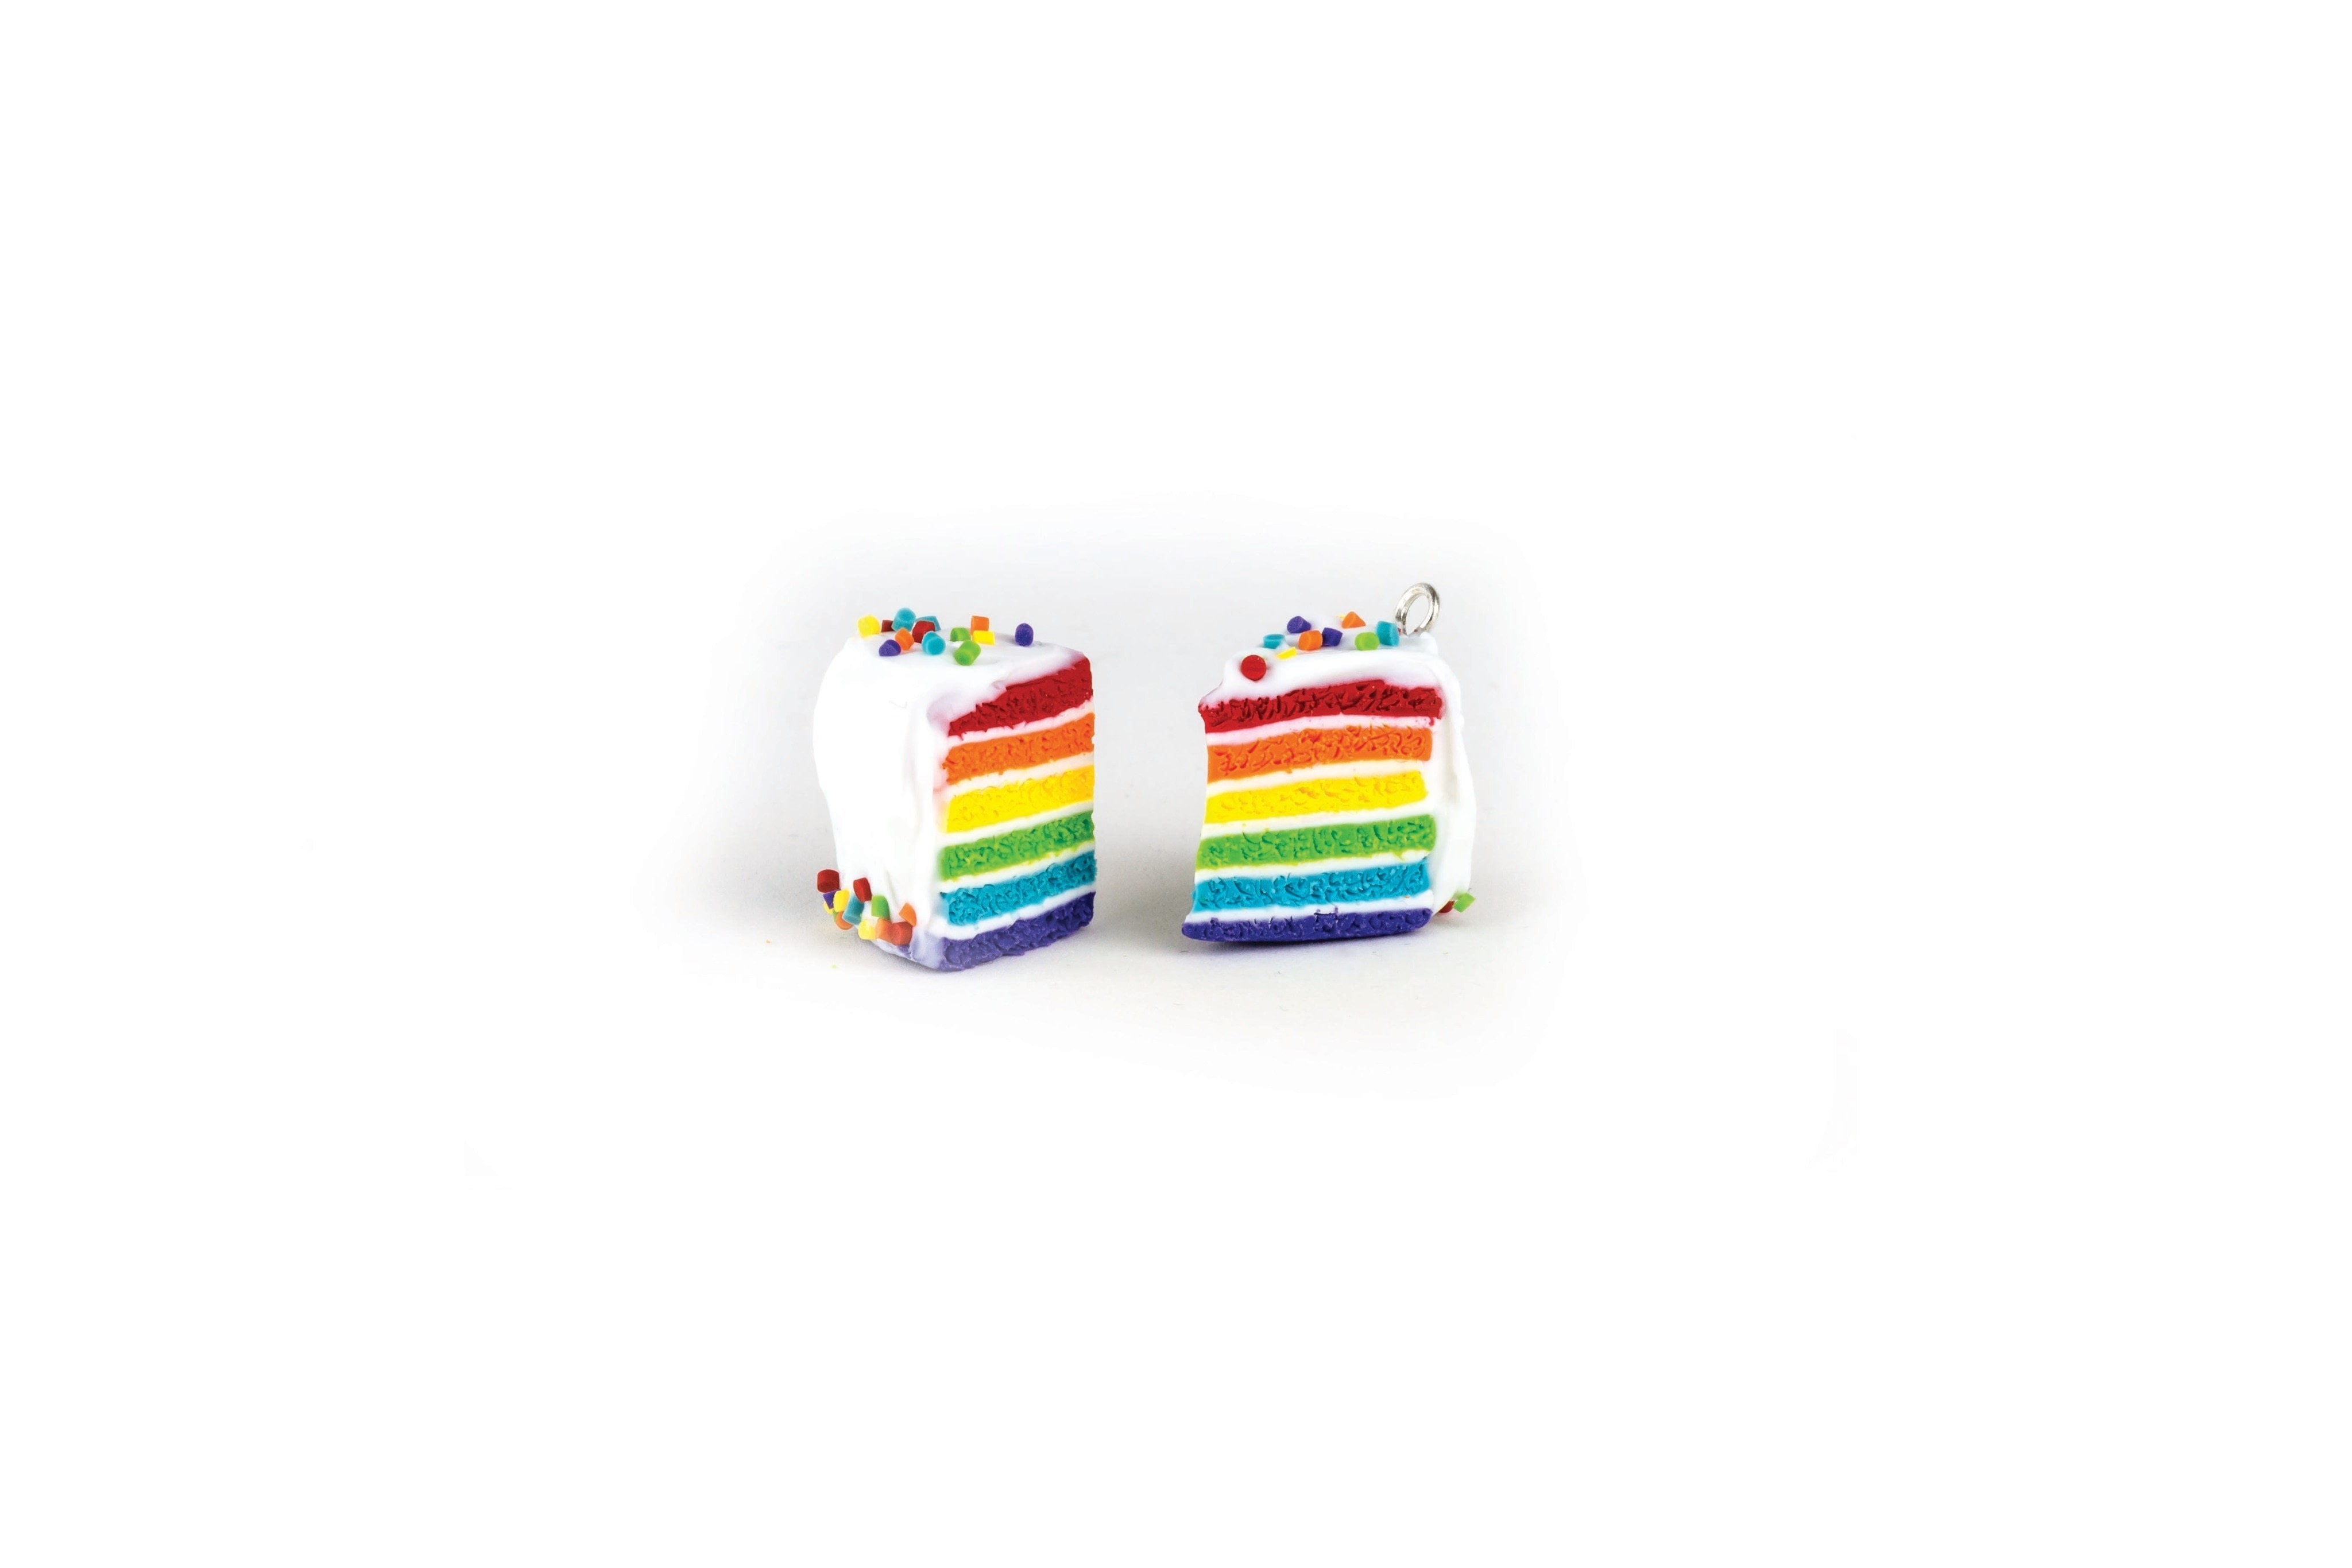
Who doesn’t love cake?! This rainbow cake takes a bit of time to make, but the colorful result is stunning and well worth the effort!
Tags
© 2024 Emily Chen / Quarto · Reproduced with permission.
-
 Luna D. favorited Clay Rainbow Cake
25 Apr 07:04
Luna D. favorited Clay Rainbow Cake
25 Apr 07:04
-
Crash Blackburn added Clay Rainbow Cake to Polymer clay epicness
09 Aug 21:15
-
 Key West Witch favorited Clay Rainbow Cake
05 May 05:53
Key West Witch favorited Clay Rainbow Cake
05 May 05:53
-
 mmotse03 favorited Clay Rainbow Cake
30 Apr 08:47
mmotse03 favorited Clay Rainbow Cake
30 Apr 08:47
-
 Crafterella featured Clay Rainbow Cake
29 Apr 23:00
Crafterella featured Clay Rainbow Cake
29 Apr 23:00
-
Pamela J. favorited Clay Rainbow Cake
28 Apr 11:48
-
 Pam favorited Clay Rainbow Cake
24 Apr 20:11
Pam favorited Clay Rainbow Cake
24 Apr 20:11
-
 Kinhime Dragon added Clay Rainbow Cake to things to make
24 Apr 14:54
Kinhime Dragon added Clay Rainbow Cake to things to make
24 Apr 14:54
-
 Creative Publishing international published her project Clay Rainbow Cake
24 Apr 09:00
Creative Publishing international published her project Clay Rainbow Cake
24 Apr 09:00
-
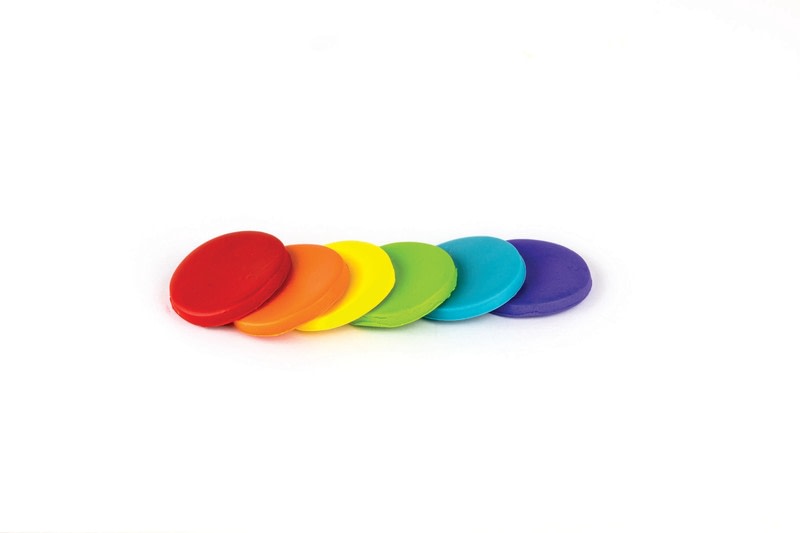
 Step 1
With a pasta machine or rolling tool, roll out the colored balls of clay to ⅛" (3 mm) thick.
-
 Step 2
Use a larger circle cutter to cut circles from the clay.
-
 Step 3
TIP
Don’t have a pasta machine? No problem! Try using playing cards or index cards. Grab two piles of cards, place a rubber band around each of them, and then roll out your clay between the two stacks to create an even thickness. -
 Step 4
Roll out a thin sheet of white clay to about one-quarter the thickness of the colored discs. Cut circles from the white clay, and place one on top of the purple disc. Then place the blue on top of the white disc, like a sandwich.
-
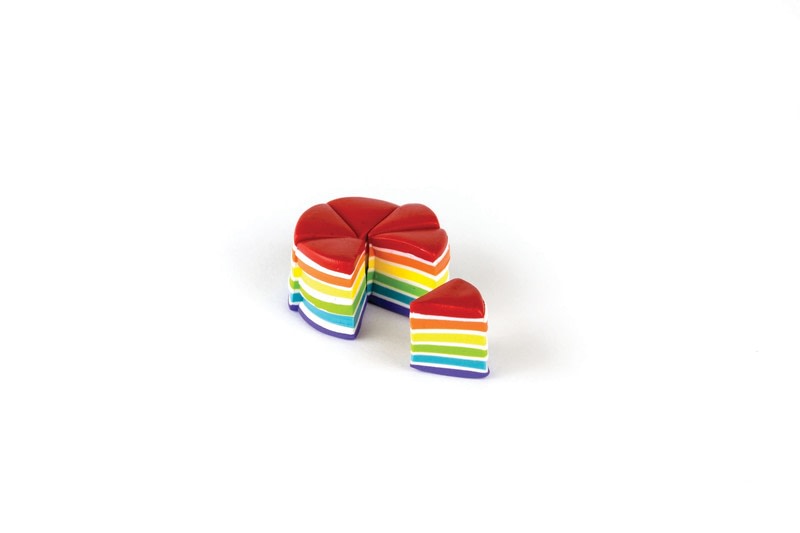
 Step 5
Continue placing layers of white clay between the colors to form a rainbow, ending with the red layer on top.
-
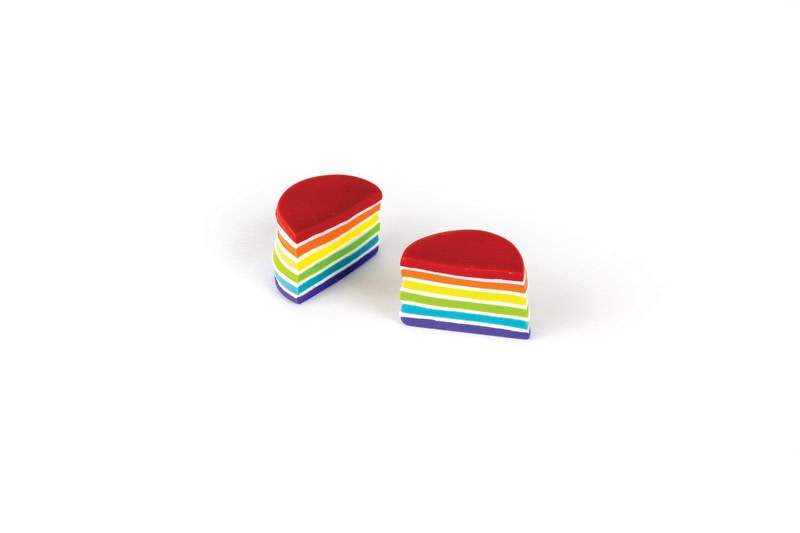
 Step 6
Using a straight cutting blade, cut the cake in half.
-
 Step 7
Cut the remaining pieces until you have formed 6 equal slices.
-
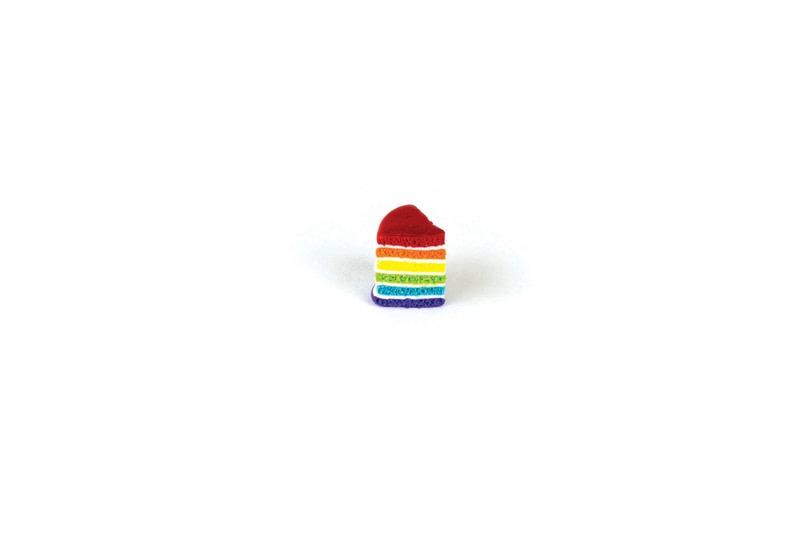
 Step 8
With a pointed detail tool or sewing pin, stir up the colored layers (except for the white) using small, circular motions. Clean the tool between each layer.
-
 Step 9
Continue texturing all of the layers. Bake the slices for about 5 to 10 minutes at the temperature indicated on the package of clay.
-
 Step 10
While you bake the cakes, prepare the frosting using equal parts white clay and liquid clay.
-
 Step 11
Mix with a flat tool until all the lumps are gone and you’ve formed a thick, sticky frosting.
-
 Step 12
Apply the frosting to the tops and sides of the cake slices
-
 Step 13
To make sprinkles, roll out a small snake of each color of clay, making each very thin. Bake the snakes for 5 minutes at the temperature indicated on the package of clay.
-
 Step 14
With a blade, cut “sprinkles” from the clay. Make them as small as possible while maintaining their circular shape.
-
 Step 15
Make about 10 to 15 sprinkles of each color.
-
 Step 16
Place the sprinkles on the tops and lower sides of the cakes.
-
 Step 17
Bake the cakes for another 5 to 10 minutes, and they’re done!
TIP
Make your cake a charm by inserting a headpin!