


About
How to sew a centered zipper
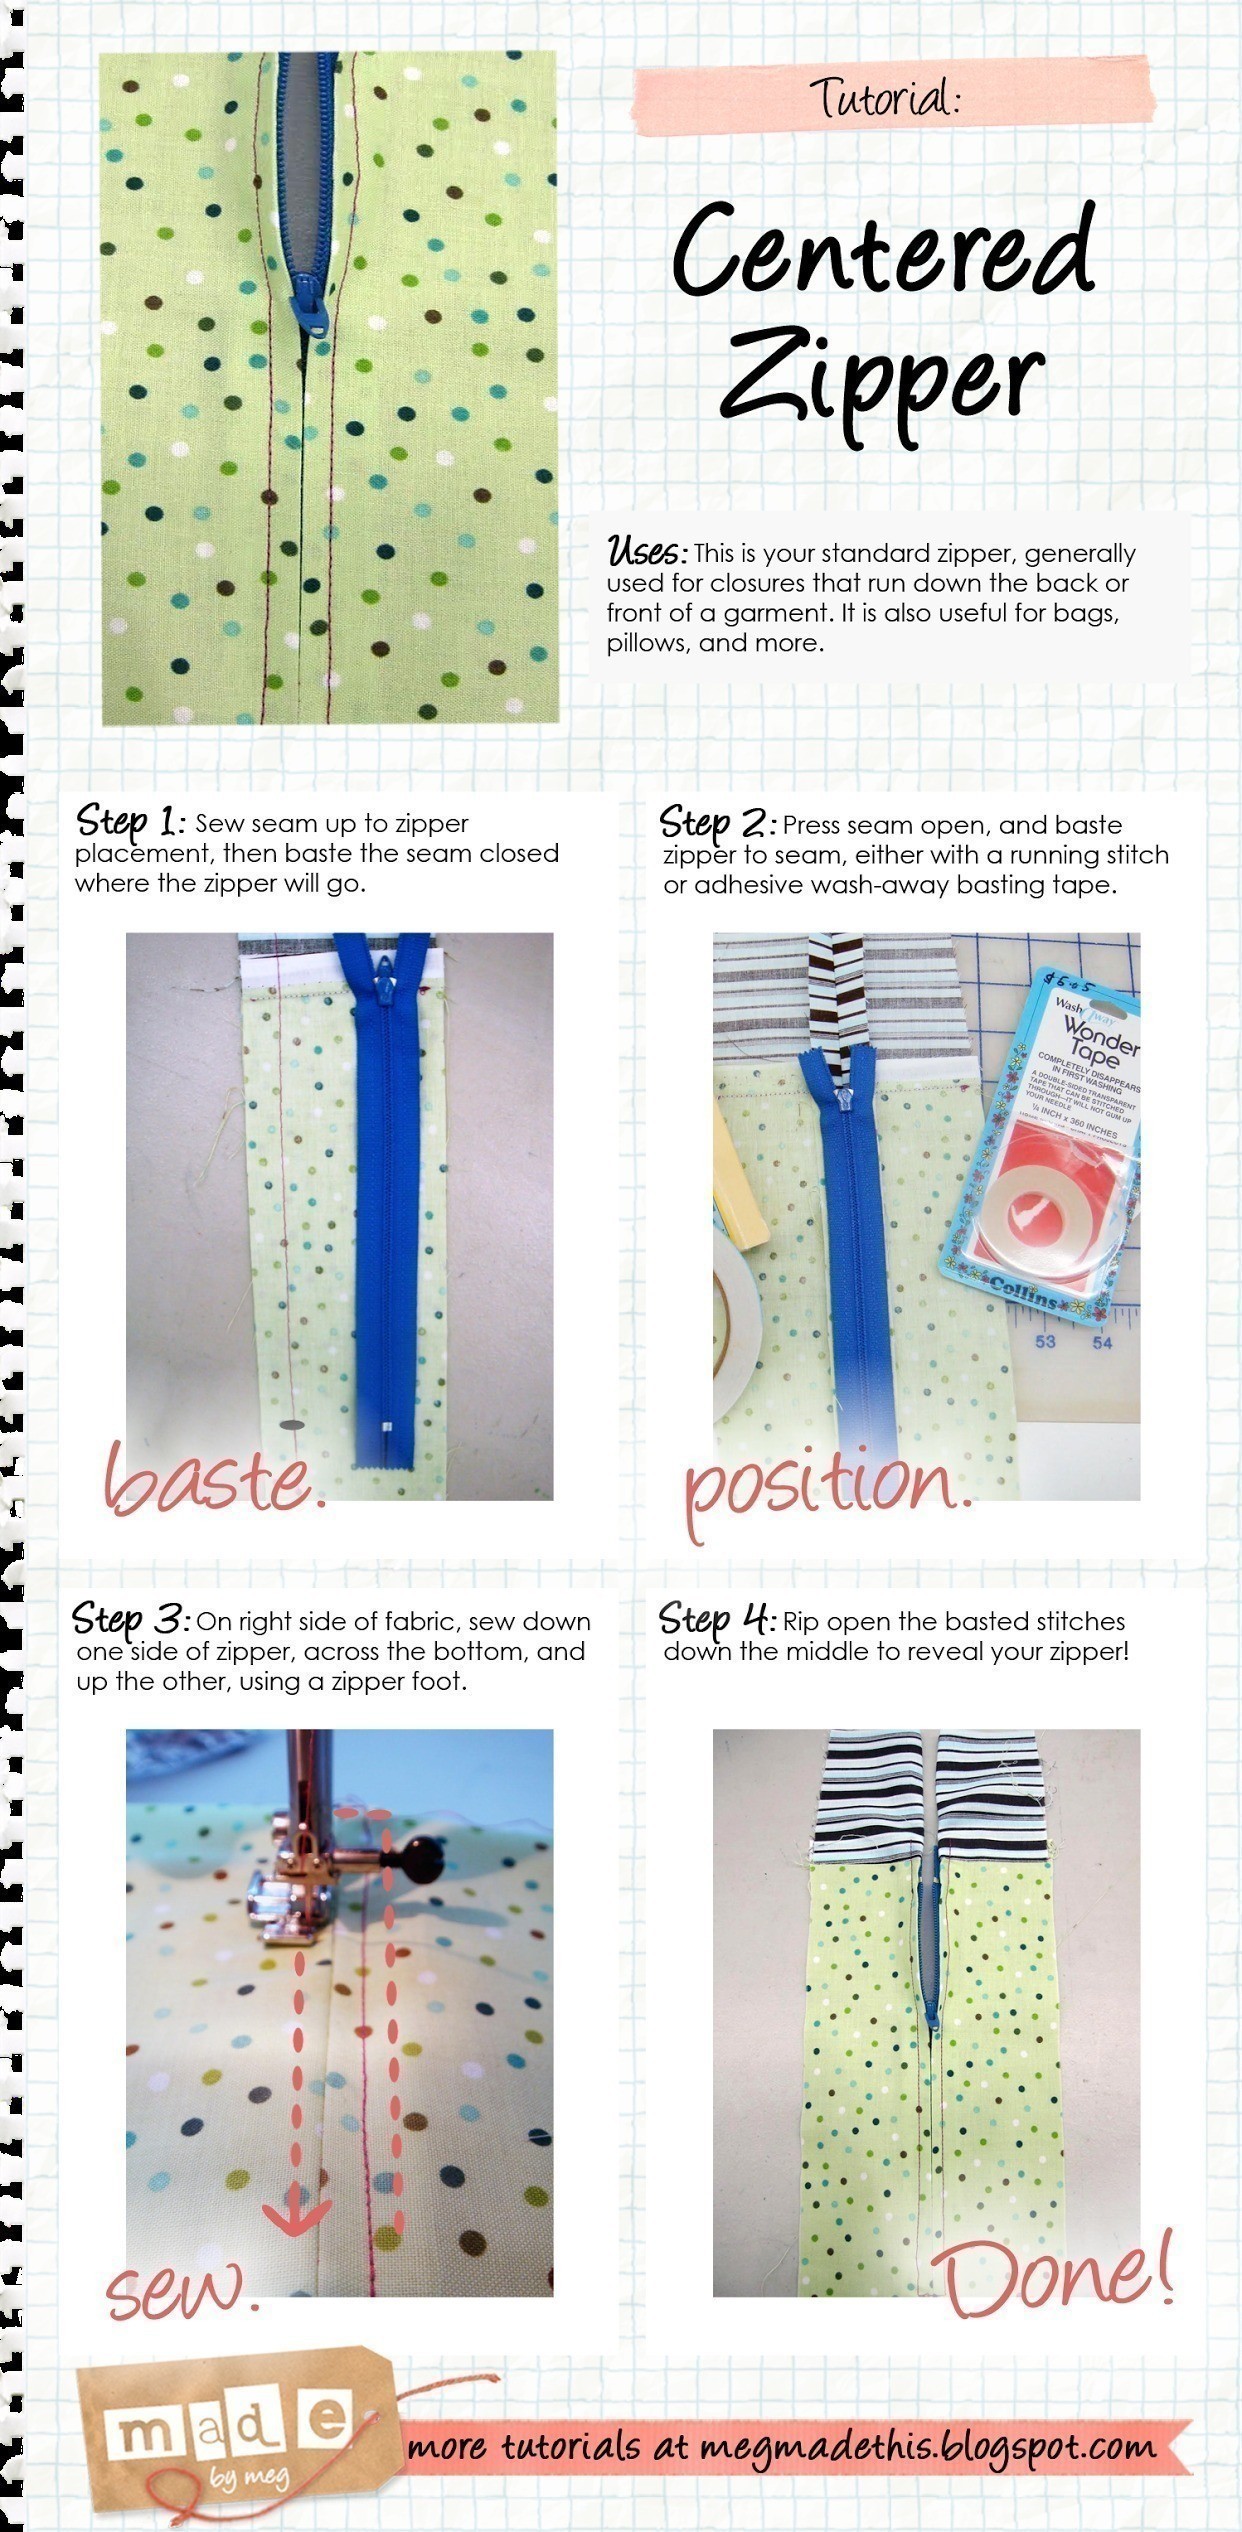
This is your standard zipper, generally used for closures that run down the back or front of a garment. It is also used for bags, pillows and more.
-
 VillainousNinja added Centered Zipper to Sewing
09 Jun 18:25
VillainousNinja added Centered Zipper to Sewing
09 Jun 18:25
-
 Krystal W. favorited Centered Zipper
19 Mar 05:31
Krystal W. favorited Centered Zipper
19 Mar 05:31
-
Krystal W. added Centered Zipper to Sewing
19 Mar 05:17
-
 MadebyMeg published their project Centered Zipper
02 May 06:00
MadebyMeg published their project Centered Zipper
02 May 06:00
You Will Need
-
 Step 1
Place the zipper in position on the garment and mark the fabric at the bottom of the zipper at the metal stopper. Next, machine baste the zipper opening closed using a long stitch length, sew a backstitch at your mark, and continue sewing down the seam with a regular stitch length. This will leave you with a sewn seam and a basted seam at just the zipper opening.
-
 Step 2
Press the seam open. Lay the zipper in position over the basted seam so that the zipper teeth lie on top of the seam. Baste the zipper in place with pins, by stitching, using a fusible tape like Steam-A-Seam 2, or with a wash-away basting tape such as Wonder Tape.
-
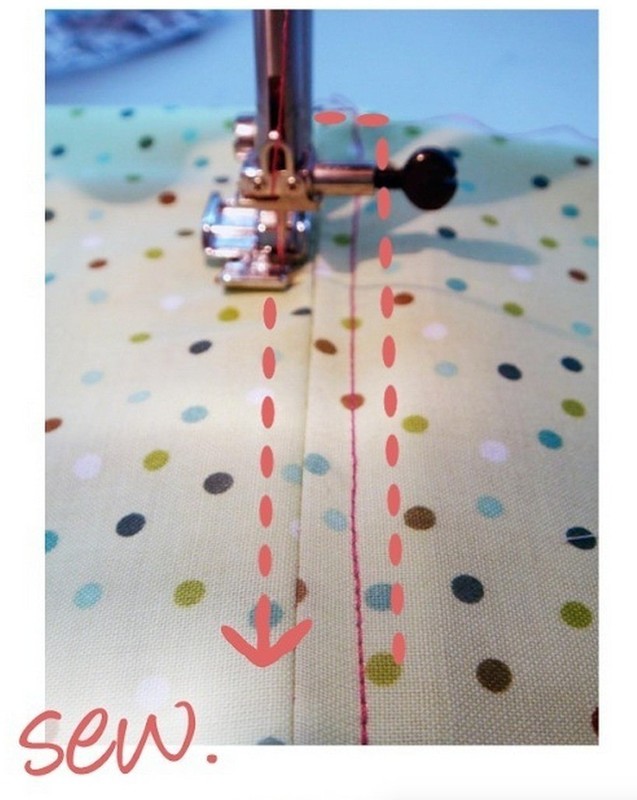
 Step 3
With the zipper basted in place, turn the fabric over to the right side. Then, starting at the top of the zipper and using a zipper foot, sew down one side of the zipper, turn and sew across the bottom of the zipper, and sew up the other side of the zipper. You can backstitch a few times across the bottom for added strength. Your final stitch lines should be about 1/4" from the basted seam.
-
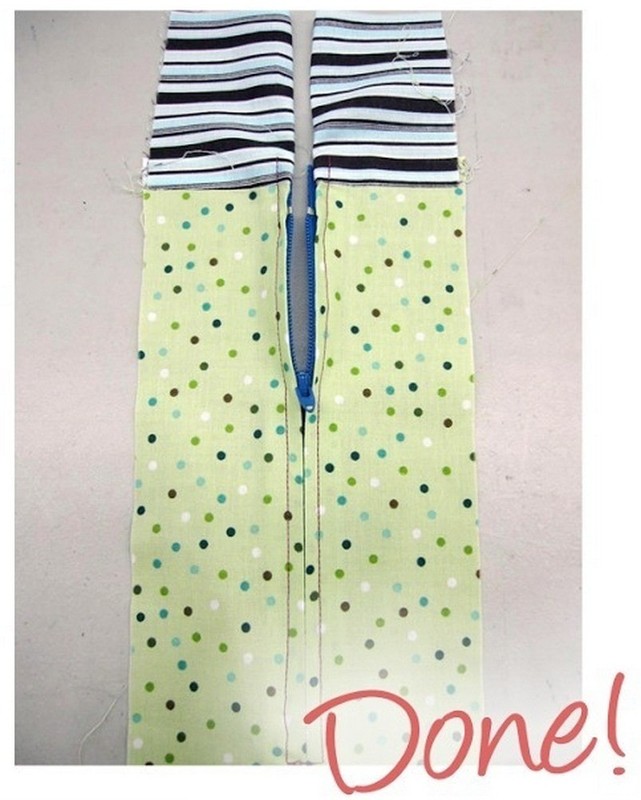
 Step 4
Carefully rip open the basted seam using a seam ripper to reveal your zipper underneath!


 1
Watercolor Art »
Watercolor Paints Made From Make Up
1
Watercolor Art »
Watercolor Paints Made From Make Up
 2
Paper Book Covers »
Shoe Inspired Spiral Notebook
2
Paper Book Covers »
Shoe Inspired Spiral Notebook

