


About
Twiggy makes her bed... and then she lies in it
-
 Roxyandboys favorited Cat Bed
22 Oct 18:26
Roxyandboys favorited Cat Bed
22 Oct 18:26
-
 Carrie Alice added Cat Bed to Kitty Luv • Projects for cat lovers
12 Aug 09:47
Carrie Alice added Cat Bed to Kitty Luv • Projects for cat lovers
12 Aug 09:47
-
 forbunnie favorited Cat Bed
05 Mar 19:54
forbunnie favorited Cat Bed
05 Mar 19:54
-
 su l. favorited Cat Bed
05 Mar 12:25
su l. favorited Cat Bed
05 Mar 12:25
-
Christine P. added Cat Bed to Pet Accessories
13 Sep 20:18
-
 Summer O. favorited Cat Bed
15 Jul 06:51
Summer O. favorited Cat Bed
15 Jul 06:51
-
 noraknickers added Cat Bed to DIY Betsy Johnson
03 Jun 23:52
noraknickers added Cat Bed to DIY Betsy Johnson
03 Jun 23:52
-
 Polly C. favorited Cat Bed
20 May 04:24
Polly C. favorited Cat Bed
20 May 04:24
-
Len favorited Cat Bed
08 Apr 17:41
-
 mmotse03 favorited Cat Bed
29 Mar 06:44
mmotse03 favorited Cat Bed
29 Mar 06:44
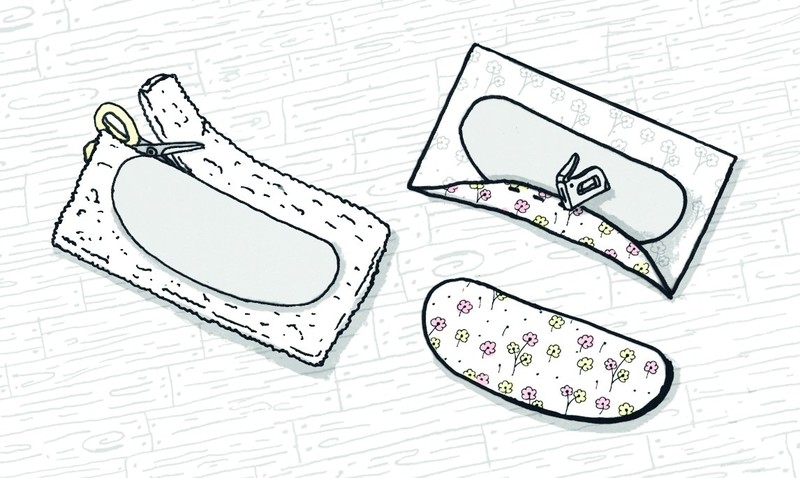
You Will Need
-
 Step 1
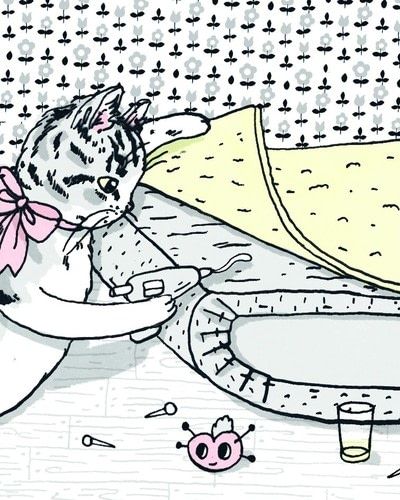
Twiggy pads into the studio one sunny morning and discovers Chloe’s much loved sewing stool sitting on the floor. She pussyfoots around it, gives it a curious sniff, and peers inside. She sees sewing needles, cotton reels, buttons, bobbins, a pin cushion... “What's all this stuff doing in this cozy-looking bed?” she thinks. She throws it all out onto the floor and clambers inside. It's very comfy, which gives Twiggy “paws” for thought. “Perfect...”, she purrs. “Well... almost!” It’s far too shabby-looking for a classy cat like Twiggy, so she grabs some of the fabric from the shelves and collects some tools. Time for a spot of renovation!
-
 Step 2
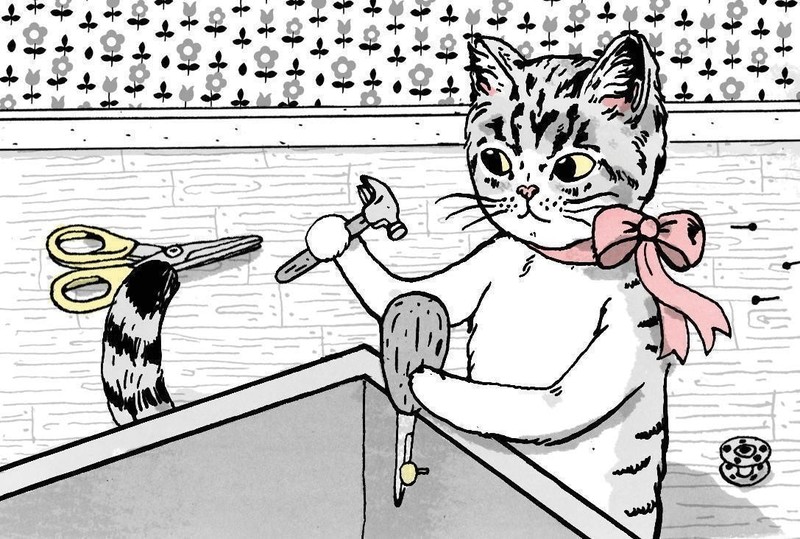
She begins by removing all the original fabric, taking care to keep it in one piece so that she can use it as a template for her new fabric. She uses a tack lifter and long-nose pliers to lift up the old fabric, and carefully removes all the upholstery pins and gimp pins with a hammer and a staple remover. If you are able to un-screw the hinges and remove the lid, do so. Twiggy finds that the screws in the hinges of this stool are so old that she doesn’t have the right tool to remove them, so she works around them instead.
-
 Step 3
She unscrews the legs from underneath and puts the rubber washers to one side. She unscrews the chain at both ends of the hinged lid and sets it aside for later, along with the washers. (She puts pins in the holes where the chain was attached, to remind her where they need to go.) She removes any panels from the inside and outside of the stool, and removes the fabric from these too, until she is left with the plain wooden panels. This all takes a while and requires elbow grease, something Twiggy has never encountered. She takes a cat nap on the sofa before she goes any further.
-
 Step 4
After her nap she feels far more frolicsome and keen to continue with her home improvements. She picks a nice vintage floral fabric for the interior and cuts a piece to size, adding 2 in. (5 cm) extra all around to fold over the edges. She places the fabric inside the stool, making sure she has an even amount of fabric to stretch over the front and back exterior, and staples the front. She removes the pins marking the chain positions when covering, but puts them straight back so she knows where the holes are.
-
 Step 5
She tucks the fabric into the corners. As the stool is curved she has excess fabric, so she folds over the fabric at the edges of the stool to form a pleat and staples it, pushing the staple gun right in to the edges so that it’s nice and neat. (If your stool is not curved this won’t apply to you.) If you like, you can glue a beading trim or ribbon over the staples to hide them, but they will be hidden once a pillow is put on top.
-
Step 6
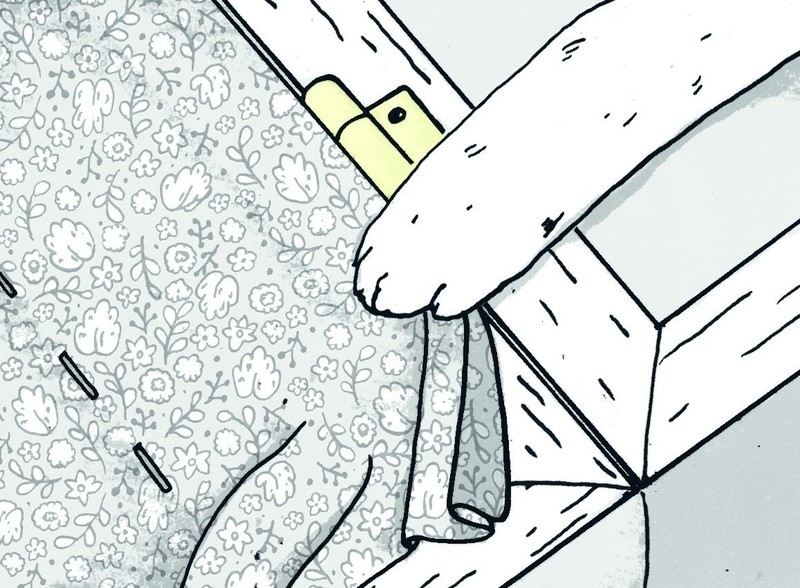
When the fabric meets a hinge, Twiggy tucks it under the groove and pulls it taut to the back. She makes a small diagonal nick away from the hinge at the back, folds a hem to align with it, and secures with a staple. All raw edges will be covered later.
-
 Step 7
Twiggy covers the interior side panels in the same fabric, folding the fabric over neatly at the corners as if she is wrapping a present and securing it with staples at the back; she’ll slot these panels back into the stool after she’s added the exterior fabric.
-
Step 8
Next Twiggy uses the main exterior fabric she removed earlier as a template to cut her new fabric, allowing an extra 2 in. (5 cm) of fabric all around. She has chosen a solid turquoise color for this part. She staples from the front along the bottom edge, pulling taut and fold-pleating around the curves. She stretches the fabric over to the back and to the insides of the stool. On the interior corners she folds under the fabric neatly, following the straight edges of the stool.
-
 Step 9
Then she cuts the lid fabric to size, making sure she has enough to cover the foam as well as the lid (at least an extra 3 in./7.5 cm all around). She uses a glue gun to stick the foam on top of the lid, so that it doesn’t slip. Next she covers the lid with the fabric as before, folding over the raw edges to the interior of the lid. Again, she marks where the hole goes through the fabric with a pin.
-
 Step 10
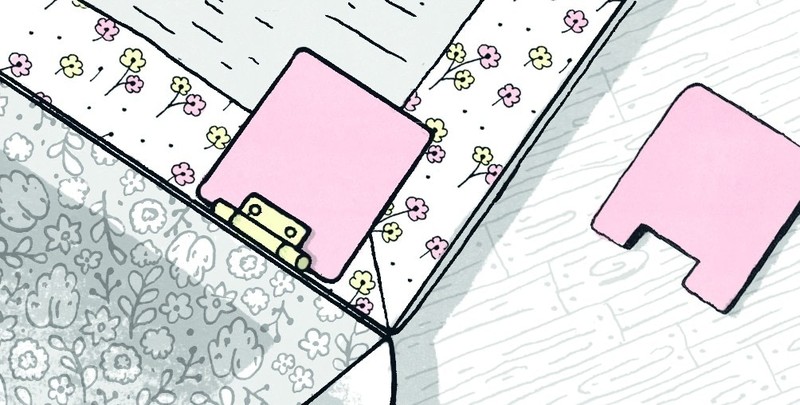
As Twiggy works around the hinges, she cuts rectangles of felt to fit around the tops of the hinges, and glues them in place with a glue gun. Then she slots the interior side panels that she covered earlier back into the stool.
-
 Step 11
Now she is going to cover all her panel pieces. She has three in total—front and back exterior and lid interior. If you don’t have any, cut some from thick cardboard. Twiggy cuts batting (wadding) to fit each panel, lays it on top of the relevant panel, then folds over the fabric and staples it at the back, folding and pleating at the curves as neatly and symmetrically as possible.
-
 Step 12
When they’re all covered, she glues them securely in place with a glue gun, removing the pins in the lid first and making sure that they are properly centered and cover the raw edges of the fabric already stuck down.
-
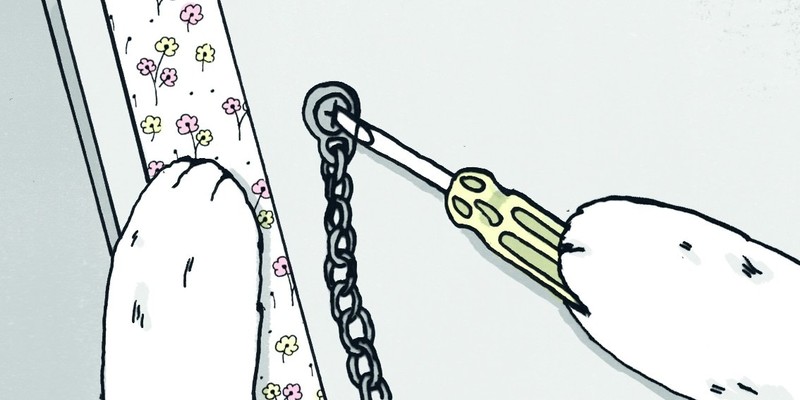
 Step 13
Next Twiggy re-attaches the chain that holds the lid open. She pierces the hole through the interior lid panel using a strong embroidery needle (you could also use a thin screwdriver) and screws one end of the chain into the panel onto the lid. She screws the other end of the chain into the other hole marked with a pin.
-
 Step 14
Twiggy is getting very excited now because she can see her comfy bed is almost finished. She turns the bed upside down, re-aligns the rubber washers she removed earlier, and staples them in place. She pierces through the fabric under each washer with a strong embroidery needle and screws the legs back on. Then she turns the bed right side up again.
-
Step 15
Twiggy thinks her new bed is the cat’s whiskers, but it’s missing something... a pillow! She measures her pillow and cuts fabric 3⁄8 in. (1 cm) bigger all around for the front. For the back she cuts two pieces measuring two-thirds the length of the front. She folds over a double 3⁄8- in. (1-cm hem) on one side of each back piece, pins, and sews into place. Then she lays the front pillow piece right side up in front of her with two back pieces right side down on top. She pins them together and sews all the way around, taking a 3⁄8-in. (1-cm) seam. Then she turns the pillow case right side out and stuffs her pillow inside.
-
 Step 16
Finally, she covers two self-cover shank buttons in the same fabric as the interior of her bed. To do this she cuts out circles twice the size of the buttons, sews a running stitch around the outside leaving loose thread tails, places a button on the wrong side of the fabric, pulls the thread tails so the fabric gathers around the button, and ties the threads in a double knot. Then she presses the back of the shank button in place and sews one button on at each end of the pillow case. She inserts the pillow in the case, places it in her bed, gets in, and... Zzzzzzzzzzz!
-
 Step 17
Shortly after, Chloe walks in ready to start another busy crafting day—and what does she find? A huge mess, with all her sewing materials all over the floor! Threads unraveled, buttons scattered far and wide, a crumpled heap of fabric scraps... who could be responsible? Gobsmacked, Chloe peers into the depths of what used to be her sewing basket... and sees that someone has moved in! Twiggy snoozes on peacefully, her work complete.


Comments


 1
Watercolor Art »
Watercolor Paints Made From Make Up
1
Watercolor Art »
Watercolor Paints Made From Make Up
 2
Paper Book Covers »
Shoe Inspired Spiral Notebook
2
Paper Book Covers »
Shoe Inspired Spiral Notebook
