

About
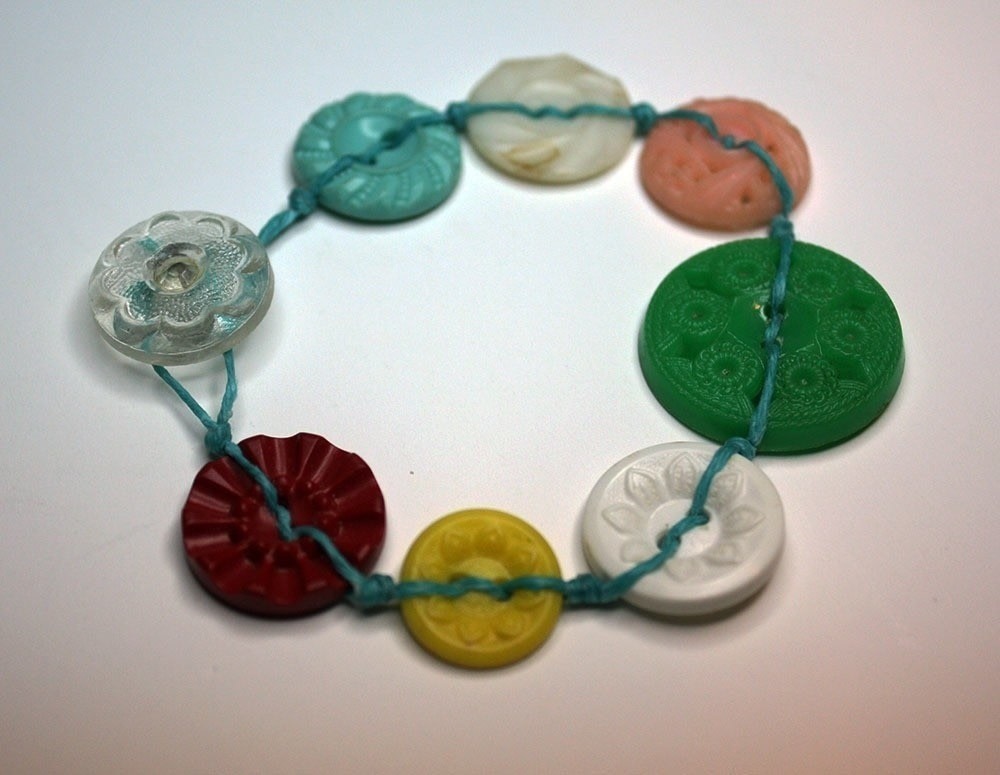
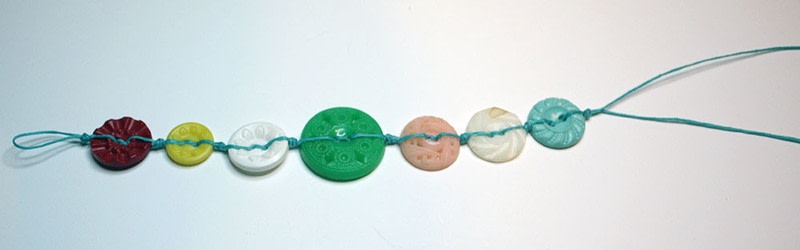
A lightweight and versatile knotted button bracelet
I’m a lover and collector of buttons. Realizing that I should really make something with at least some of them, this bracelet pattern was born. It’s a quick and easy project, and the resulting bracelet is lightweight and fun to wear. As well, it comes together quickly so you can make one to go with every outfit.
-
 Kathy C. favorited Button Bracelet
10 Apr 11:37
Kathy C. favorited Button Bracelet
10 Apr 11:37
-
 Michele F. favorited Button Bracelet
05 May 21:35
Michele F. favorited Button Bracelet
05 May 21:35
-
 Kari G. favorited Button Bracelet
02 Jan 10:36
Kari G. favorited Button Bracelet
02 Jan 10:36
-
 jamie.griffin0606 favorited Button Bracelet
21 Nov 19:34
jamie.griffin0606 favorited Button Bracelet
21 Nov 19:34
-
 Crafterella featured Button Bracelet
02 Nov 23:00
Crafterella featured Button Bracelet
02 Nov 23:00
-
 Emma H. favorited Button Bracelet
01 Nov 21:33
Emma H. favorited Button Bracelet
01 Nov 21:33
-
 Pam favorited Button Bracelet
27 Oct 00:04
Pam favorited Button Bracelet
27 Oct 00:04
-
 CraftyHope published her project Button Bracelet
26 Oct 12:19
CraftyHope published her project Button Bracelet
26 Oct 12:19
You Will Need
-
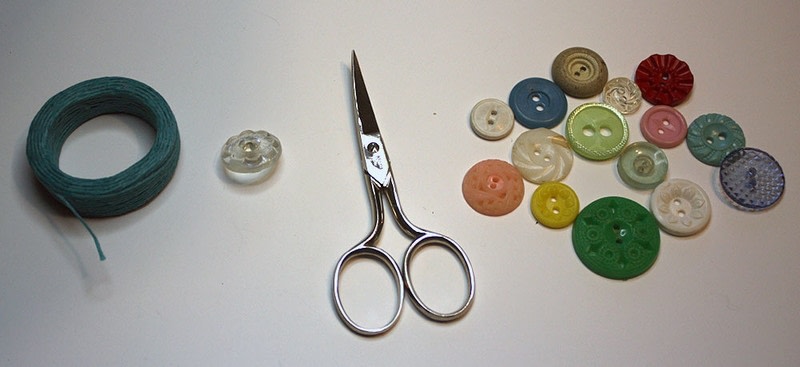
 Step 1
Gather supplies (more buttons are pictured than needed)
-
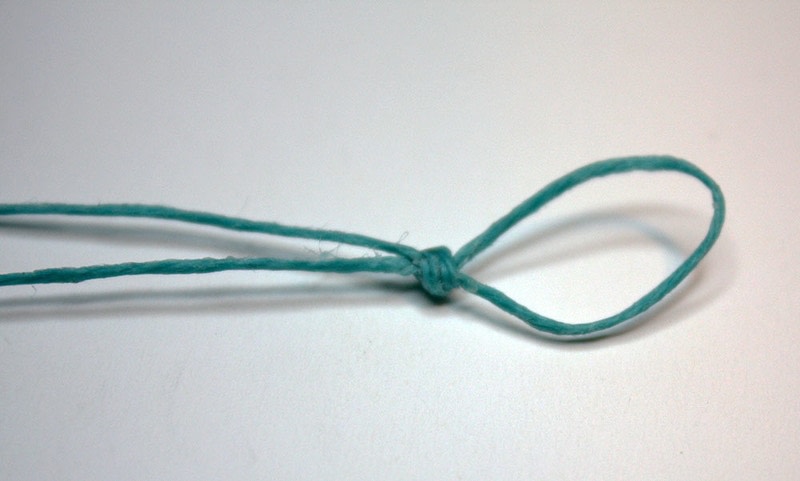
 Step 2
Fold the cord in half and tie a knot just below the bend at the middle, forming a loop. This loop should be large enough for the shank button to just barely fit through.
-
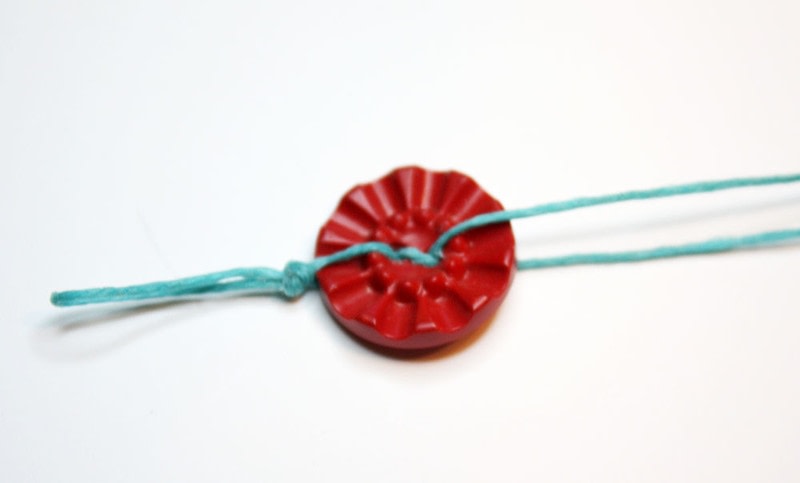
 Step 3
Insert one of the ends of the cord into the back of your first button. Slide the button all the way down to the knot, nestling it into the knot so it sits flat.
-
 Step 4
Pull that first cord back, exposing the top of the first hole.
-
 Step 5
Insert the second cord end into the top of and through the first hole. Pull tight. (You should now have one cord coming out of the top and one out of the bottom of the button.)
-
 Step 6
While holding that second cord, go ahead and insert it into the back of the second hole. Pull it tight and toward the knot. (Both cord ends should now be coming out the top of the button)
-
 Step 7
Insert the first cord through that same second buttonhole, pull tight. Pull both cords away from the loop.
-
 Step 8
Holding both ends of the cord together, tie a knot and tighten it against the button.
-
 Step 9
Repeat steps 3-8 until the bracelet is almost as long as you want it. I’ve found that 7-9 buttons usually work, depending on the size of the buttons and the wrist you want to fit.
-
 Step 10
Thread your shank button onto the end of one of the cords. Pull it toward the knot, but not flush – leave some wiggle room.
-
 Step 11
Cross your cords and pull one end through, pull the knot toward the button but not tight against it. Repeat for a strong double knot.
-
 Step 12
Trim the ends of the cord fairly close to the knot. Add a drop of glue to secure the knot (optional).
-
 Step 13
Additional Note:
If any of your buttons have 4 holes, use the same procedures – the second hole will just be the one diagonally across from the first one.


 1
Watercolor Art »
Watercolor Paints Made From Make Up
1
Watercolor Art »
Watercolor Paints Made From Make Up
