


About
My version of the well-known dream catcher
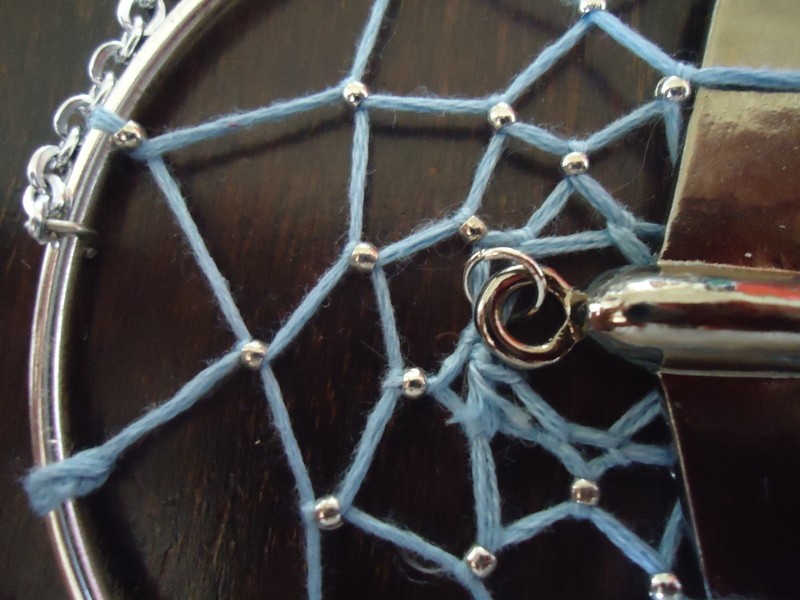
I am aware of the fact that there already are thousands of dream catcher tutorials on Cut Out + Keep so I'm only going to explain how you can add beads.
I'm using my dream catcher as a necklace. In a few days I'll be flying to Spain for a holiday. I really enjoy flying so I added an aeroplane to combine two of my biggest loves: planes and sleeping.
NOTE: For the tutorial I used big beads so it's easy for you to see what I'm doing. I'd recommend using small beads and a needle. I used crimp beads because they are nice, shiny and have big holes.
Tags
-
 Key West Witch added Beaded Dream Catcher to Dreamcatchers
30 Jun 12:34
Key West Witch added Beaded Dream Catcher to Dreamcatchers
30 Jun 12:34
-
 Tierra T. favorited Beaded Dream Catcher
16 Nov 22:35
Tierra T. favorited Beaded Dream Catcher
16 Nov 22:35
-
 Jo C. added Beaded Dream Catcher to dream catchers
30 Jan 14:56
Jo C. added Beaded Dream Catcher to dream catchers
30 Jan 14:56
-
 Daina R. added Beaded Dream Catcher to nometnei
07 Jun 08:30
Daina R. added Beaded Dream Catcher to nometnei
07 Jun 08:30
-
 Logan M. favorited Beaded Dream Catcher
17 Dec 15:53
Logan M. favorited Beaded Dream Catcher
17 Dec 15:53
-
 Nikki R. favorited Beaded Dream Catcher
01 Oct 11:44
Nikki R. favorited Beaded Dream Catcher
01 Oct 11:44
-
 zoegirl221 favorited Beaded Dream Catcher
21 Sep 21:25
zoegirl221 favorited Beaded Dream Catcher
21 Sep 21:25
-
Toni T. favorited Beaded Dream Catcher
26 Jul 03:25
-
breanna w. favorited Beaded Dream Catcher
23 Jun 06:52
-
hanny s. favorited Beaded Dream Catcher
22 Jun 17:38
You Will Need
-
 Step 1
I made some stitches first.
-
 Step 2
Put the string through the bead and flip the string over the stitch.
-
 Step 3
Put the string back through the bead. Make sure you keep your stitches tight. I couldn't do this because I had to take pictures.
-
 Step 4
Repeat step 3.
-
 Step 5
And step 4.
-
 Step 6
And so on.
-
 Step 7
With small beads it would look like this. You can decorate it more if you desire. I added tassels and an aeroplane.


 1
Watercolor Art »
Watercolor Paints Made From Make Up
1
Watercolor Art »
Watercolor Paints Made From Make Up
 2
Paper Book Covers »
Shoe Inspired Spiral Notebook
2
Paper Book Covers »
Shoe Inspired Spiral Notebook
