


About
How-to take a gorgeous shot of the Aurora Borealis
We live in Edinburgh and Scotland is just north enough that you're able to see the Northern Lights once or twice a year. Obviously, the higher north you live, the easier it will be to see the aurora but on occasion, you'll be able to see it as far south as middle England and mainland America too.
We've been hunting for the aurora for almost a year and on our tenth attempt, we were lucky enough to catch an amazing hour long display just 30 minutes outside of the city and take some gorgeous shots. On the nights when there was no sign of a display, we practised our photography so that we'd be ready for when they finally did appear and picked up lots of tips and tricks which you might find handy!
-
 Jill Goslinga favorited How To Photograph The Northern Lights
02 Oct 14:13
Jill Goslinga favorited How To Photograph The Northern Lights
02 Oct 14:13
-
 ElizabethJuddTaylor added How To Photograph The Northern Lights to Picnic with Nessie
08 Apr 16:37
ElizabethJuddTaylor added How To Photograph The Northern Lights to Picnic with Nessie
08 Apr 16:37
-
 Cat Morley replied to a comment on her project How To Photograph The Northern Lights
03 May 16:44
Cat Morley replied to a comment on her project How To Photograph The Northern Lights
03 May 16:44
-
 Rainbow Wyvern commented on How To Photograph The Northern Lights
02 May 11:17
Rainbow Wyvern commented on How To Photograph The Northern Lights
02 May 11:17
-
Rainbow Wyvern favorited How To Photograph The Northern Lights
02 May 11:15
-
 PixieFey added How To Photograph The Northern Lights to Photo Tutorials
23 Apr 19:54
PixieFey added How To Photograph The Northern Lights to Photo Tutorials
23 Apr 19:54
-
 Kay Bay favorited How To Photograph The Northern Lights
19 Apr 11:18
Kay Bay favorited How To Photograph The Northern Lights
19 Apr 11:18
-
Cat Morley published her project How To Photograph The Northern Lights
18 Apr 20:23
-
 Step 1
Pick your go-to location
You'll want to be as far north as possible but most importantly, somewhere with no light pollution. Ideally far from a city with a good vantage point. Coastlines and hills work really well.
If possible, pick somewhere really pretty with an interesting focal point. We found the perfect spot at a lighthouse along the coast, which was a really pretty place to be on any night of the year.
-
 Step 2
Watch the weather
You'll need a clear night to be able to see the aurora but if you're able to see stars, it's dark enough to see the lights but even a full moon can create enough light to wash out the aurora. We were lucky enough to get a night with no moon at all, so it was pitch black with a million stars in the sky. Check the weather forecasts to get a good idea for which nights might be good.
-
 Step 3
Sign up for aurora alerts
There are many apps for your phone and websites you can check that will alert you to geomagnetic activity. You can also find charts with an ovation forecast which will show you how far south you'll be able to see the nights. Most are only able to give you an alert for 30 minutes in advance but if there's a large solar storm going on with lots of activity, this is the perfect time to head to your go-to spot.
-
 Step 4
Be patient and keep yourself entertained
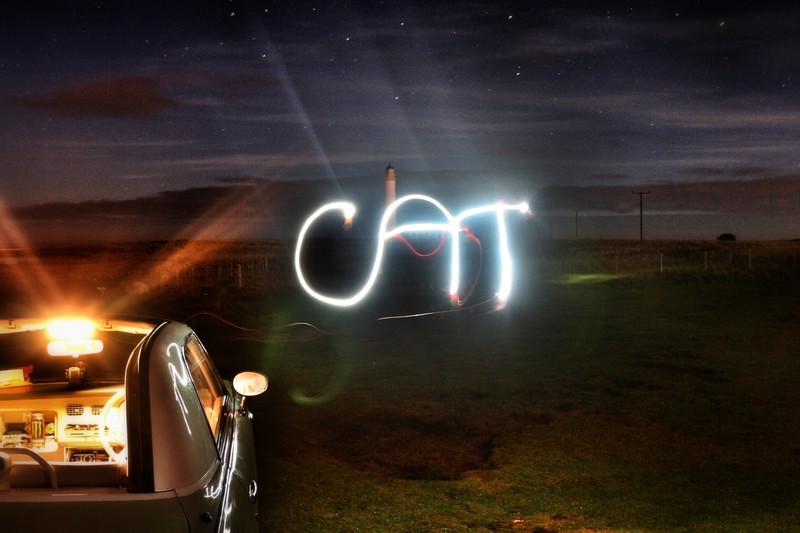
Catching a glimpse of the aurora involves a lot of waiting. So pack your car with duvets, snacks and something to keep you entertained. The Serial podcast came in really handy while we were waiting but this is also the perfect time to practise your photography. Take practise shots of the scene you'd like to capture the lights in so you can get your camera set up properly. There are also lots of other fun nighttime shots you can take and have fun with too.
-
 Step 5
Keep watching
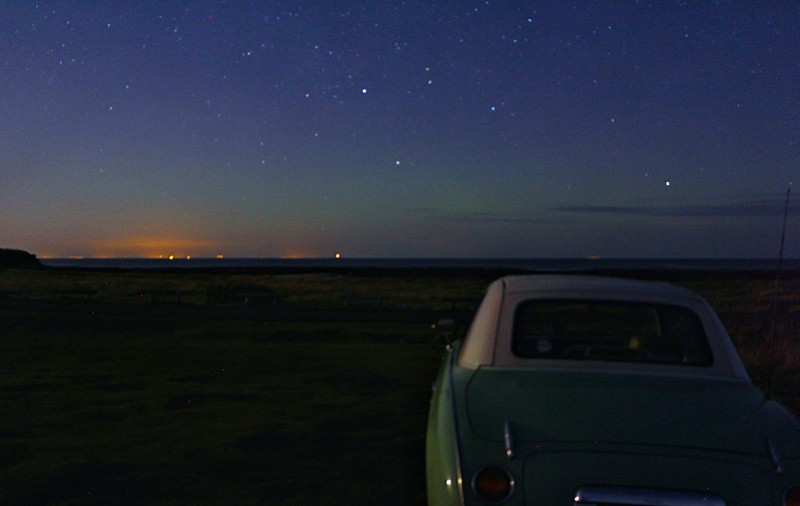
When the aurora first appears it might just look like a faint cloud to the north. It can be quite hard to spot by eye so take a photo on a long exposure which will pick up light and colour that you can't see for yourself.
-
 Step 6
Set up your camera
When it's time for the aurora, pop your camera on a tripod.
Here's a shot to show you how a photo looks before you set up your camera properly, so don't worry if this is what your first shot looks like.
-
 Step 7
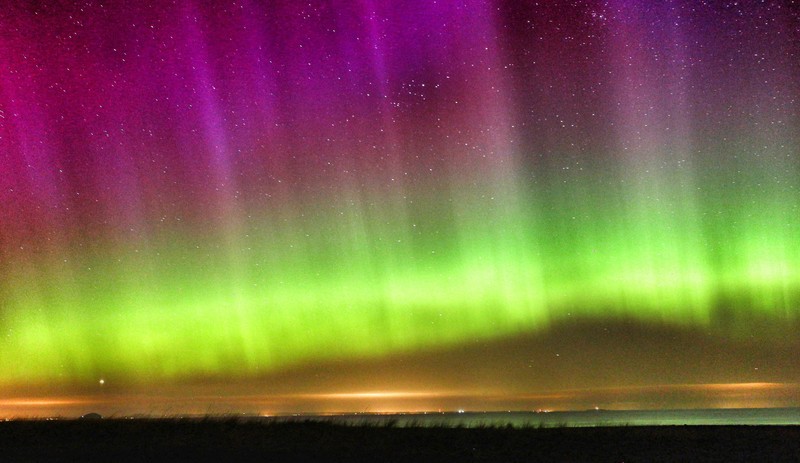
Use a long exposure
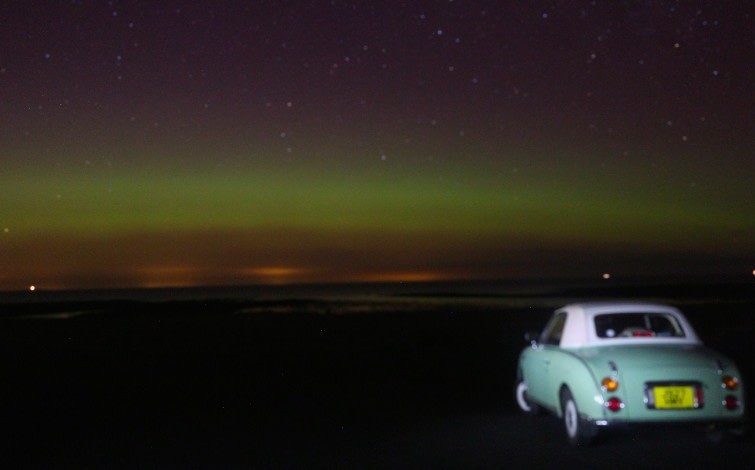
Once you've set your exposure on a long setting, your photos will look a lot better with more light and colour. We used a 30 second exposure for our best shots.
In this shot, you can see the lighting is right but the shot is still blurry.
-
 Step 8
Focus your shot
Getting your shot in focus can be really difficult in the pitch black. Take a torch and light up something in the foreground to help you get focused and then turn the light out when you're ready to take your shot.
Now your shot will be looking awesome!
-
 Step 9
Light up foreground objects
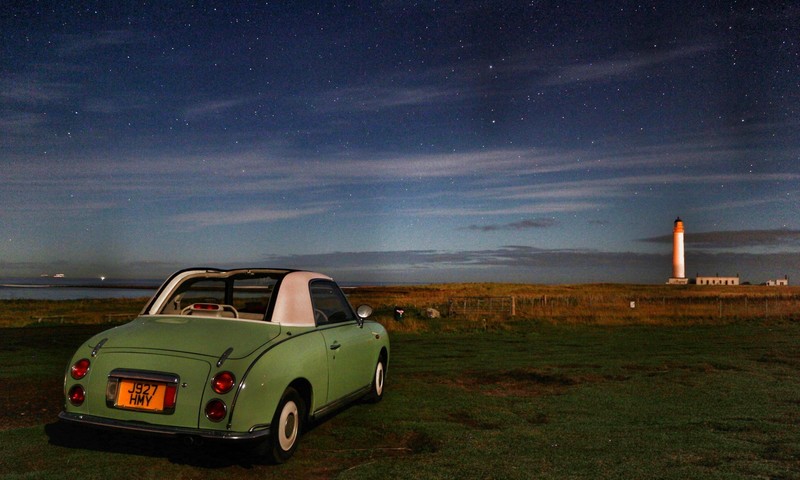
If you've got an interesting focal point you'd like up in the foreground, you can make your shot even more amazing by using the torch to light it up for a few seconds. Set the exposure for a 30 second shot and shine the torch on the object for a couple of seconds from multiple angles.
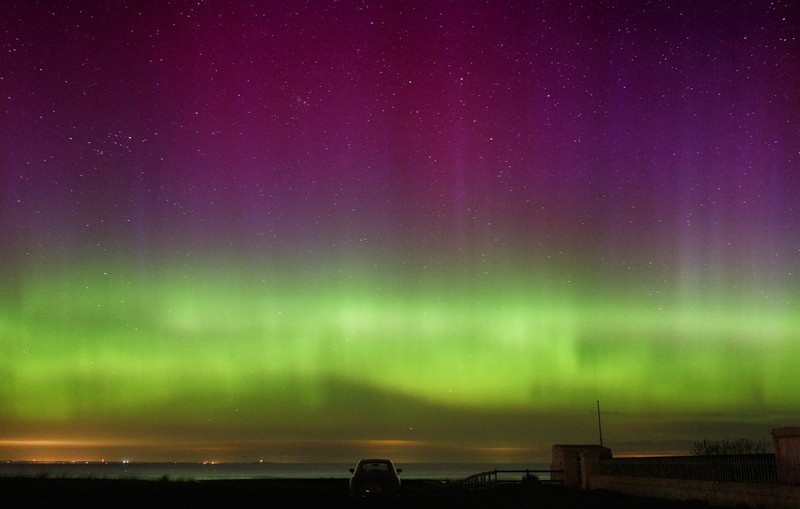
We used the torch technique to light up both our car and the lighthouse on this shot.
-
 Step 10
Once you've got your camera set up, start snapping and keep watching. Auroras move and change, growing brighter and stronger. The peak of it's show may only last a minute or two and when you've got your camera set for a 30 second exposure, you're only going to get a couple of chances to get it right!
-
 Step 11
I hope you found my tutorial helpful. It can be really frustrating failing to see the lights over and over again but I promise that if you keep trying, the one time you do get to see them will make it all worthwhile!


Comments


 1
Watercolor Art »
Watercolor Paints Made From Make Up
1
Watercolor Art »
Watercolor Paints Made From Make Up
 2
Paper Book Covers »
Shoe Inspired Spiral Notebook
2
Paper Book Covers »
Shoe Inspired Spiral Notebook

