


About
because binders are terrible people
This is my first, so please be kind...
I'm using a dollar store plastic coated binder. When I go back to school I'm going to invest in a fabric one that will probably go better. But, hey, at least this one is cheap! ^.^
Tags
-
 Conner W. favorited Pimp My Binder! (Gothic/Steampunk/Lolita Style)
06 Sep 22:16
Conner W. favorited Pimp My Binder! (Gothic/Steampunk/Lolita Style)
06 Sep 22:16
-
Conner W. added Pimp My Binder! (Gothic/Steampunk/Lolita Style) to Things to try and make
13 Feb 14:30
-
Conner W. added Pimp My Binder! (Gothic/Steampunk/Lolita Style) to fashion
13 Feb 14:30
-
 The Downtown Fiction favorited Pimp My Binder! (Gothic/Steampunk/Lolita Style)
18 Feb 04:45
The Downtown Fiction favorited Pimp My Binder! (Gothic/Steampunk/Lolita Style)
18 Feb 04:45
-
 TheAngelsHaveTheBox favorited Pimp My Binder! (Gothic/Steampunk/Lolita Style)
11 Aug 22:35
TheAngelsHaveTheBox favorited Pimp My Binder! (Gothic/Steampunk/Lolita Style)
11 Aug 22:35
-
 TwistedRomantic added Pimp My Binder! (Gothic/Steampunk/Lolita Style) to Items
05 Aug 06:09
TwistedRomantic added Pimp My Binder! (Gothic/Steampunk/Lolita Style) to Items
05 Aug 06:09
-
 Phoenix M. favorited Pimp My Binder! (Gothic/Steampunk/Lolita Style)
03 Jul 03:12
Phoenix M. favorited Pimp My Binder! (Gothic/Steampunk/Lolita Style)
03 Jul 03:12
-
 margot d. favorited Pimp My Binder! (Gothic/Steampunk/Lolita Style)
06 Apr 01:21
margot d. favorited Pimp My Binder! (Gothic/Steampunk/Lolita Style)
06 Apr 01:21
-
Tenebris A. favorited Pimp My Binder! (Gothic/Steampunk/Lolita Style)
02 Apr 20:28
-
 Ana.Loli favorited Pimp My Binder! (Gothic/Steampunk/Lolita Style)
30 Mar 03:04
Ana.Loli favorited Pimp My Binder! (Gothic/Steampunk/Lolita Style)
30 Mar 03:04
-
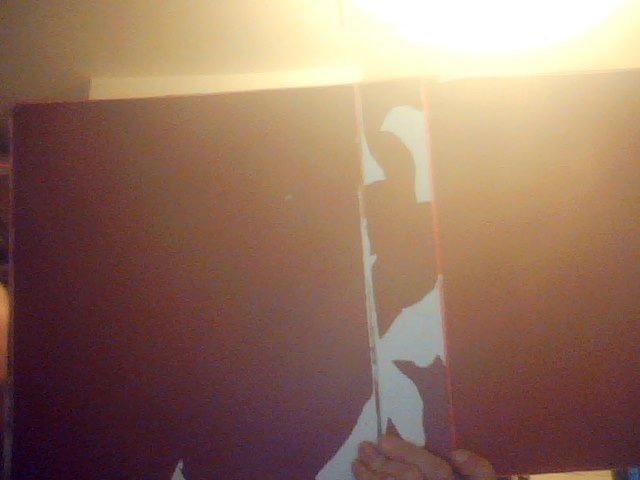
 Step 1
Have a good hard look at the offending boring binder.
Take a look at what it's made of as this is very important.
(Mine has a bit of a rough-ish coating, but it's still pretty slick)As you can plainly see I've tried before and failed to, because I tried priming first. Tsk. Tsk. Tsk.
-
Step 2
Cover the part you want to decorate with the masking tape.
-
 Step 3
This next step is for all you stripe enthusiasts.
Measure the width of your masking tape (mine 18mm (.70")
Decide in which way you want your stripes to face (Personal suggestion, stick to vertical or horizontal because diagonal stripes have a majority share in migraine medication)
Mark that down on your binder using your permanent marker.
I'm using a brown on a red binder, so it's sorta hard to see. Look at the white bits at the top. But this isn't rocket science and I'm sure you get the gist.
-
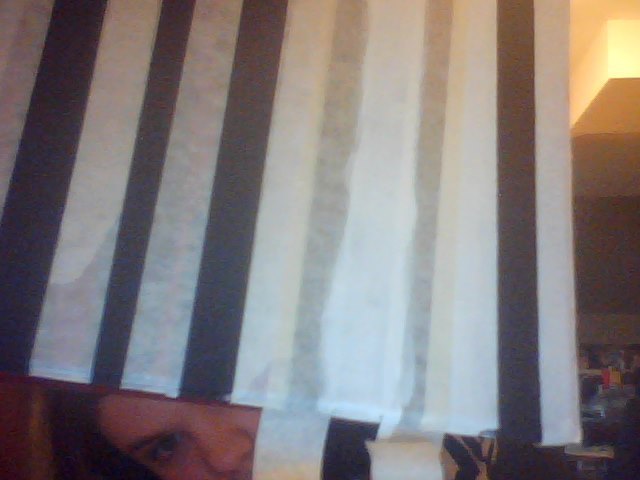
 Step 4
TAPE TIME FOR THE STRIPE FETISHISTS!
Lay down one length of tape where you want that ONE stripe colour.
My case, I'm doing every other one. Yours will look something like this, slightly different depending on things like tape width and number of colours
-
 Step 5
Paint the tape.
Don't worry about going over the line, it'll be covered up later.
-
 Step 6
Wait for the paint to dry.
(If need be, add a second coat)
-
 Step 7
Add the second colour:
Put the second layer of tape in the extra space, thusly.
-
 Step 8
This is going to be a bit trick to get a picture of because the painting tape I thought I had informed me that this is a trip I must take alone. So, white masking tape on either side of more white masking tape so I can paint in really white it is!
You need to make sure you don't get the new colour all over the other one. So put tape on either side of where you're about to paint.
DO NOT PRESS IT DOWN TOO HARD!!! Otherwise you're going to have to redo the previous tape.
It looks like this:
Wait for the paint to dry.
-
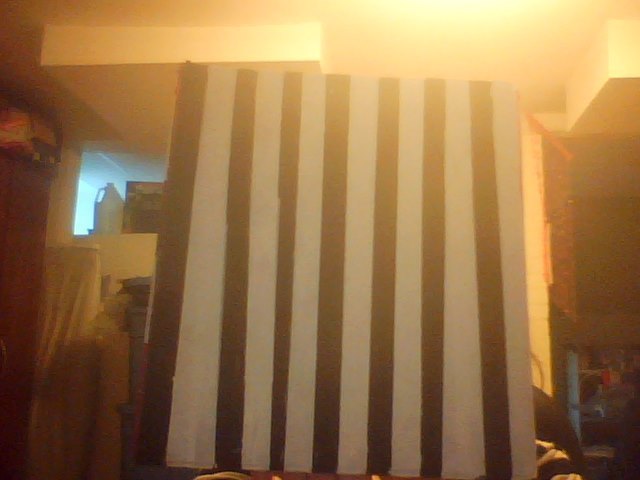
 Step 9
When you're done, it should something similar to this
-
 Step 10
TARTING TIME!!!
I'm going for an Emilie Autumn motif, because i'm suffering from a lack of imagination. So I'm putting the rat silhouette printed from here:
http://fc04.deviantart.net/fs70/i/2011/135/0/d/emilie_autumn_plague_rat_logo_by_ixheartxwar-d3gfw5y.pngWithout the lace step coming next, mine looks like this
-
Step 11
ADDING LACE!!
Now most binders of this variety come with a little ridge along each edge where the plastic was machine press when the binder was born. We're gonna hot glue the lace to that.
-
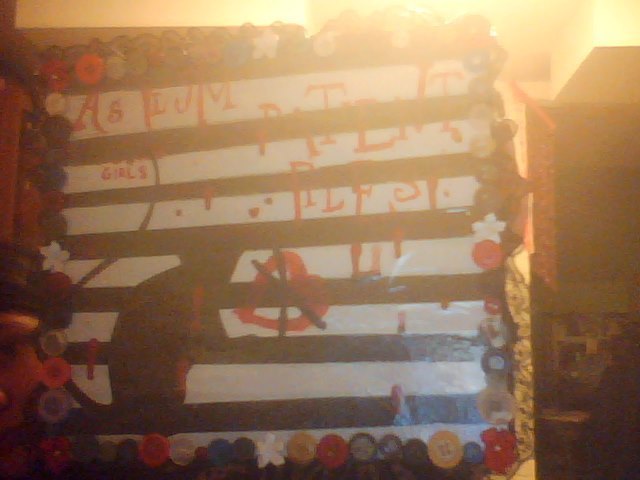
 Step 12
Emblish then as you well. This is how mine's turns out!


Comments

 1
Watercolor Art »
Watercolor Paints Made From Make Up
1
Watercolor Art »
Watercolor Paints Made From Make Up
 2
Paper Book Covers »
Shoe Inspired Spiral Notebook
2
Paper Book Covers »
Shoe Inspired Spiral Notebook
