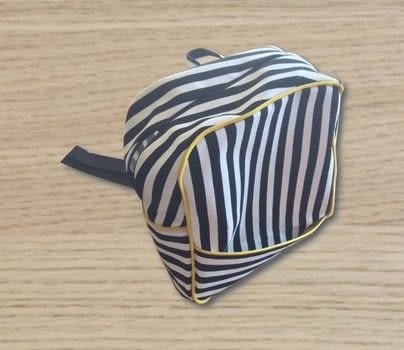
https://www.cutoutandkeep.net/projects/toddles-backpack • Posted by Diana P.
My baby boy, started Kindergarten, for the very first time. He needed a small backpack to carry his essentials... you know... toy car... pacifier... toy train... leftover cookie... importante stuff! I've been wanting to make a pattern for a while, and this seemed like the perfect project to start. Download it here: http://misscastelinhos.com/wp-content/uploads/2014/12/ToddlerBackpackPattern.pdf

My baby boy, started Kindergarten, for the very first time. He needed a small backpack to carry his essentials... you know... toy car... pacifier... toy train... leftover cookie... importante stuff! I've been wanting to make a pattern for a while, and this seemed like the perfect project to start. Download it here: http://misscastelinhos.com/wp-content/uploads/2014/12/ToddlerBackpackPattern.pdf

Start by adding the piping to the front pocket. Place the pocket with right side up (RSU), and pin the piping to the diagonal edge. Sew with a 1cm (3/8”) seam allowance (SA). Finish the raw edge with a zig-zag stitch.

Press the SA down and topstitch close to the edge of the piping.

Place the pocket, on top of the Front piece of the backpack (RSU), match the notches and baste the two pieces together. Set aside.

Take the two Zipper Pieces and place them right sides together (RST). Sew the zipper edge (the one without the notches) with a 1cm (3/8”) SA. Press the seam open.

Place the zipper and align it with the center of the seam. Pin in place. Sew, using a zipper foot, each side of the zipper.

Turn the piece RSU and with a seam ripper, carefully pick the seam leaving the zipper exposed. Set aside.

Take the Bottom Piece, place it RSU and pin the piping to the smaller raw edge. Sew with a 1cm (3/8”) SA. Repeat on the other side.

Place the Bottom Piece on top of the Zipper Piece with RST, with the piping in between. Sew with a 1cm (3/8”) SA. Press the SA down to the Bottom Piece. Topstich close to the edge of the piping. Repeat on the other side. Set aside.

Take the Front Piece with the pocket and pin the piping around the raw edge. Sew with a 1cm (3/8”) SA.

Pin the Zipper and Bottom Pieces (already sewn together) to the Front Piece with RST. Match all the notches. Sew with a 1cm (3/8”) SA.

Turn it right side out (RSO).

Cut two strap pieces 13cm (5.12”) long. Run them trough the sliders and join the raw edges together.

Place the two strap pieces on the bottom notches of the Back Piece (RSU). Sew them in place with a 1cm (3/8”) SA.

Take the Hook Piece and fold it as you would a bias tape. Press well and sew close to the edge. Cut two straps 50cm (20”) long. Place them, as well as the Hook Piece, on the top notches of the Back Piece and sew in place with a 1cm (3/8”) SA.

Repeat step 10 to attach the Back Piece to the Backpack. Don’t forget to open your zipper before you sew the all thing together!! Turn RSO and move on to the lining.

Take the two Zipper Pieces and fold the zipper side 1cm (3/8”) to the wrong side. Sew close to the edge.

Place the two Zipper Pieces and place them on top of the Bottom Piece with RST. Sew the short raw edges with a 1cm (3/8”) SA.

Press the SA away from the Zipper Pieces and topstitch close to the edge.

Repeat step 10 to attach the Front and Back Pieces.

Put the lining, with wrong side out (WSO) inside the backpack. Pin the lining Zipper Pieces as close as possible to the edge of the opening and sew through the right side, along the length of the zipper.

Take the long straps (already attached to the backpack) and burn the edges, so they don’t fray. Push the straps through the sliders on the bottom, and then fold 1cm (3/8”) and sew with a zig-zag stitch.

And you are done!!