


Spotlighting Technique Tutorial
Spotlighting Technique Tutorial
Posted by Linda K.
About
Share
You Will Need (11 things)
- Happy Birthday Gorgeous Stamp set
- You've Got This Stamp set
- Crumb Cake Cardstock
- Real Red Cardstock
- Whisper White Cardstock
- Red/Pink Striped DSP Cardstock
- Black Memento Ink
- Watercolor Pencils
- Aqua painter
- Red Card Dots (I made these and dried them with red Enamel Accents by Ranger)
- Stampin' Dimensionals Stamps
Steps (6 steps, 45 minutes)
-
1
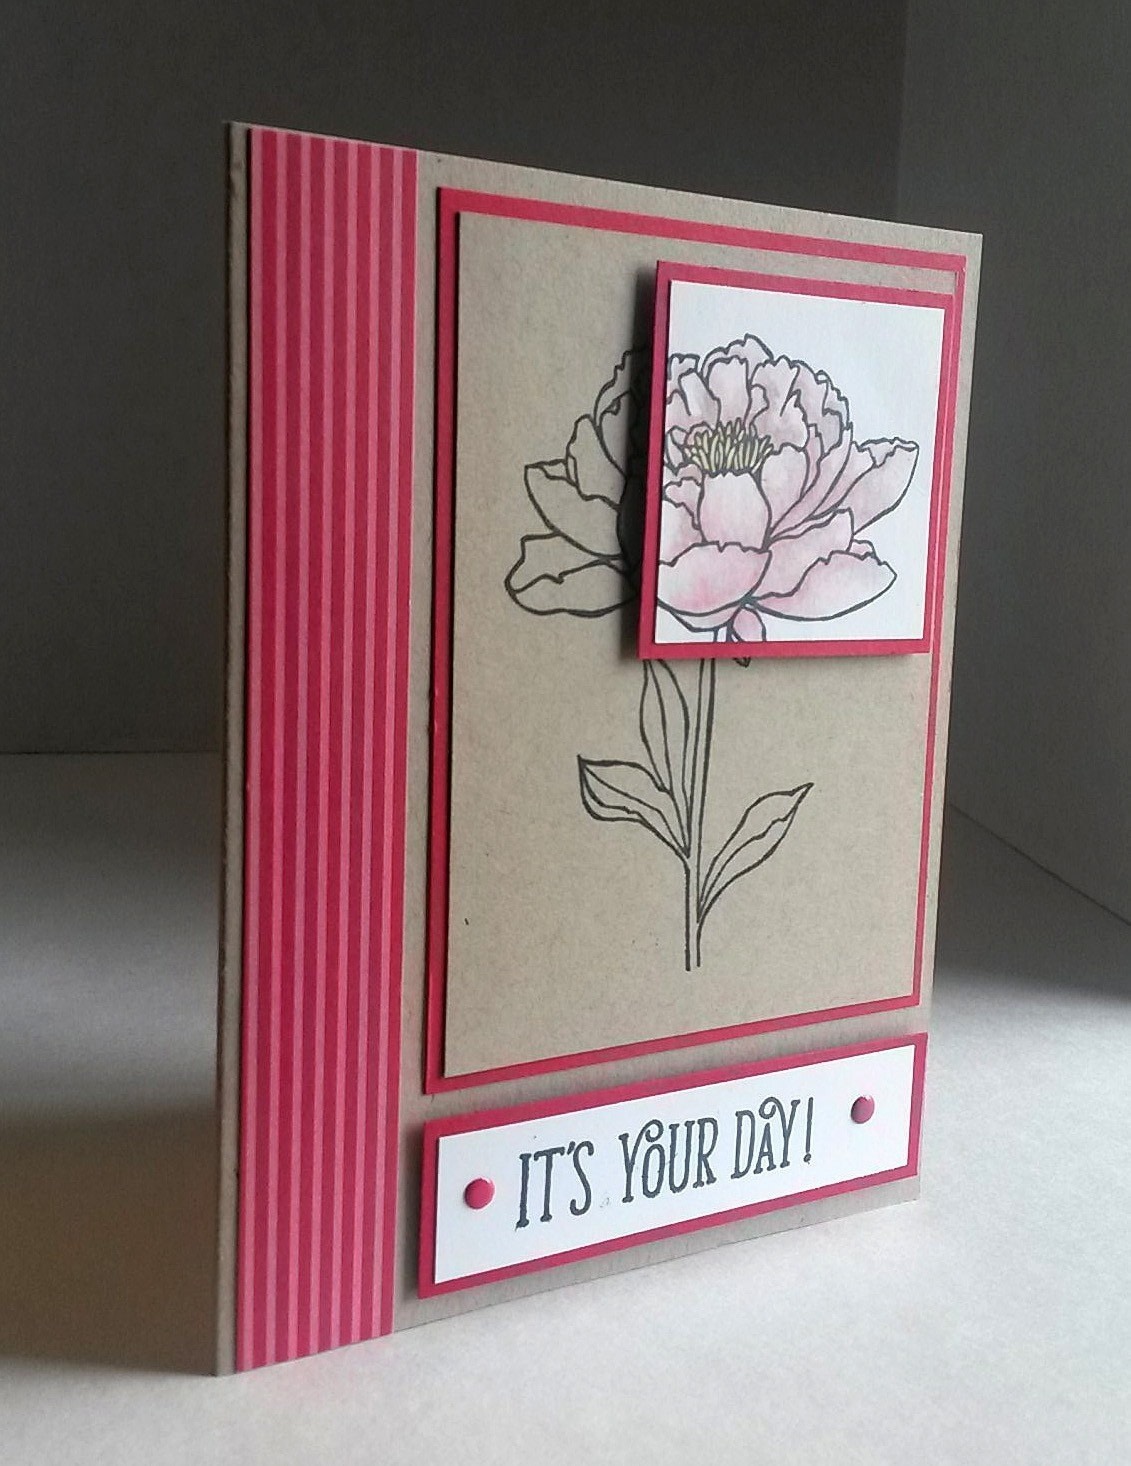
Fold a 5 1/2" x 8 1/2" piece of Crumb Cake cardstock in half, creasing it well with a bone folder.
-
2
In black ink, stamp the flower image centered on a 3" x 4" piece of Crumb Cake cardstock.
-
3
Stamp just the lower right portion of the flower itself onto a 1 3/4" x 1 3/4" piece of Whisper White cardstock. Using an Aqua Painter and your choice of Watercolor Pencils, color the flower on the white as you wish. Mount this piece onto a 1 7/8" square of Real Red cardstock. Add a few Stampin' Dimensionals to the back of this piece, and matching up the flower lines, adhere it over the uncolored image.
-
4
Mount this entire piece to a 3 1/8" x 4 1/8" piece of Real Red cardstock and adhere it to the card base with equal margins at the right and top.
-
5
In black ink, stamp the sentiment onto a 3/4" x 3" piece of Whisper White cardstock. Add two of the homemade red dots alongside the words. Adhere this to a 3 1/8" x 7/8" piece of Real Red cardstock. Use a few Dimensionals to add it to the bottom of the card.
-
 6
6Finish off with a 3/4" x 5 1/2" strip of striped Designer Series Paper.