https://www.cutoutandkeep.net/projects/milk-carton-coin-purse • Posted by connect the dots
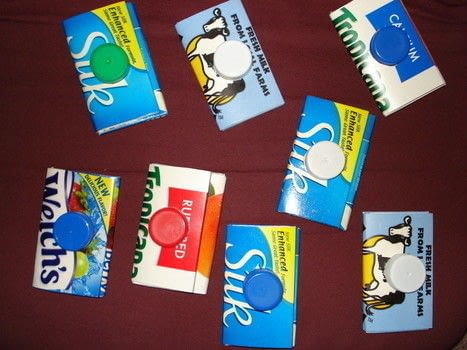
It's great to reuse milk/juice cartons - I have tons of them under my couch just waiting to be converted into a cute coin purse. I always get stopped when I pay for things because people think it's so cute! This is my first how to, so if anything is confusing please let me know!! I would love your feedback. Oh, and for some reason step one is a phantom...I can't figure out how to get it to go away. So take Step 1 as "Mentally prepare yourself for the awesomeness to come."


It's great to reuse milk/juice cartons - I have tons of them under my couch just waiting to be converted into a cute coin purse. I always get stopped when I pay for things because people think it's so cute! This is my first how to, so if anything is confusing please let me know!! I would love your feedback. Oh, and for some reason step one is a phantom...I can't figure out how to get it to go away. So take Step 1 as "Mentally prepare yourself for the awesomeness to come."

Start with a half-gallon sized milk or juice carton. Pull open the top of the carton, clean out the inside and make sure the inside is dry. Be sure to keep the cap!

Use scissors or an x-acto knife to cut off the bottom of the container. Pay close attention to the "front" of the carton (the front is the side that has the cap on it) - you want to make sure that this edge looks really neat.

Use a ruler to measure and mark one of the sides of the container about 3" from the bottom and 5" from the bottom. The space in between these markings is going to be the body of the purse.

Use scissors or an x-acto knife to cut away the sides and back of the carton below the 3" mark and above the 5" mark. Make sure you don't cut away the front of the carton!! We need that part.

Push the back of the carton towards the front of the carton to fold the sides in half.

Make two more folds on each side to create the accordion effect.

Fold the bottom of the front of the carton up. It should be a little bit taller than the accordion folds.

Fold that tall part in, and tuck it under the accordion folds.

Now for the top of the carton - cut off the ugly white part that has the expiration date, etc. You should only have the colorful part left.

Use the x-acto knife to gently detach the white thingy that the cap screws into. This topmost part is the "lining", providing reinforcement for the top flap.

Fold the lining over on the already-existing crease, and trace the circle onto the other layer of of the top flap. Cut this out with an x-acto knife.

Now that the whole top flap has the cap hole in it, fold this over the body of the purse and trace the circle once again onto the front of the purse.

Pull out the bottom flap and lay it flat on the cutting mat. Cut out the cap hole with the x-acto blade out of only the bottom flap.

Once you have your hole, put the white thingy through the hole.

Tuck this bottom flap back into the accordion folds so the white thingy sticks out of the front of the body of the purse.

Fold the top flap over the white thingy and put on the cap. You're done! Fill it with change, and be prepared to take the whole thing apart every time someone asks you how you made such a cute purse!