


About
great to store itty bitty items
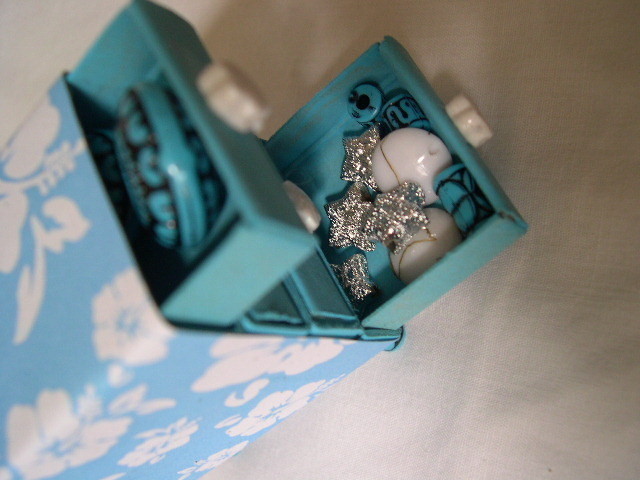
These work great to store itty bitty items or use to decorate a dollhouse.
-
 Rebecca C. favorited Matchbox Drawer Tutorial
29 Jul 07:08
Rebecca C. favorited Matchbox Drawer Tutorial
29 Jul 07:08
-
 Tierra T. favorited Matchbox Drawer Tutorial
26 Oct 19:29
Tierra T. favorited Matchbox Drawer Tutorial
26 Oct 19:29
-
 Tracey G. favorited Matchbox Drawer Tutorial
13 Oct 02:00
Tracey G. favorited Matchbox Drawer Tutorial
13 Oct 02:00
-
Angel C. favorited Matchbox Drawer Tutorial
17 Aug 18:42
-
 mr.nawaabfuzzumspompom commented on Matchbox Drawer Tutorial
22 Jul 17:19
mr.nawaabfuzzumspompom commented on Matchbox Drawer Tutorial
22 Jul 17:19
-
 shumaila n. commented on Matchbox Drawer Tutorial
20 May 05:14
shumaila n. commented on Matchbox Drawer Tutorial
20 May 05:14
-
Brenda M. favorited Matchbox Drawer Tutorial
18 Mar 08:32
-
 Romana S. favorited Matchbox Drawer Tutorial
16 Nov 11:48
Romana S. favorited Matchbox Drawer Tutorial
16 Nov 11:48
-
 Zombie Babe favorited Matchbox Drawer Tutorial
24 Jul 08:11
Zombie Babe favorited Matchbox Drawer Tutorial
24 Jul 08:11
-
 zoegirl221 added Matchbox Drawer Tutorial to Organize
20 Jul 04:16
zoegirl221 added Matchbox Drawer Tutorial to Organize
20 Jul 04:16
-
 Step 1
Supplies you will need:
4 matchboxes (same sizes)
Acrylic Paint
Paint Brush
Pretty Paper or Adhesive Paper
Stick of Glue
Strong glue for legs and handles (I use Bond 527) -
 Step 2
Step 1: Paint
Paint your matchboxes. I paint the whole thing inside and out and the drawers. Use thin layers 3-4 coats so the matchbox does not loose its shape from being drenched in paint. Let dry between coats. -
 Step 3
Step 2:
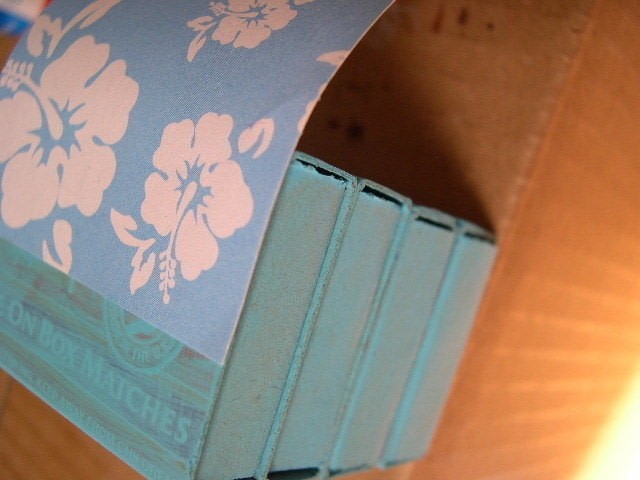
When completely dry put the drawers back inside the slides. This is very important when starting Step 3 otherwise you will have a hard time attaching the boxes.Step 3:
Use your stick glue and apply all over one side of a matchbox. Take another matchbox and stack it ontop of the glue. Hold together and make sure all sides are flush with one another. If you don't you will have an uneven drawer. Glue the 2nd matchbox and stick #3 ontop and keep going until all matchboxes are stacked and flush with one another. -
 Step 4
Step 4:
After I have put the matchboxes together I sit them aside with something heavy ontop for about 20 minutes to allow the glue to dry completely. -
 Step 5
Step 5:
Trace the length of your box on the backside of your paper. Then cut the paper. -
 Step 6
Step 6:
Take your stick glue and put it all over the back of your paper.Step 7:
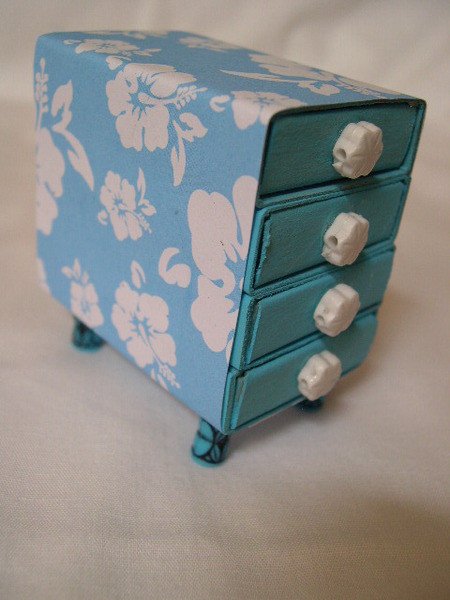
Wrap your matchboxes with the paper and press firmly but delicately to make sure you do not unloosen the boxes. Let dry for about 5 minutes. -
 Step 7
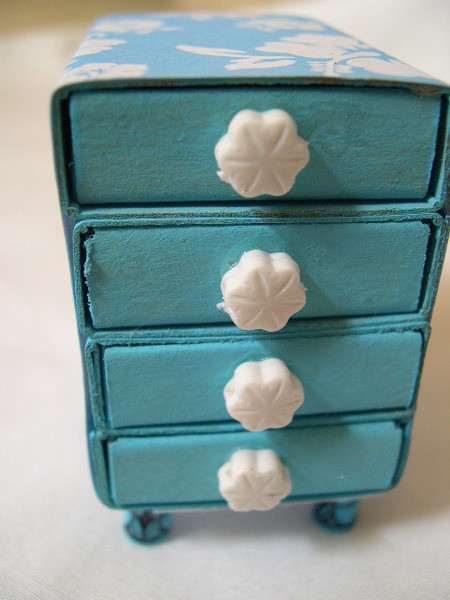
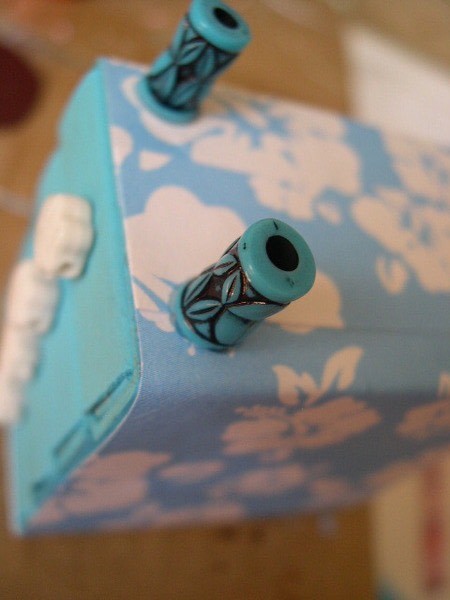
Step 8: Handles
Using your strong glue dab a small amount into a container dab the bead into the glue. Attach it to the middle of the drawer. Continue this will all beads putting them in a row. -
Step 8
-
 Step 9
Step 9: Legs
Using your strong glue also dab a small amount onto your bead or wood piece. Attach to the bottom left top. Continue this with all the legs attaching them on each corner of the bottom. -
 Step 10
Step 10:
Let dry for aslong as the glue recommends.You are done and now have yourself a matchbox drawer! I suggest that you push the drawers from the back so that you don't pull the beads off. And don't forget to filler up :D


 1
Stud Earrings »
Miraculous Ladybug Earrings
1
Stud Earrings »
Miraculous Ladybug Earrings
 2
Mint & Trinket Tins »
Miniverse Trinket Boxes
2
Mint & Trinket Tins »
Miniverse Trinket Boxes
 3
Pouches, Purses & Wallets »
Water Bottle Pack
3
Pouches, Purses & Wallets »
Water Bottle Pack
 4
Christmas Decorations »
Christmas Table Centerpiece
4
Christmas Decorations »
Christmas Table Centerpiece

great for earings!
thats so cute!!