


About
Every iPod needs a buddy!
So I got the new nano for my birthday in October and found out that no one makes cases for this model yet :( So like any crafty girl I took matters in to my own hands..
Before we get a move on with this, I wanted to let you know that this version is a little bigger than my first one. I wanted to solve the problem of storing the earbuds inside the pouch.
So it's just a matter of preference. For larger go with the 1/2 inch measurement, for the smaller the 1/4 inch.
Tags
-
 lyn h. favorited Happy Star iPod Cozy
18 Jul 08:07
lyn h. favorited Happy Star iPod Cozy
18 Jul 08:07
-
 Amy M. commented on Happy Star iPod Cozy
08 May 11:38
Amy M. commented on Happy Star iPod Cozy
08 May 11:38
-
Carolina C. favorited Happy Star iPod Cozy
05 Apr 14:38
-
 WisPa added Happy Star iPod Cozy to To make
13 Oct 05:58
WisPa added Happy Star iPod Cozy to To make
13 Oct 05:58
-
WisPa favorited Happy Star iPod Cozy
13 Oct 05:58
-
 Sara S. favorited Happy Star iPod Cozy
17 Aug 22:23
Sara S. favorited Happy Star iPod Cozy
17 Aug 22:23
-
 Emilia L. favorited Happy Star iPod Cozy
19 May 01:43
Emilia L. favorited Happy Star iPod Cozy
19 May 01:43
-
 mmotse03 favorited Happy Star iPod Cozy
14 Apr 10:25
mmotse03 favorited Happy Star iPod Cozy
14 Apr 10:25
-
April M. favorited Happy Star iPod Cozy
07 Mar 23:25
-
 Robutts favorited Happy Star iPod Cozy
19 Feb 01:08
Robutts favorited Happy Star iPod Cozy
19 Feb 01:08
You Will Need
-
 Step 1
If you are making this without the aid of an iPod the 3g measurements are as follows-
Height: 2.75"
Width: 2.06"
Depth: 0.26"Screen- 1.25" H x 1.75" W
Wheel - 1.10 x 1.10 (I noticed that if I placed a quarter flat and traced around it with the pencil straight up and down it was the right size if that makes it easier :) ) -
 Step 2
Creating Your Pattern:
Print out the star shape and using you iPod/Mp3 player make sure that it is the right size. Be sure you have a minimum of 1/4 inch to a max of 1/2 inch clearance at the bottom and top 2 corners of your iPod.
-
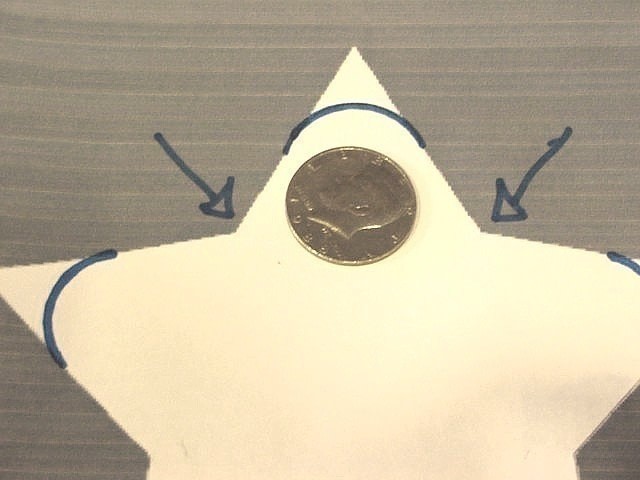
 Step 3
Use your 50 cent piece to round off the corners and cut out the shape.
-
 Step 4
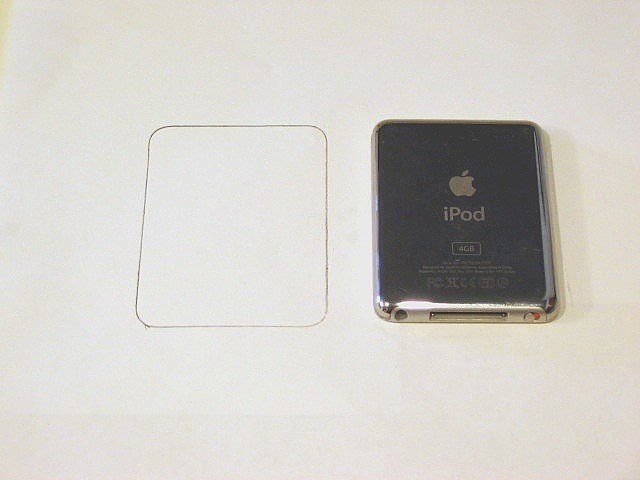
Trace your iPod/Mp3 face down on a piece of paper.
-
 Step 5
Using your ruler, extend the top by 1 inch and sides by 1/4 inch. This will be your back flap. Cut out shape.
-
 Step 6
Place your iPod/Mp3 Player in the center of the paper star and mark the bottom edge. Lay your back flap on top of the paper star carefully lining up the bottom of the back flapapproximately half way between the mark you made and the bottom of the star.
-
 Step 7
Tape in place with the painters tape and flip over. Use the edges of your star shape as a guide and trace along the corners of the rectangle sticking out. Cut off those corners.
Yay! Now you have a pattern :)
-
 Step 8
Putting it all together:
Using the pattern that you just made, cut out :
4 Yellow felt stars
3 Quilt batting stars
2 Yellow felt back flaps
1 Quilt batting back flap -
 Step 9
Center your iPod/Mp3 on one of the yellow felt stars and tape down with the painters tape.
-
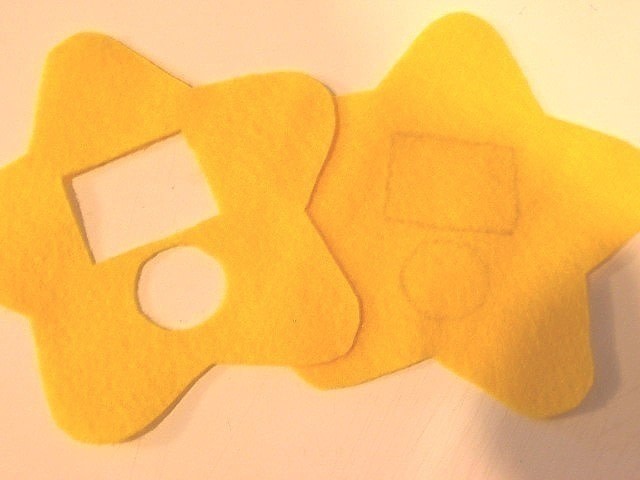
 Step 10
Flip over and trace the screen and touch wheel with a pencil. Cut out openings. Repeat this on one more yellow felt star and one quilt batting star.
-
 Step 11
Take the 3 star pieces that you just cut the openings in and stack together with the quilt batting star in the middle. Using 3 strands Of DMC yellow #972, Whip stitch around the window openings.
-
 Step 12
Using your iPod/Mp3 as a size reference, cut a rectangle out of your yellow felt that is the same height but 1/4 inch wider on each side.
-
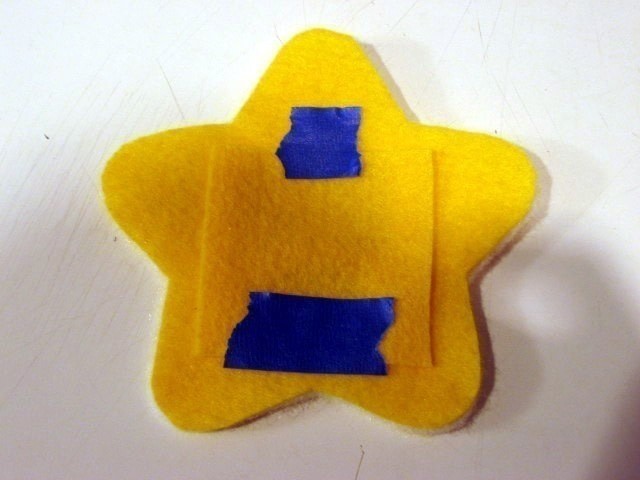
 Step 13
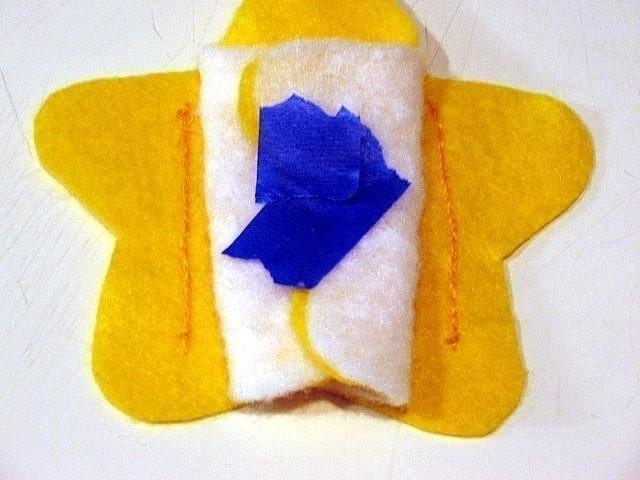
Pick which side of your star has prettier stitching and mark that as your top with painters tape. Flip over and and place the rectangle you just cut out over you window openings. Line up the top of the rectangle with the top of the screen opening.and tape in place.
-
 Step 14
Stitch down each horizontal side only going through 1 piece of felt and leaving about 1/8 of an inch between the stitching and the window openings. Slide your iPod/Mp3 in to check fit and set piece aside.
-
 Step 15
Take your 2 yellow felt back flaps and starting with either left or right side stitch up, across the top, and down the other side leaving the bottom open. Leaving your needle and thread attached insert your quilt batting back flap.
-
 Step 16
Take you star piece with the window openings and center the back flap over the windows top side facing the back flap. Be sure to leave enough space between the edge of the star and the flap for your final edge stitching. Stitch together only going through the top layer of felt.
-
 Step 17
Center one half of a snap over top of window and sew into place. Repeat with other half of snap on back flap.
You have finished the back half of your star! Set it aside and lets get the front done :)
-
 Step 18
Cut 2 small circles from pink felt.
-
 Step 19
Take one of your remaining yellow felt stars and place your eyes and cheeks where you would like them to be and mark your places. Use a small amount of glue to tack down your cheeks.
-
 Step 20
Using 6 strands of DMC Pink # 603 such your cheeks into place.
-
 Step 21
Now sew on the eyes and mark the outline for your mouth with a pencil.
-
 Step 22
Stitch your mouth using 6 strand DMC Black # 310.
-
 Step 23
Stack your pieces in this order:
Back piece with flap side down
Plain yellow felt star
2 remaining quilt batting stars
Face star with face side up -
 Step 24
Pin together ad starting right above the outside edge of the inside pocket stitch all of the way around to the bottom half way point of your star.
-
 Step 25
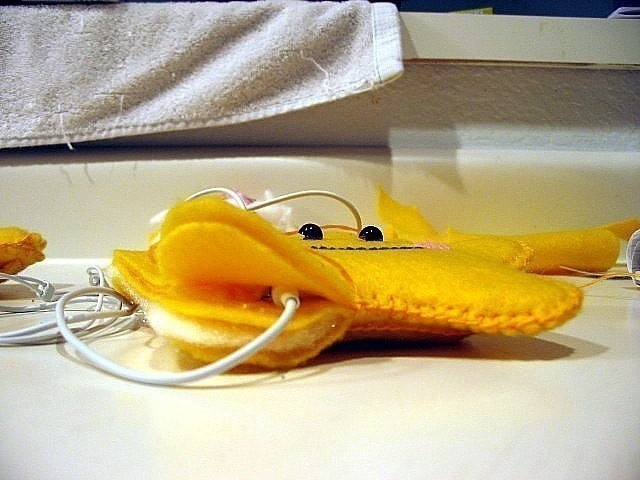
Insert you iPod/Mp3 and check where your earbud cord placement.After checking placement, continue stitching around the star point stitching together the top side only.
-
 Step 26
Continue around to the other outside edge of the inside pouch. Leaving thread and needle attached sew in snap. Continue sewing the edge the rest of the way around but make sure that it is only the face side leaving an opening for you to insert your iPod/Mp3 into the case.
-
 Step 27
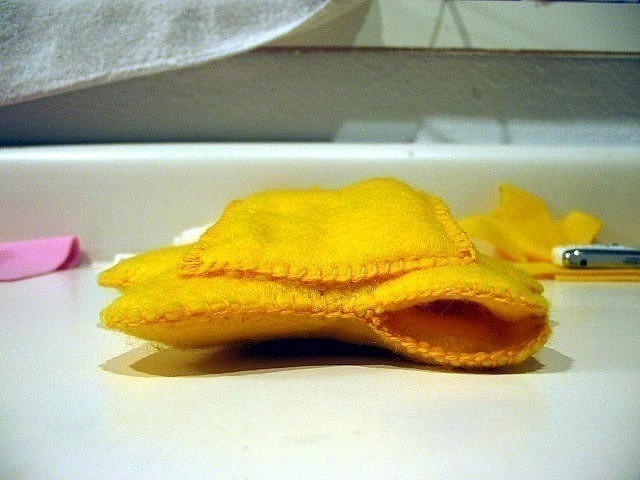
Finish by going back and sewing remaining edges at the top....
-
 Step 28
.....and earbud openings.
Now after all of that work insert your IPod and enjoy!!!!! :D :D :D
-
 Step 29
Star Template :)


Versions
See all 19 »


Comments


 1
Bracelets »
Gifts From The Village Of Shadows Bracelet
1
Bracelets »
Gifts From The Village Of Shadows Bracelet
 2
Charms »
Akuma No Otto Pendant
2
Charms »
Akuma No Otto Pendant
 3
Stud Earrings »
Miraculous Ladybug Earrings
3
Stud Earrings »
Miraculous Ladybug Earrings
